Chicken Biryani is a tasty and flavorful rice cooked with whole spices , chicken and spice powder. It is so aromatic and makes a complete meal.
Biryani is one of the most tasted recipes all over the word which is originally from the Indian Subcontinent .It is prepared as a combination of the Indian spices along with or without Meat .Few say they are originally from Persia and introduced to India by the Mughals. Few say that they are bought by the Arab traders to Calicut. However the nativity of Biryani is still uncertain. Source wiki .
Usually the Biryani is prepared using Basmati rice in North India and Seeraga Samba rice in south India. But now a days Basmati rice is being used in most of the places across India. Today I am sharing a quick and easy version of biryani with Basmati Rice in a Pressure Cooker.
Variations in Biryani:
Numerous variation are there in cooking biryani
Authentic Dum Biryani Method
Awadi Biryani
Malabar BIryani
Ambur Biryani
Thalapakatti Biryani
Dindigul Biryani
Kolkatta Biryani
Chettinad Biryani
and many more. Every region has their own specialization and improvements in the biryani
No Fail Chicken Biryani
Today I have cooked one of the Basic no fail method. However the authentic way of preparing the biryani is the Dum Style.
check out the other biryani recipes too in the blog Mutton Biryani ,Kongunad Vella Biryani ,Hyderabadi Mutton Biryani
How to make Easy Chicken Biryani in pressure Cooker
Sauté Aromatics :
In a heavy bottomed pressure cooker add oil or Ghee. Once it becomes hot add the whole spices. I am using Bay leaves, Cloves ,Fennel seeds ,Cinamon, Star Anise ,Cardamom. Fry for few secs until aromatic.

Next add green chili and fry for few secs.

Cook Onions and Tomatoes:
Now add the sliced onion and saute till the onion turns translucent. Continue cooking in a medium flame it might take close to 5-7 mins for the onions to get cooked and soft. It is an important step hence do not skip or speed up at this step.

Next Mint and chopped Coriander Leaves and fry for a min. They shrink and give a nice aroma.

Now add Ginger-Garlic paste and saute for 2 mins or till the raw smell leaves. Make sure not to burn it.

Now add in sliced Tomato and saute till they are cooked.

In some time the tomatoes are cooked and they leave oil. This is the base of the biryani. So make sure you give the required time and cook the onions and tomato.

Cook the Chicken
Next add yogurt.

And then add the required spice powders.

Combine and cook for a min the masala gets cooked. Noe add the cleaned chicken pieces. Cook for 5 mins. The chicken gets cooked along with the masala.

Add Rice and Liquid
Drain the soaked basmati rice and add it to the pressure cooker. Give a mix.

Now add in the measured water. Combine and check for salt and the spices are right. Squeeze in a lemon juice and stir gently.

Pressure cook the biryani
Close the pressure cooker and wait till the stream comes vigorously. Now add the whistle and cook in a high flame for 3 mins and switch off.

Release Pressure
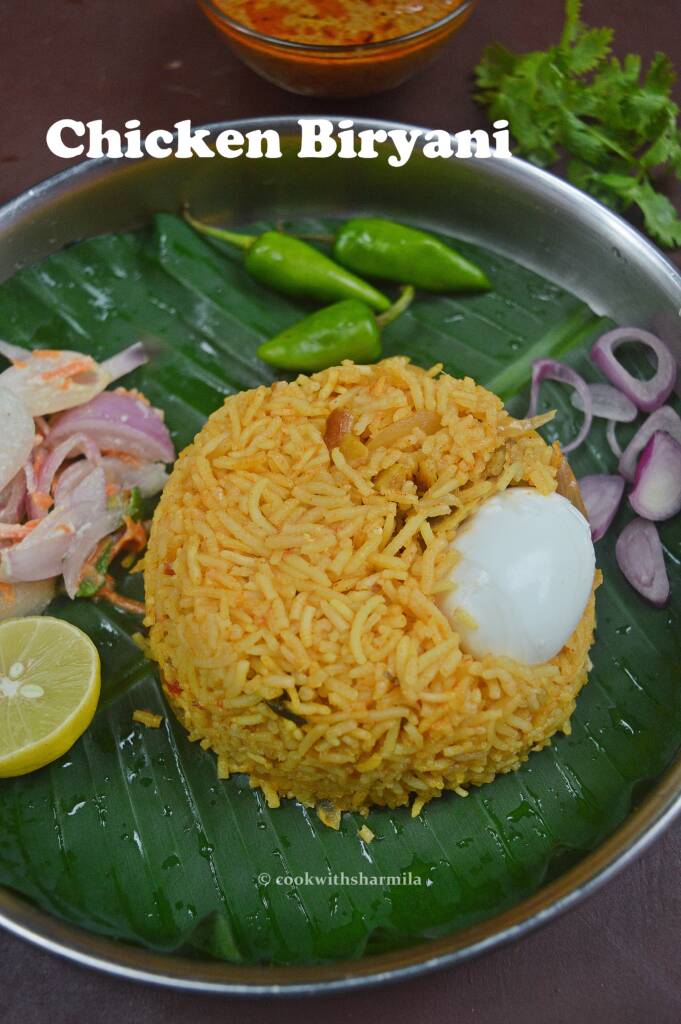
Allow the pressure to release naturally and then open the cooker. Gently fluff the biryani. Delicious chicken biryani is now ready to serve.

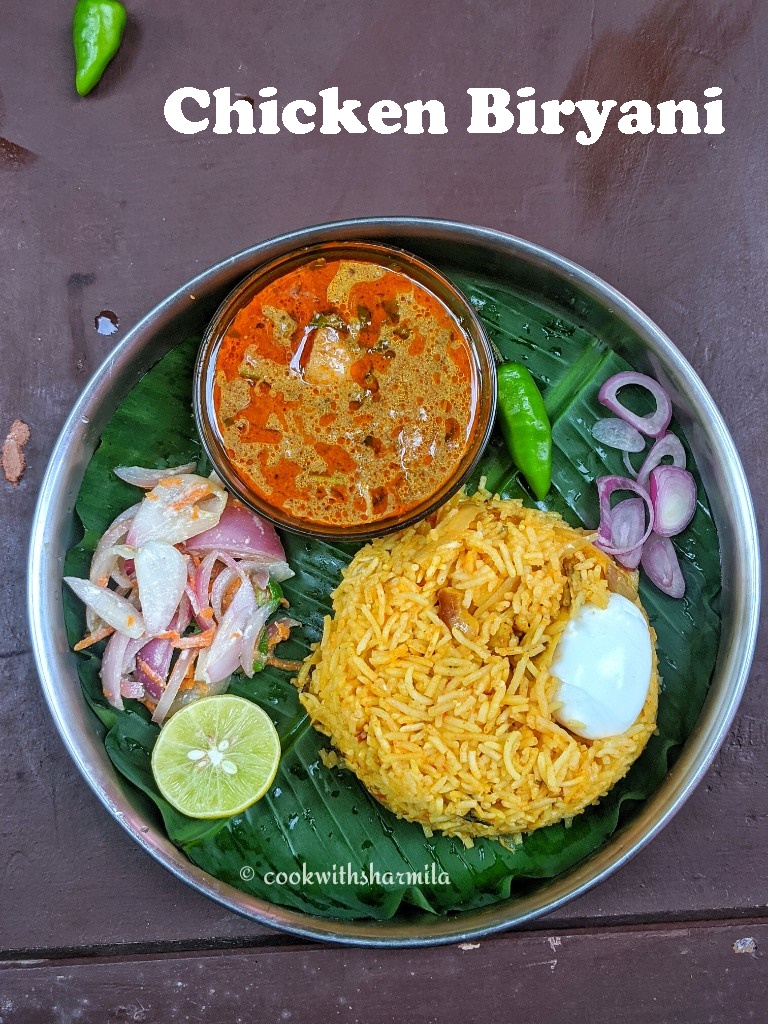
Serving Suggestion :
I served my chicken Biryani with Onion Raita and Home Style Chicken Kuzhambu which is one of the classic combinations.
Check the Video of Chicken Biryani made in a pressure Cooker .It is so easy and even beginners can perfect it in the first attempt!!
Similar Recipes


★ Did you enjoy this recipe? If you happen to try it out, I would love to hear from you! I’d appreciate it if you could rate and leave a review below in the comments. Your reviews help others know the recipe better too. Thanks for your time. You can also follow me on Facebook, Pinterest, Instagram,Youtube and Twitter for more updates
📖 Recipe

Chicken Biryani in Pressure Cooker
Standard 1 cup measures 240 ml
Equipment
- Pressure Cooker
- Pressure Cooker
Ingredients
- 2 cups Seeraga Samba Rice
- ½ kg Chicken
- 3 Onion thinly sliced
- 2 Tomato
- 2 tbsp Ginger Garlic Paste
- 1 cup Coriander Leaves
- 1 cup Mint leaves
- ¼ cup Curd
- 1 tablespoon Red chilli powder
- 1 tablespoon Garam Masala powder
- ¼ teaspoon Turmeric Powder
- 1 teaspoon Fennel seeds/Sombu
- 1 inch piece Cinnamon stick/Pattai
- 3 Cloves
- 2 Bay Leaves
- 3 Cardamon
- Salt to taste
- 2 tablespoon Oil
- 2 tablespoon Ghee
- 2.5 cups Water
Instructions
Sauté Aromatics :
- In a heavy bottomed pressure cooker add oil or Ghee. Once it becomes hot add the whole spices. I am using Bay leaves, Cloves ,Fennel seeds ,Cinamon, Star Anise ,Cardamom. Fry for few secs until aromatic.
- Next add green chili and fry for few secs.
Cook Onions and Tomatoes:
- Now add the sliced onion and saute till the onion turns translucent. Continue cooking in a medium flame it might take close to 5-7 mins for the onions to get cooked and soft. It is an important step hence do not skip or speed up at this step.
- Next Mint and chopped Coriander Leaves and fry for a min. They shrink and give a nice aroma.
- Now add Ginger-Garlic paste and saute for 2 mins or till the raw smell leaves. Make sure not to burn it.
- Now add in sliced Tomato and saute till they are cooked.
- In some time the tomatoes are cooked and they leave oil. This is the base of the biryani. So make sure you give the required time and cook the onions and tomato.
Cook the Chicken
- Next add yogurt.
- And then add the required spice powders.
- Combine and cook for a min the masala gets cooked. Noe add the cleaned chicken pieces. Cook for 5 mins. The chicken gets cooked along with the masala.
Add Rice and Liquid
- Drain the soaked basmati rice and add it to the pressure cooker. Give a mix.
- Now add in the measured water. Combine and check for salt and the spices are right. Squeeze in a lemon juice and stir gently.
Pressure cook the biryani
- Close the pressure cooker and wait till the stream comes vigorously. Now add the whistle and cook in a high flame for 3 mins and switch off.
Release Pressure
- Allow the pressure to release naturally and then open the cooker. Gently fluff the biryani. Delicious chicken biryani is now ready to serve.


Anusha Praveen Rajagopal says
Biriyani is biriyani. Always bae
Romi Singh says
This comment has been removed by the author.