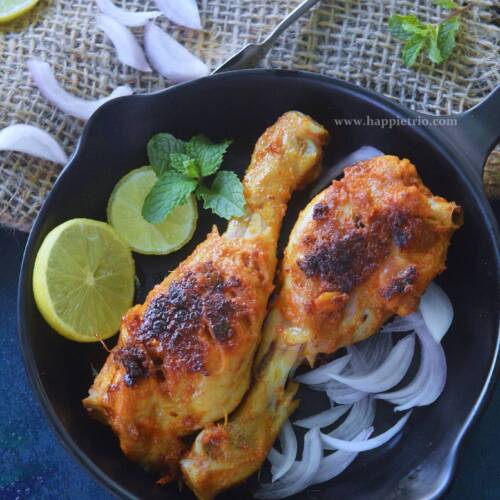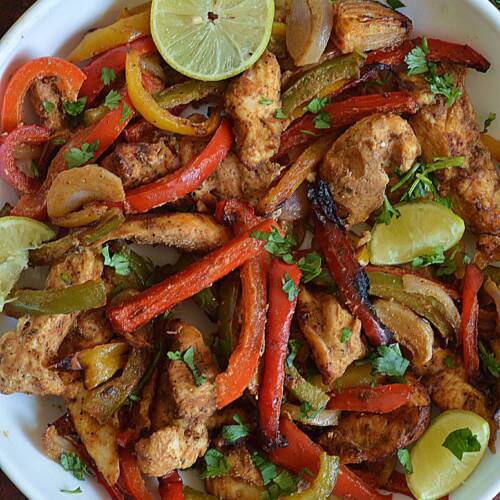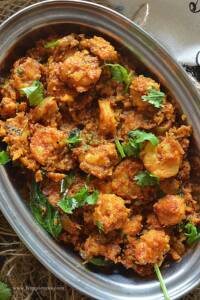
Prawn Chukka masala or Sukka varuval is always a popular order in the restaurants. Its very famous for its masala taste. This juicy shrimp curry is always a delight to taste buds with some hot rice.
Follow us on Pinterest for delicious pins. Join our Facebook group for more Instant Pot and Air Fryer recipes.

Prawn Chukka Masala Recipe | Iral Sukka Varuval with step by step pictures. Chukka Fry or Sukka varuval is always a popular order in the restaurants. Its very famous for its taste.
The Fennel seeds and curry leaves along with coconut and coconut oil is like too yummy to handle. The entire family enjoyed this delicacy. I am going to make this again definitely. So give a try sure you will love this !!
Check out Chettinad Prawn Masala ,Prawn Bajji recipes too
[feast_advanced_jump_to]Ingredients
Prawn - Use cleaned, fresh, de-veined prawns.
Oil - We can use any oil for cooking. But I prefer coconut oil, it elevates the taste of the prawn.
Spice Powders - We cook with basic Indian spice powders like chili powder, turmeric powder, pepper powder, and garam masala.
Onions - Slice and add the onions preferably red onions.
Masala Paste - we prepare a flavorful masala with coconut, fennel, garlic and they elevate the taste of the prawn chukka.
Refer the recipe table for detailed list of ingredients and measurements.

How to make Prawn Chukka Masala
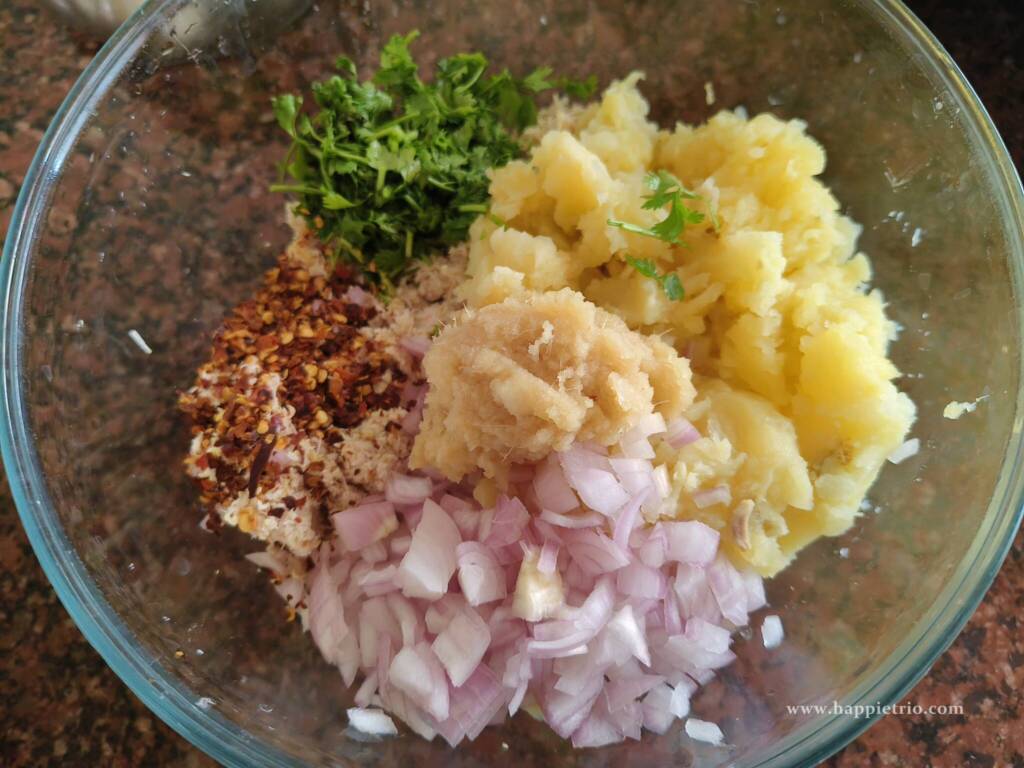
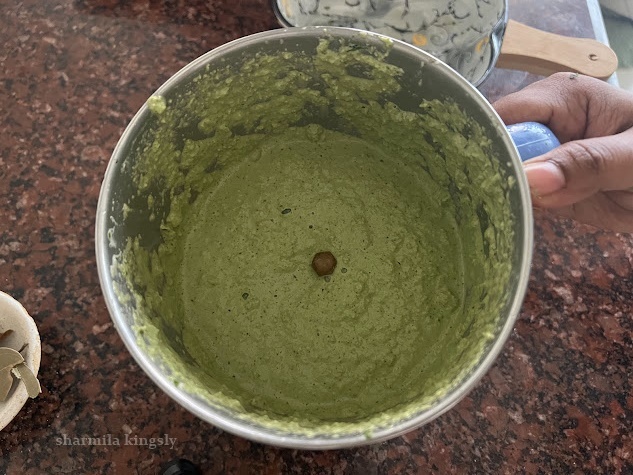
1.Add the ingredients mentioned under the “To Grind” section to a blender.

2. Blend the ingredients to a coarse paste.

3. Clean and devein the prawn. Add the ground coconut masala to the cleaned prawn. Mix well and allow it to marinate for 30 mins.

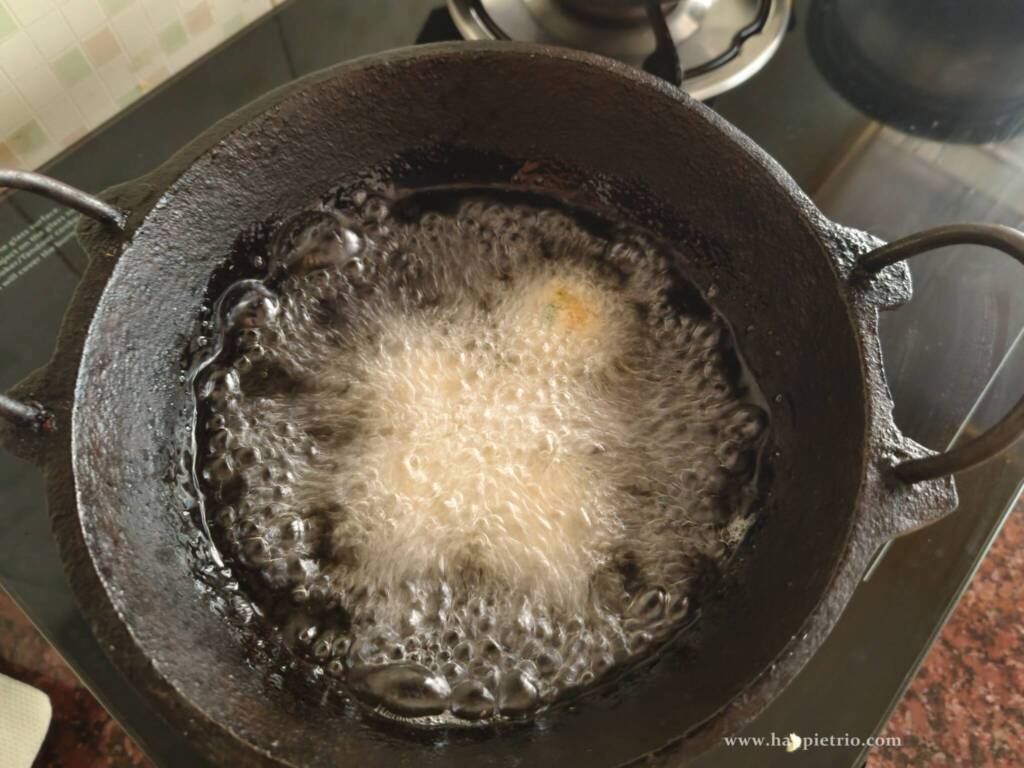
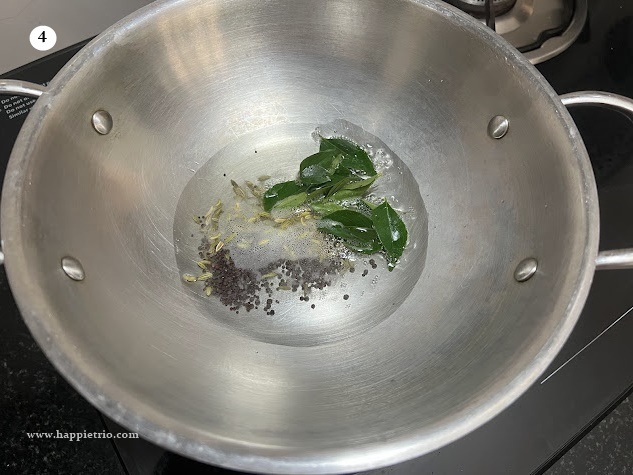
4. Heat a pan with coconut oil. Once it's hot add the mustard seeds and Fennel seeds. let them splutter and then add curry leaves.
5. Next, add sliced onions. Sauté till the onions are soft.

6. Next, add marinated prawn. Combine everything until mixed.

7. And then add the spice powders. I am using red chili powder, turmeric, pepper powder, and garam masala. Detailed measurements are in the recipe table.

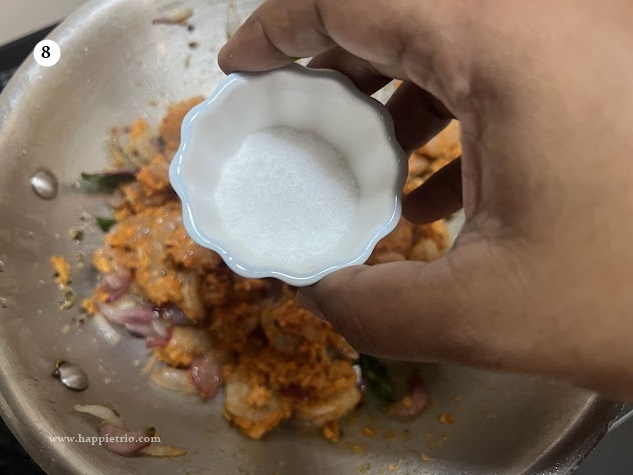
8. Also, add salt to taste.
9. Add ¼ cup of water. Mix everything and cook until the prawns are cooked and become dry. It will take 5-6 mins not more than that. Cooking more than six minutes will make the prawn rubbery.

10. Finally add a pinch of pepper powder give a good mix and switch off the flame. Garnish with coriander leaves.

Expert Tips
Adjust the spice powders as per your taste.
You can also add a tomato for a slightly tangy flavor.
The cooking time after adding prawn should not exceed 5-6 mins. Cooking for more time makes the prawn rubbery. Cooking time is the key for a juicy shrimp masala.
Also, do not close the cooking vessel after adding shrimp. We may not get the right consistency.
We can use this prawn chukka as a filling for sandwiches. It makes a quick and tasty breakfast or snack.
We can use them as a filling to prepare prawn rolls. Adding some cheese, onion, and tomato sauce increases the taste.
Serving Suggestions
It goes well with Rice or Roti. We can also serve them as a stuffing in rolls ,wraps or sandwich
Storage Options
Shrimp chukka keeps well in the fridge for 4 days. Store in an air tight container. We can reheat and serve.
More Prawn Recipes


★ Did you enjoy this recipe? If you happen to try it out, I would love to hear from you! I’d appreciate it if you could rate and leave a review below in the comments. Your reviews help others know the recipe better too. Thanks for your time. You can also follow me on Facebook, Pinterest, Instagram, Youtube and Twitter for more updates
📖 Recipe

Prawn Chukka Masala
Standard 1 cup measures 240 ml
Ingredients
- ½ kg Prawn
- Salt as needed
- ¼ teaspoon Turmeric powder
- 1 tablespoon Coconut Oil
- 1 teaspoon Mustard seeds
- 1 teaspoon Fennel Seeds
- 2 sprigs Curry Leaves
- 1 Onion
- ¼ cup Water
- ½ teaspoon Pepper powder
- Coriander leaves to garnish
To Grind:
- ¼ cup Coconut
- 1 Garlic pods
- 1 inch Ginger
- 1 teaspoon Fennel Seeds
- ½ teaspoon Chilli powder
Instructions
- Add the ingredients mentioned under the “To Grind” section to a blender.
- Blend the ingredients to a coarse paste.
- Clean and devein the prawn. Add the ground coconut masala to the cleaned prawn. Mix well and allow it to marinate for 30 mins.
- Heat a pan with coconut oil. Once it's hot add the mustard seeds and Fennel seeds. let them splutter and then add curry leaves
- Next, add sliced onions. Sauté till the onions are soft.
- Next, add marinated prawn. Combine everything until mixed.
- And then add the spice powders. I am using red chili powder, turmeric, pepper powder and garam masala. Detailed measurements in the recipe table.
- Also add salt to taste.
- Add ¼ cup of water. Mix everything together and cook until the prawns are cooked and becomes dry. It will take 5-6 mins not more than that. Cooking more than six mins will make the prawn rubbery.
- Finally add a pinch of pepper powder give a good mix and switch off the flame. Garnish with coriander leaves.
Video
Notes
Nutrition
Disclaimer: I am not a nutritionist , the nutrition value provided here is an estimate. It will vary based on the quantity and brands of the products used.
Note: This post is originally from 2016. I have updated it with a new Recipe card, Pictures, and video