Cook with Sharmila

  • Home
  • About Me
    • Video Recipes
    • Media Mentions
    • Privacy Policy
  • Recipe Index
    • Recipes
  • Nanjilnad Recipes
  • Shop
menu icon
go to homepage
  • Home
  • Recipe Index
  • Air Fryer
  • About Me
  • Subscribe
    • Facebook
    • Instagram
    • Pinterest
    • Twitter
    • YouTube
  • subscribe
    search icon
    Homepage link
    • Home
    • Recipe Index
    • Air Fryer
    • About Me
    • Subscribe
    • Facebook
    • Instagram
    • Pinterest
    • Twitter
    • YouTube
  • ×
    Home » Recipe Index

    Basic Vanilla Sponge Cake

    August 20, 2016 By Sharmila Kingsly 1 Comment

    Basic Vanilla Sponge Cake
    Basic Vanilla Sponge Cake
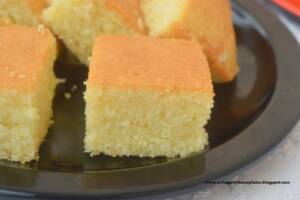
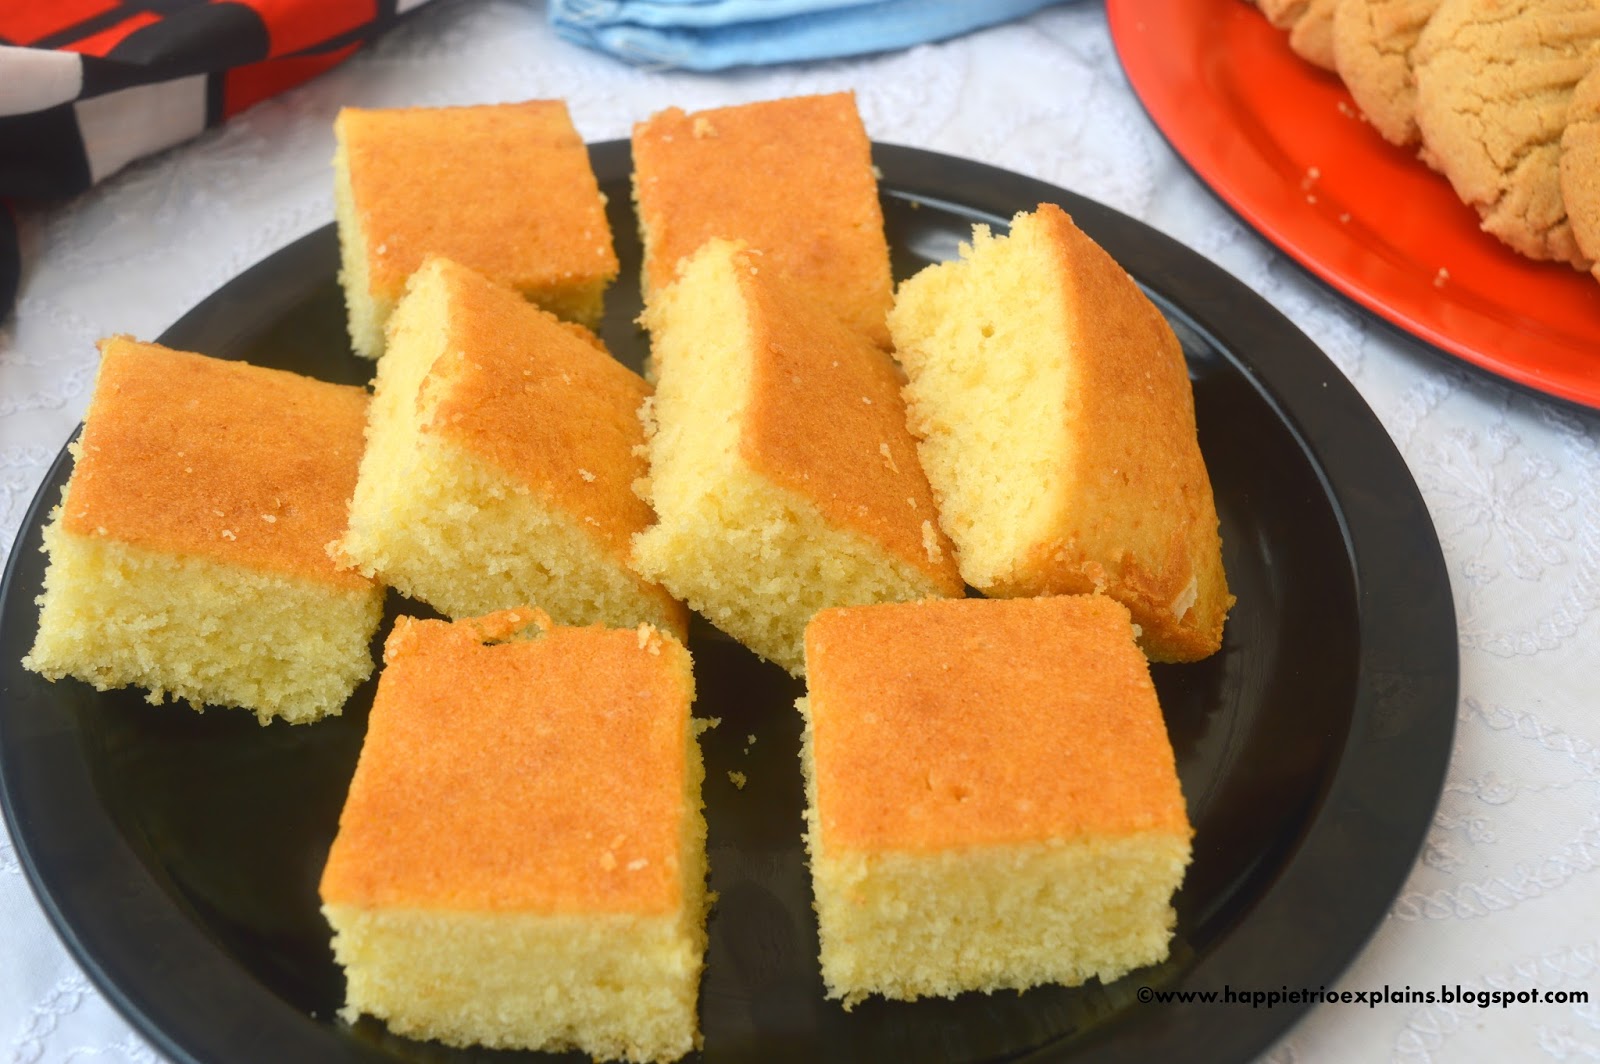
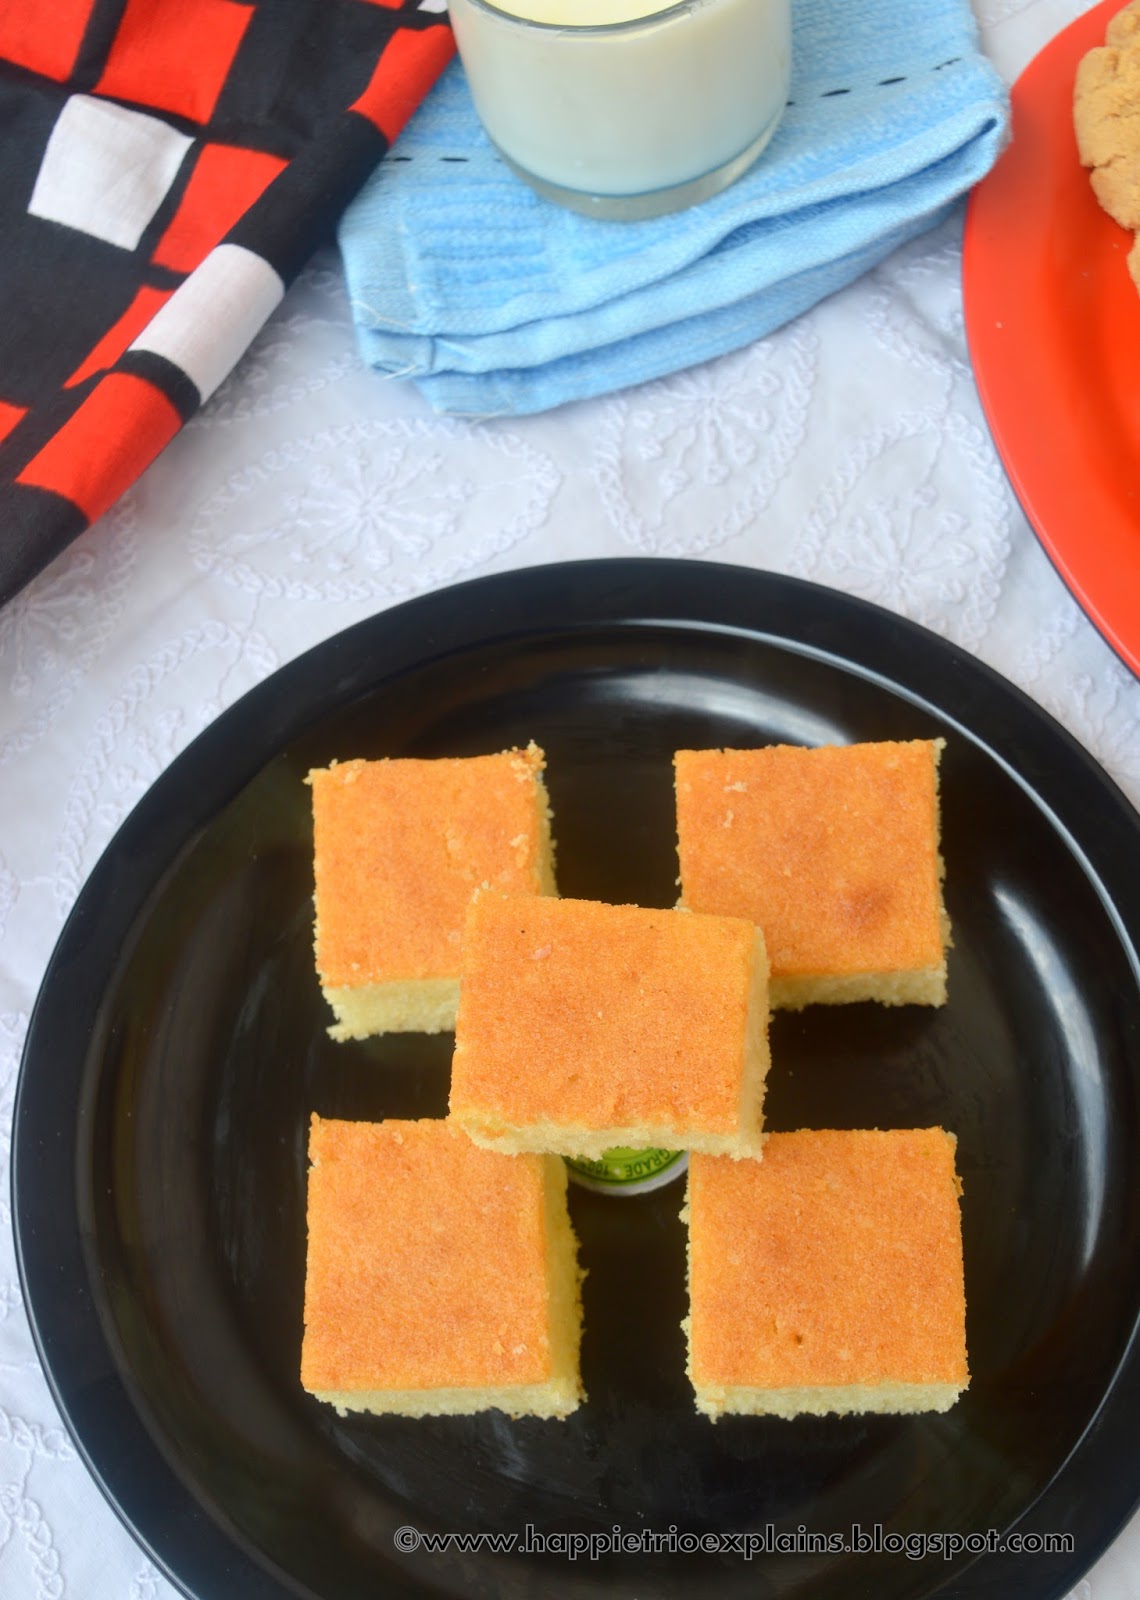
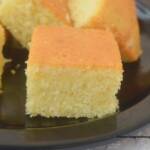
    Basic Vanilla Sponge Cake with step by step pictures.A Very common cake that every baker begins with is a Vanilla Cake /Sponge Cake... Sharing one such recipe today... The Sponginess of the cake comes from the addition of Egg. Sponge Cake can be frosted and decorated for parties, or can be had just like that with a cup of Chai. My Daughter simply loved this cake. Now get see the recipe…

    Similar Recipe

    eggless Vanilla sponge cake 

    Cashew pound cake

     
    Basic Vanilla Sponge Cake
     
    Vanilla sponge cake Recipe
     
    Method:
     
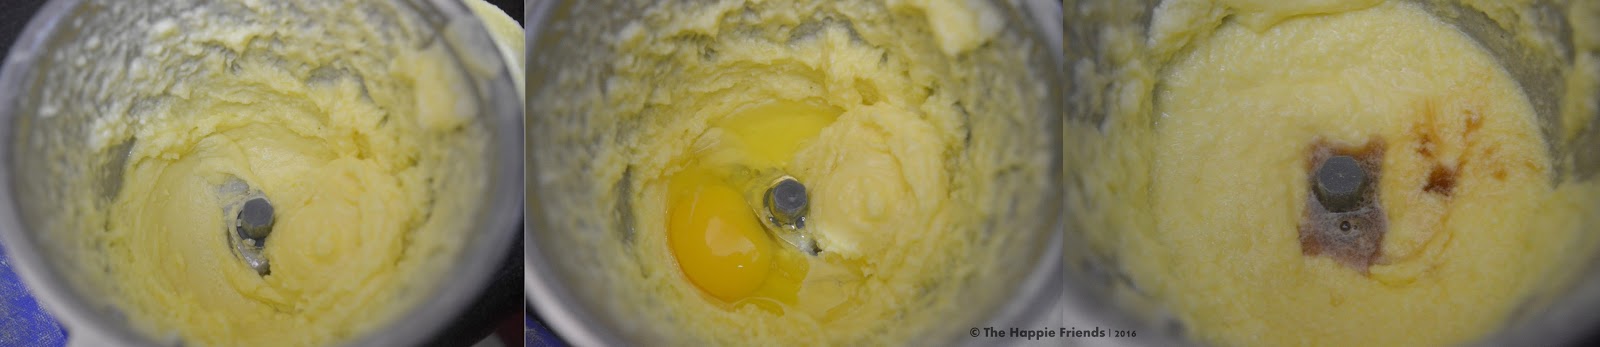
       1.      In a blender add in Butter and Sugar blend well till both the ingredients are blended well. Crack open an egg to this.

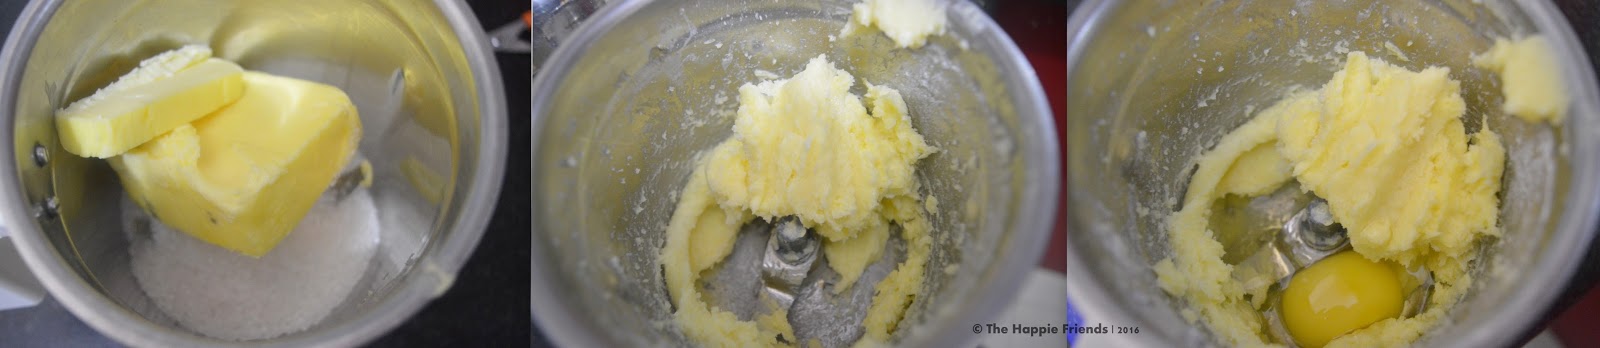
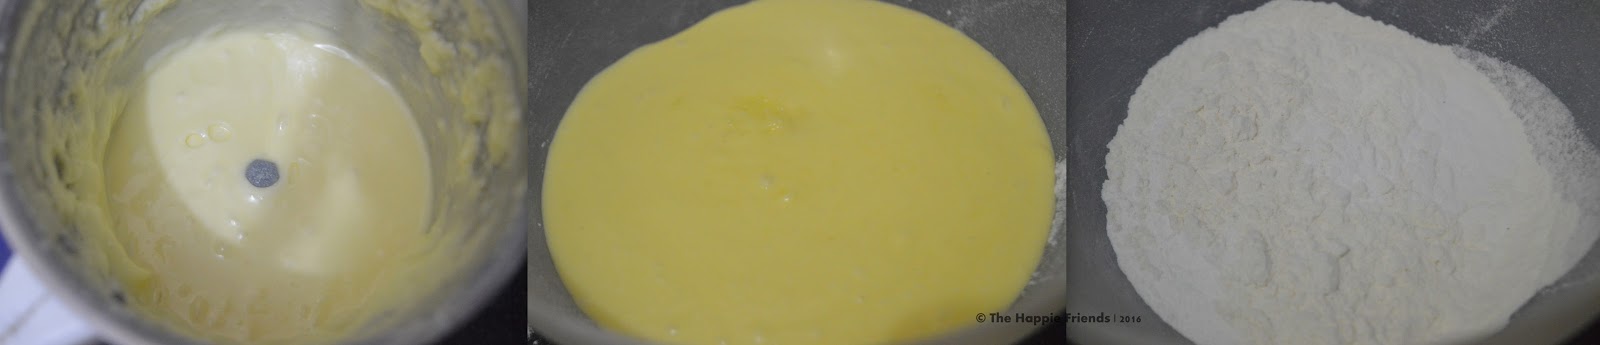
       2.    Blend well until the egg is well combined with the Butter and Sugar mixture. Crack open the other egg and repeat the same process. To this add in the Vanilla Essence and blend everything together finally.
       3.  Transfer this blended mixture to a large mixing bowl. Meanwhile sift in all the dry ingredients together twice or thrice.
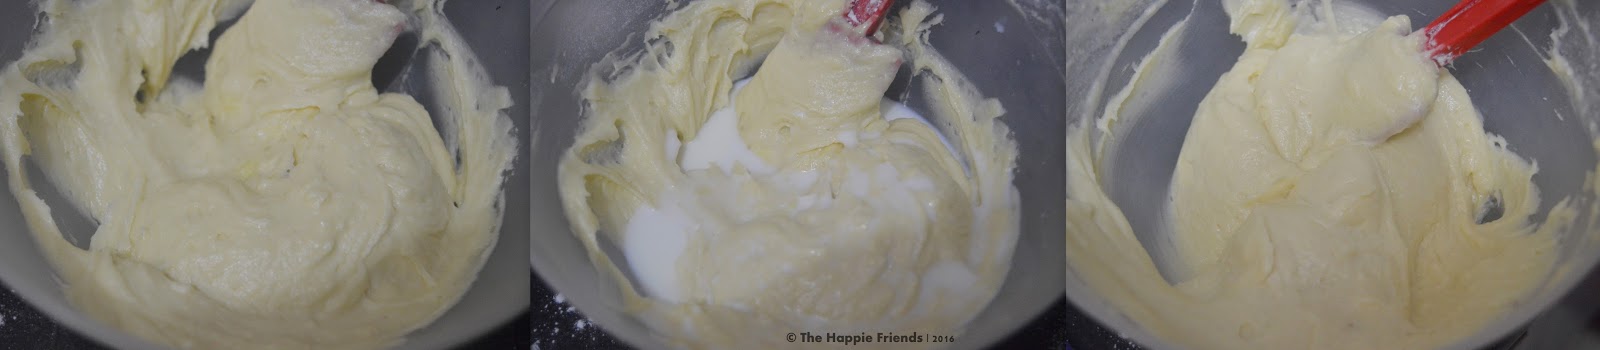
        4.      Slowly combine the dry and wet ingredients in batches and fold gently with a spatula. Fold gently until everything is well combined. Add in the Milk and fold once again. Don't beat the batter fast at this stage as the batter has to be folded gently for a crack less cake.
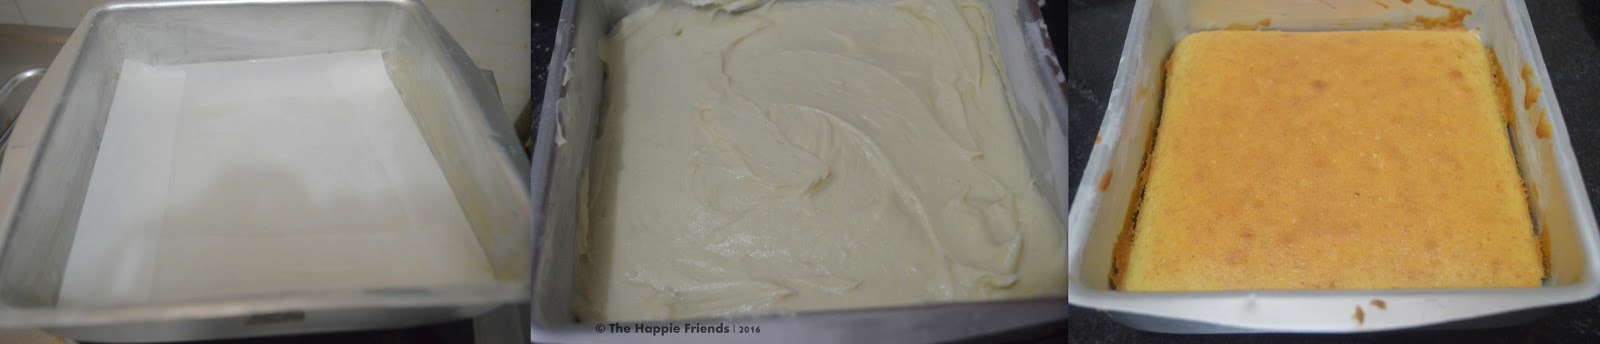
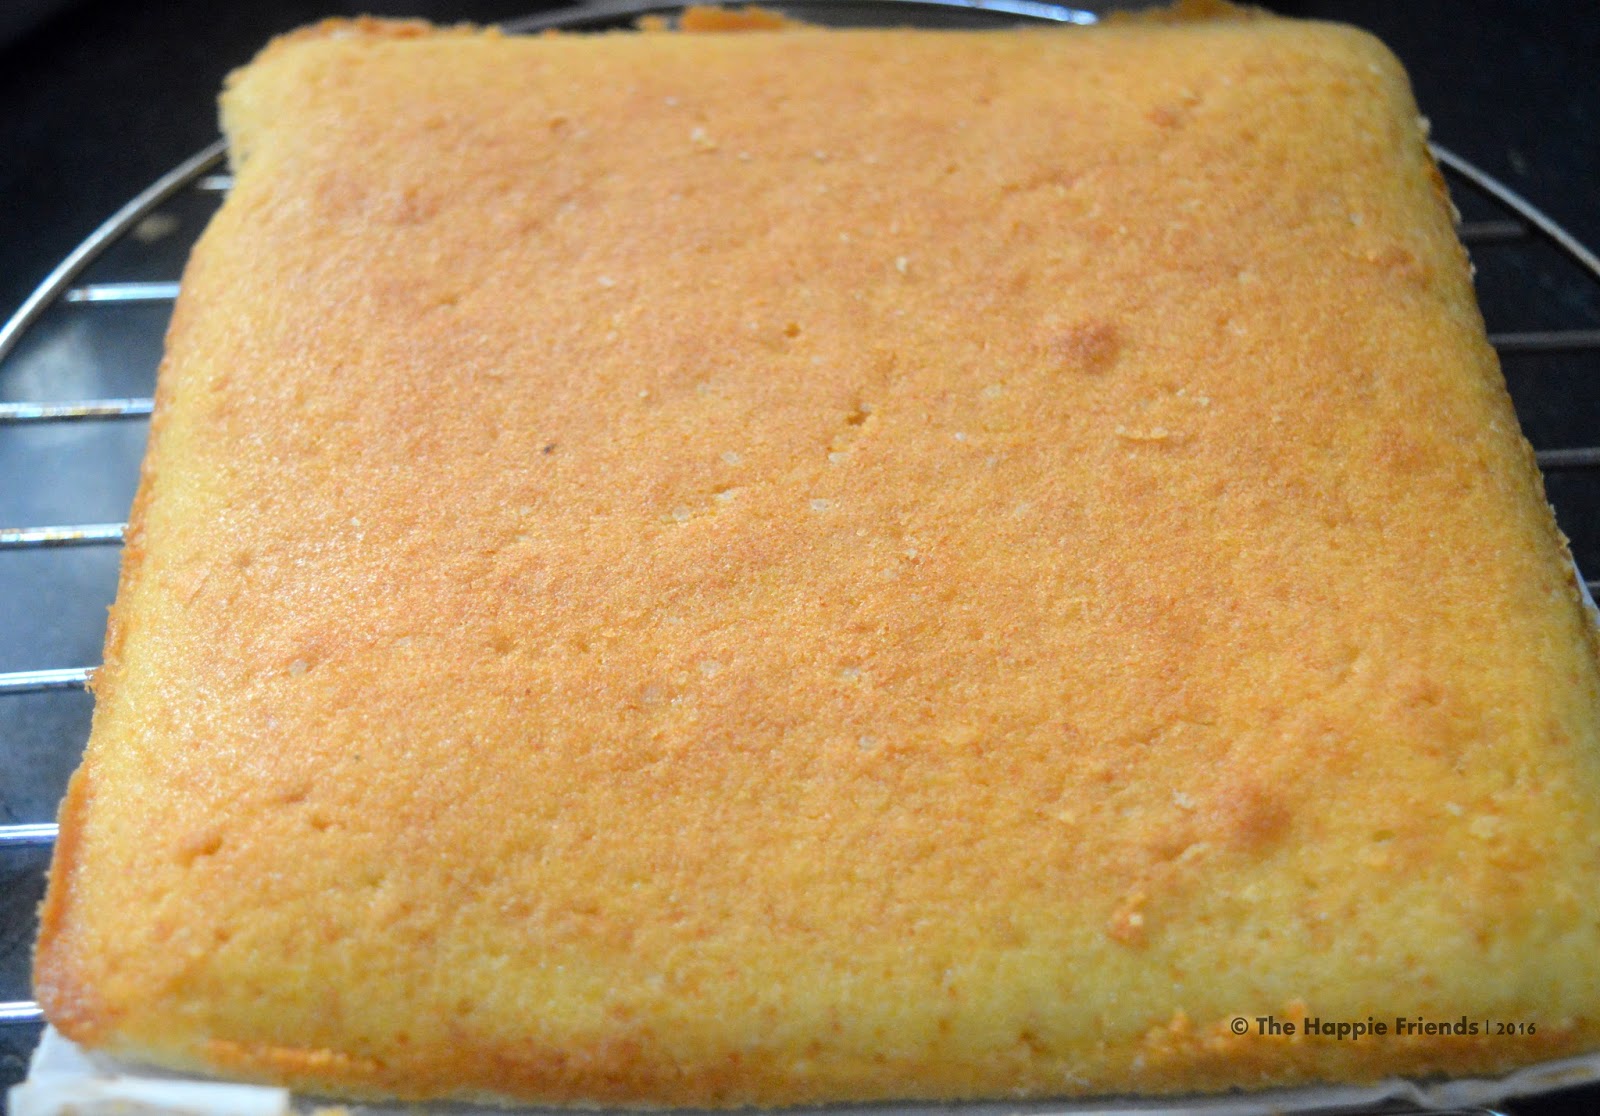
        5.      Pour the cake batter into the prepared Cake Pan and Pre heat the oven at 180 Deg C for about 10 mins and then Bake the Cake at 180 Deg C for about 30 mins or until a tooth pick when inserted into the cake comes out clean.
     
    Notes:
     
    • The Baking time may vary from oven to oven so check the user manual instruction before baking the cake.
    • Instead of blender you can use the Electric beater to creme the butter and sugar together.
    • Don’t omit the sifting of dry ingredients as sifting helps in all the ingredients to combine evenly and it brings a nice aeration to the flour.
    • My cake was baked in 30 mins sharp.
    Basic Vanilla Sponge Cake

    📖 Recipe

    Basic Vanilla Sponge Cake
    Print Recipe Pin Recipe
    5 from 2 votes

    Basic Vanilla Sponge Cake

    Sponge Cake is a Very common cake that every baker begins with is a Vanilla Cake /Sponge Cake
    Prep Time10 minutes mins
    Cook Time30 minutes mins
    Total Time40 minutes mins
    Course: Dessert
    Cuisine: International
    Servings: 9 squares
    Calories: 217kcal
    Author: Sharmila Kingsly
    Prevent your screen from going dark

    Standard 1 cup measures 240 ml

    Ingredients

    • 1 cup All-purpose flour / Maida
    • 100 gm Butter unsalted
    • ½ cup Sugar
    • 1 tsp Vanilla Extract
    • 1.5 tsp Baking powder
    • Salt a pinch
    • 2 Egg
    • 3 tbsp Milk

    Instructions 

    • In a blender add in Butter and Sugar blend well till both the ingredients are blended well. Crack open an egg to this.
    • Blend well until the egg is well combined with the Butter and Sugar mixture. Crack open the other egg and repeat the same process. To this add in the Vanilla Essence and blend everything together finally.
    • Transfer this blended mixture to a large mixing bowl. Meanwhile sift in all the dry ingredients together twice or thrice.
    • Slowly combine the dry and wet ingredients in batches and fold gently with a spatula. Fold gently until everything is well combined. Add in the Milk and fold once again. Don't beat the batter fast at this stage as the batter has to be folded gently for a crack less cake.
    • Pour the cake batter into the prepared Cake Pan and Pre heat the oven at 180 Deg C for about 10 mins and then Bake the Cake at 180 Deg C for about 30 mins or until a tooth pick when inserted into the cake comes out clean

    Video

    Nutrition

    Calories: 217kcal | Carbohydrates: 23.7g | Protein: 5.2g | Fat: 13.3g | Saturated Fat: 7.6g | Cholesterol: 113mg | Sodium: 63mg | Potassium: 748mg | Fiber: 0.7g | Sugar: 7.3g | Calcium: 778mg | Iron: 2mg
    Tried this recipe?Mention @happietrio or tag #happietrio
    Subscribe to my Channelclick for more videos

    Tomato Rasam | Tomato Jeera rasam

    August 12, 2016 By Sharmila Kingsly Leave a Comment

    Tomato Rasam
    Tomato Rasam

    Rasam is a comforting soup/Gravy for a sick day. It is very healthy as it includes Garlic, Pepper, and Coriander... This is also very essential for digestion.

    Usually, in all south Indian homes, Rasam will be there on the menu daily. We usually prepare Rasam on alternate days. It stays good without a fridge for a day. So we prepare Rasam one day and use it for two days.

    We have Rasam with a small serving of Rice at the end of the meal. Since Rasam is good for digestion. It is good to include it after a heavy meal.

    Tomato Rasam


    There are so many types of Rasam and out of that Tomato, Rasam is the most popular one. We flavor it with tomatoes and the Rasam powder. We prepare it almost every other day. I like My Rasam Rice with Potato Fry and fryms. It is so good.

    Tomato Rasam without Rasam Powder

    If you are not able to source Rasam Powder in your place, no worries It definitely have a replacement. We can easily prepare the Rasam Powder.

    Dry Roast 1 tsp Channa Dal, 1 tsp Coriander seeds,1 tsp Cumin Seeds, 5 Whole peppercorns, 2 Dry Red Chilli,⅛th tsp of Methi or fenugreek seeds.Dry Roast everything together and grind it to a fine powder and Use 1.5 tsp to 2 tsp from this Powder, You are good to go.

    How to make tomato rasam without dal

    As a practice, many rasam varieties have dal added to use. Dal is cooked mashed well and added to Rasam. But in tomato Rasam, there is no need of adding the Dal. Rasam Powder along with crushed garlic, pepper, and Cumin seeds does all the magic.

    Serving Suggestions:

    Rasam goes very well with Rice. It can also be had as a soup by itself.I fall in this category instead of having with Rice, I take it as a soup. Rasam Vadai or bonda is a famous snack in South India.

    Leftover Vadai or bonda is dunked into Rasam. It tastes delicious soaked in rasam.

    Similar Rasam Recipes:

    • Butter Milk Rasam | Mooru Rasam
    • Kalyana Rasam

    Tomato Rasam , Tomato Chaaru Ingredients:

    Tomatoes

    Rasam is always meant to be tangy. In most of the rasam, we add both tomatoes and tamarind. The taste balances and will be good. Use ripe local breed tomatoes for a delicious rasam.

    Rasam Powder

    Rasam powder has toor dal, coriander seeds, Peppercorns, Cumin Seeds, Hing, Methi, and Dry red chili. It is available in all Indian Super Markets. Usually, all the above ingredients are dry roasted and made as a powder.

    Rasam powder is the main flavoring ingredient and hence it is not to be missed. Also if using store-bought Rasam powder taste may vary from brand to brand. Feel free to increase or decrease the quantity as per taste.

    Tamarind:

    Tamarind water is usually added to Rasam. But if you have access to Tamarind paste you can use that as well. If the tomatoes you use are too sour, you can adjust the amount of tamarind used and vice versa.

    Garlic , Pepper Corn ,Cumin Seeds

    These three are the main flavoring agents in Tomato Rasam. I usually crush them in mortar and pestle and add in Rasam. It tastes better than grinding in a blender.

    When we crush in mortar and pestle the half-broken pieces give more flavor. It is more flavorful than the one ground finely in a blender.

    How to make Tomato Rasam , Step by Step Pictorial

    1.      Wash the tomatoes very well .In a kadai add in Water and bring it boil and add the tomatoes in it and allow it to cook till the skin of the tomatoes start peeling as shown in the image .switch off the flame and allow it to cool down.

     2.      Once the cooked tomatoes cool down with the help of the hands. Mash it well. Remove off the outer skin and retain the juicy tomato pulp along with the water. Now in a Mortar and Pestle add in the Garlic pods and Peppercorns, Cumin Seeds and crush it nicely.

     3.      In a Kadai add oil, once it heats up add in Mustard Seeds, Curry leaves and then add the crushed Garlic and Pepper corn fry for a min .

    4.      Add the tomato water, along with this add the tamarind water as well. Next add in Rasam Powder, Turmeric powder, and Salt.

     5.      Mix it well and allow it to cook till it comes to a boil add in coriander leaves and switch off the flame.

    Tomato Rasam FAQ

    Why Rasam should not be boiled?

    Tamarind water and Salt together should not be cooked for a longer time. It induces some reactions which is not good for health. And hence we usually switch off the flame when the Rasam is about to boil.

    How long can Rasam be stored?

    Rasam stays good for about 2 to 3 days. If storing for a single day , we can keep it outside the fridge itself. Since we add tamarind and tomatoes Rasam will not be spoiled.

    How to prepare Rasam in Eeya Combu / Tin Vessal.

    Extreme caution is necessary while cooking in Eeya sombu . Yet cooking Rasam has Eeya sombu has a delicious taste and good health benefits.

    📖 Recipe

    Tomato Rasam
    Print Recipe Pin Recipe
    5 from 2 votes

    Tomato Rasam | Tomato Jeera Rasam

    Tomato Rasam is a traditional Indian soup made of tomatoes, pepper corns, Cumin Seeds. It is very good for digestion. Goes well with Rice,
    Prep Time10 minutes mins
    Cook Time10 minutes mins
    Total Time20 minutes mins
    Course: Side Dish
    Cuisine: Indian
    Servings: 4
    Calories: 41kcal
    Author: Sharmila Kingsly
    Prevent your screen from going dark

    Standard 1 cup measures 240 ml

    Equipment

    • Motar and Pestle
    • Pan
    • Motar and Pestle
    • Pan

    Ingredients

    • 2 Tomato
    • 4 Garlic pods
    • 1 tsp Pepper corns
    • 1 tsp Cumin Seeds
    • 1 tsp Mustard Seeds
    • 1 tsp Oil
    • Curry Leaves a spring
    • Salt as needed
    • Tamarind small lemon sized ball
    • 1 tbsp Rasam Powder
    • ½ tsp Turmeric powder
    • 1 tbsp Coriander leaves

    Instructions 

    • Wash the tomatoes very well .In a kadai add in Water and bring it boil and add the tomatoes in it and allow it to cook till the skin of the tomatoes start peeling as shown in the image .switch off the flame and allow it to cool down.
    • Once the cooked tomatoes cool down with the help of the hands. Mash it well. Remove off the outer skin and retain the juicy tomato pulp along with the water.
    • Now in a Mortar and Pestle add in the Garlic pods, Cumin Seeds, and Pepper corns and crush it nicely.
    • In a Kadai add oil, once it heats up add in Mustard Seeds, Curry leaves and then add the crushed Garlic, Cumin, and Peppercorn fry for a min.
    • Add the tomato water, along with this add the tamarind water as well. Next add in Rasam Powder, Turmeric powder and Salt.
    • Mix it well and allow it to cook till it comes to a boil add in coriander leaves and switch off the flame.

    Notes

    • Tastes good when served with Steamed rice and Potato Fry.
    • It is a good medicine during cold and cough. It soothes the throat.

    Nutrition

    Calories: 41kcal | Carbohydrates: 6.3g | Protein: 1.3g | Fat: 1.6g | Saturated Fat: 0.2g | Sodium: 51mg | Potassium: 141mg | Fiber: 1.4g | Sugar: 4.3g | Calcium: 17mg | Iron: 1mg
    Tried this recipe?Mention @happietrio or tag #happietrio
    Subscribe to my Channelclick for more videos

    Disclaimer: I am not a nutritionist , the nutrition value provided here is an estimate.It will vary based on the quantity and brands of the products used.

    Note: This post is originally from 2016. I have updated with new Recipe card, Pictures now.

    Carrot Lemonade

    August 11, 2016 By Sharmila Kingsly Leave a Comment

    Carrot Lemonade

    Carrot Lemonade is a delicious summer drink. It has the goodness of carrots with the tanginess of lemon making it perfect.

    Follow us on Pinterest for delicious pins. Join our Facebook group for more Instant Pot and Air Fryer recipes.

    Carrot Lemonade

    Carrot is healthy and sweet vegetable. So I try to include it in my daily diet in all possible ways. Carrot Lemonade is once such try. It is very good for health and it brings a cooling effect to the body.

    Carrot Lemonade has the goodness of both Vitamin A and c in one drink. It is a perfect drink to include at least twice or thrice a week.

    Ingredients

    Carrots - Use fresh juicy carrots. It has the natural sweetness and hence we need not extra sweeteners more for the drink.

    Lemon - Adds the perfect tang to the drink.

    Maple Syrup - I am using maple syrup for the sweetness of the drink. You can also use honey or sugar if you prefer.

    Ginger - A small piece of ginger elevates the taste of the lemonade.

    Carrot Lemonade

    How to make Carrot Lemonade

    Wash the carrot well and then wipe using a paper towel. Chop both the ends and then peel the skin.

    Chop the carrots into small pieces.

    Add the chopped carrots to a blender. To this add a small piece of ginger and water.

    Blend well and extract the carrot Juice.

    Strain the juice to remove the discards.

    To the carrot juice squeeze and add lemon juice.

    Next add maple syrup or any other sweeteners if using.

    Add ice cubes and serve the lemonade chilled or as you prefer

    Carrot Lemonade

    Tips & Variations

    • Honey or Sugar can be used instead of Maple syrup.
    • You can also skip Ice cubes if you prefer.
    • Serve immediately after preparing. Otherwise it might tend to acidic reactions as we have added lemon juice.

    Similar Recipes

    • Watermelon Lemonade
      Watermelon Lemonade
    • Chilli Lemonade
      Chilli Lemonade Recipe
    • Gooseberry Lemonade Recipe | Amla Lemonade | Nellikai Juice
      Gooseberry Lemonade
    • Aloe Vera Lemonade
      Aloe Vera Lemonade

    ★ Did you enjoy this recipe? If you happen to try it out, I would love to hear from you! I’d appreciate it if you could rate and leave a review below in the comments. Your reviews help others know the recipe better too. Thanks for your time. You can also follow me on Facebook, Pinterest, Instagram, Youtube and Twitter for more updates

    📖 Recipe

    Carrot Lemonade
    Print Recipe Pin Recipe
    No ratings yet

    Carrot lemonade

    Carrot Lemonade is a delicious summer drink. Carrot Is a healthy vegetable always. So I try to include it in my daily diet in all possible ways, this is one amazing way.
    Prep Time10 minutes mins
    Cook Time0 minutes mins
    Total Time10 minutes mins
    Course: Drinks
    Cuisine: International
    Servings: 3
    Calories: 79kcal
    Author: Sharmila Kingsly
    Prevent your screen from going dark

    Standard 1 cup measures 240 ml

    Equipment

    • Blender
    • Peeler
    • Blender
    • Peeler

    Ingredients

    • 5 Carrots
    • 2 cup Water
    • 2 tbsp. Lemon Juice
    • 2 tbsp Maple Syrup

    Instructions 

    • Wash the carrot well and then wipe using a paper towel. Chop both the ends and then peel the skin.
    • Chop the carrots into small pieces.
    • Add the chopped carrots to a blender. To this add a small piece of ginger and water.
    • Blend well and extract the carrot Juice. Strain the juice to remove the discards.
    • To the carrot juice squeeze and add lemon juice.
    • Next add maple syrup or any other sweeteners if using.
    • Add ice cubes and serve the lemonade chilled or as you prefer

    Video

    Notes

    • Honey or Sugar can be used instead of Maple syrup.
    • You can also skip Ice cubes if you prefer.
    • Serve immediately after preparing. Otherwise it might tend to acidic reactions as we have added lemon juice.

    Nutrition

    Calories: 79kcal | Carbohydrates: 19.2g | Protein: 0.9g | Fat: 0.1g | Saturated Fat: 0.1g | Sodium: 76mg | Potassium: 366mg | Fiber: 2.5g | Sugar: 13.1g | Calcium: 45mg
    Tried this recipe?Mention @happietrio or tag #happietrio
    Subscribe to my Channelclick for more videos

    Disclaimer: I am not a nutritionist, the nutrition value provided here is an estimate. It will vary based on the quantity and brands of the products used.

    Note: This post is originally from 2016. I have updated with new Recipe card, Pictures and video now.

    Medu Vadai | Ulundu Vadai | Urad Dal Fritters

    August 9, 2016 By Sharmila Kingsly Leave a Comment

    Medu vada

    Medu Vada or Ulundhu Vadai is a popular South Indian Breakfast recipe. We usually serve it along with Sambar and Chutney.

    Medhu Vadai /Urad Dal Vadai is a main recipe in South Indian Breakfast. Say any festival days we will be having Medhu Vadai, along with chutney and sambar. It is prepared by soaking Urad Dal for around 2-3 hours and then ground with minimal water and finally deep fried by adding onions and other garnish.

    How to Prepare Medu Vada or Ulundhu Vadai

    1.Wash and soak urad dal for about 4 hours and then grind it in a grinder by adding 3 or 4 tbsp of water. Not more than that. It takes 20 - 25 mins to grind to a fine paste

    2. Drop a small dollop of the batter in a bowl of water. The batter will float in water that is the correct consistency of the vada batter. If the batter sinks and did not float. Grind the batter until it reached the desired consistency. The batter will be as soft and light as a cloud.

    3. Chop all the vegetables finely and set them aside.

    4. Add the chopped vegetables to the ground urad dal add and mix well. Add salt to taste and combine everything together. Now heat oil in a Kadai for deep frying.

    5. Keep a bowl of water handy. Dip the hand in the water and wet the hand before taking the batter.

    6. Take a small portion of the batter

    7. Shape the vadai with an oil greased banana leaf or parchment paper.

    8. Remove the vada from the leaf or paper and drop in the oil. The oil should be in a medium-high flame. Crisp fry the vadai on both sides until golden.

    9. Do not flip the vada immediately it might get crumbled. Fry till the vada turns golden brown and crisp. Drain in a Paper towel. Serve hot with Coconut chutney.

    Similar Recipes:

    • Masala Vada
      Masala Vada| Paruppu Vadai | Channa Dal Vada
    • Vazhaipoo Vadai.
      Crispy Vazhaipoo Vadai

    ★ Did you enjoy this recipe? If you happen to try it out, I would love to hear from you! I’d appreciate it if you could rate and leave a review below in the comments. Your reviews help others know the recipe better too. Thanks for your time ?

    You can also follow me on Facebook, Pinterest, Instagram, Youtube and Twitter for more updates

    📖 Recipe

    Medu vada
    Print Recipe Pin Recipe
    5 from 1 vote

    Medu Vada | Ulundhu Vadai

    Medu Vada or Ulundhu Vadai is a popular South Indian Breakfast recipe. We usually serve it along with Sambar and Chutney.
    Prep Time10 minutes mins
    Cook Time5 minutes mins
    Soaking Time4 hours hrs
    Course: Breakfast
    Cuisine: Indian
    Servings: 5
    Calories: 139kcal
    Author: Sharmila Kingsly
    Prevent your screen from going dark

    Standard 1 cup measures 240 ml

    Ingredients

    • 1 cup Urad Dal
    • 1 small Onion
    • 1 tsp Pepper crushed
    • 1 tsp Ginger finely chopped
    • 1 spring Curry Leaves
    • Salt as needed
    • Oil for deep frying

    Instructions 

    • Wash and soak urad dal for about 4 hours and then grind it in a grinder by adding 3 or 4 tbsp of water. Not more than that. It takes 20 - 25 mins to grind to a fine paste
    • Drop a small dollop of the batter in a bowl of water. The batter will float in water that is the correct consistency of the vada batter. If the batter sinks and did not float. grind the batter until the desired consistency is reached. The batter will be as soft and light as a cloud.
    • Chop all the vegetables finely and set them aside.
    • Add the chopped vegetables to the ground urad dal add and mix well. Now heat oil in a Kadai for deep frying.
    • Keep a bowl of water handy. Dip the hand in water and wet the hand before taking the batter.
    • Take a small portion of the batter
    • Shape the vadai with an oil greased banana leaf or parchment paper.
    • Remove the vada from the leaf or paper and drop in the oil
    • The oil should be in a medium-high flame. Crisp fry the vadai on both sides until golden.
    • Do not flip the vada immediately it might get crumbled. Fry till the vada turns golden brown and crisp. Drain in a Paper towel. Serve hot with Coconut chutney.

    Notes

    • Do not use more water than the mentioned amount the batter might get runny and you will not be able to shape the vada.
    • Never allow the batter to stay long after adding onions and Salt. As it leaves water and the batter might turn watery.
    • The shape of the batter may not come perfectly on the first try, it comes only by practice. Keep trying.
    • Adding a tsp of rice flour gives more crisp vada’s

    Nutrition

    Calories: 139kcal | Carbohydrates: 10.2g | Protein: 4.2g | Fat: 9.3g | Saturated Fat: 1.2g | Sodium: 13mg | Potassium: 161mg | Fiber: 5g | Sugar: 0.6g | Calcium: 10mg | Iron: 1mg
    Tried this recipe?Mention @happietrio or tag #happietrio
    Subscribe to my Channelclick for more videos

    Andhra Style Pesarattu Dosa

    August 6, 2016 By Sharmila Kingsly Leave a Comment

    Pesarattu Dosa, also known simply as Pesarattu, is a popular and nutritious breakfast dish originating from Andhra Pradesh, India. It is a type of dosa made from green gram (mung beans) and is often enjoyed with a variety of chutneys and sambar.

    About Pesarattu Dosa

    Traditionally Pesarattu Dosa is served along with Upma , chutney and Sambar .Persarattu Dosa is prepared by soaking the Green Gram (also know as Paasi Parupu or Payatham Parupu in Tamil ,Cerupayar in Malayalam ,Hasiru Gram in Kannada and Pesalu in Telugu ) Overnight and then grinding it with green chilli ,Ginger and cooked like crepes.

    How to Prepare Pesarattu Dosa

    Wash the Green Gram well and soak in water overnight. Morning the Green Gram would have increased in size.

    Take the Green Gram, Coriander leaves, Green Chilli, Ginger in a blender.

    Add little water and blend everything to form a batter. The consistency should be similar to dosa batter consistency.

    Along with the batter, add in Rice flour, Salt, and Hing and mix well. Adjust the consistency of the batter correctly.

    Heat an iron skillet. In a big ladle take a spoon full of dosa batter, and pour the batter into the iron skillet.

    With the backside of the laddle spread the dosa batter and drizzle in oil or Ghee and cook till the edges of the dosa turn crisp. Flip the dosa and cook till both sides are well cooked.

    Remove the dosa from the griddle. Pesarattu dosa is now ready. Serve hot with chutney and Sambar.

    Nutritional Value

    Pesarattu Dosa is rich in protein and fiber, making it an excellent choice for a healthy and filling breakfast. The mung beans provide essential nutrients like iron, potassium, and magnesium. Additionally, it is gluten-free and can be enjoyed by those with gluten intolerance.

    Variations

    • Upma Pesarattu: A unique variation where a small amount of upma (a savory semolina dish) is stuffed inside the dosa.
    • Moong Dal Pesarattu: Instead of whole green gram, split green gram (moong dal) is used for a different texture.

    Accompaniments

    Pesarattu Dosa is traditionally served with:

    • Ginger chutney (Allam pachadi)
    • Coconut chutney
    • Tomato chutney
    • Sambar

    Enjoy this delicious and wholesome dish as a part of your breakfast, brunch, or any meal of the day!

    Similar Recipes

    • Multigrain Adai dosa Recipe | Paruppu Adai Dosa
      Multigrain Adai dosa (Paruppu Adai )
    • Foxtail Millet Idli Dosa Recipe | Thinal Idi Dosa Recipe | Millet Recipes
      Foxtail Millet Idli Dosa

    ★ Did you enjoy this recipe? If you happen to try it out, I would love to hear from you! I’d appreciate it if you could rate and leave a review below in the comments. Your reviews help others know the recipe better too. Thanks for your time ? You can also follow me on Facebook, Pinterest, Instagram, Youtube and Twitter for more updates

    📖 Recipe

    Print Recipe Pin Recipe
    5 from 1 vote

    Pesarattu Dosa

    Pesarattu Dosa is an Andhara specialty Green Lentil Crepes. We usually serve pesarattu dosa with ginger chutney and Sooji Upma.
    Prep Time10 minutes mins
    Cook Time2 minutes mins
    Soaking Time8 hours hrs
    Total Time8 hours hrs 12 minutes mins
    Course: Breakfast
    Cuisine: Andhra
    Servings: 5
    Calories: 55kcal
    Author: Sharmila Kingsly
    Prevent your screen from going dark

    Standard 1 cup measures 240 ml

    Ingredients

    • 1 cup Green Moong Dal /Green Gram
    • 1 tbsp Rice flour
    • 1 Green chilli
    • ½ inch Ginger
    • 2 tbsp Coriander Leaves
    • Salt as needed
    • ¼ tsp Hing
    • 1 tsp Oil/Ghee

    Instructions 

    • Wash the Green Gram well and soak in water overnight. Morning the Green Gram would have increased in size.
    • Take the Green Gram, Coriander leaves, Green Chilli, Ginger in a blender
    • Add little water and blend everything to form a batter. The consistency should be similar to dosa batter consistency.
    • Along with the batter, add in Rice flour, Salt, and Hing and mix well. Adjust the consistency of the batter correctly.
    • Heat an iron skillet. In a big ladle take a spoon full of dosa batter, and pour the batter into the iron skillet.
    • With the backside of the laddle spread the dosa batter and drizzle in oil or Ghee and cook till the edges of the dosa turn crisp.
    • Flip the dosa and cook till both sides are well cooked.
    • Remove the dosa from the griddle. Pesarattu dosa is now ready. Serve hot with chutney and Sambar.

    Notes

    • Usually Pesarattu dosa is served with upma ,Chutney and Sambar
    • Sprinkle chopped onions and serve .

    Nutrition

    Serving: 1dosa | Calories: 55kcal | Carbohydrates: 9.8g | Protein: 3.4g | Fat: 0.5g | Sodium: 19mg | Potassium: 213mg | Fiber: 3.8g | Sugar: 0.6g | Calcium: 27mg | Iron: 1mg
    Tried this recipe?Mention @happietrio or tag #happietrio
    Subscribe to my Channelclick for more videos

    Disclaimer: I am not a nutritionist , the nutrition value provided here is an estimate.It will vary based on the quantity and brands of the products used.

    Mutter Paneer Butter Masala -Restaurant style

    July 29, 2016 By Sharmila Kingsly Leave a Comment

    Mutter Paneer Butter Masala

    Mutter Panner Peas Masala is prepared by cooking the Peas and Panner in tomatoes and onions based gravy and garnished with fresh cream .

    Mutter Panner /Paneer Peas Masala is a tasty and creamy Gravy that is prepared by cooking the Peas and Panner in tomatoes and onions based gravy and finally garnished with fresh cream. It that pairs very well with most of the Indian Flat Bread like Roti, Naan, Phulka, Parata or even poori. It also pair’s very well will with pulav . The addition of fresh cream to this gravy makes it very rich and creamy. Now let’s get cooking.

    Mutter paneer butter masala Recipe
    Method:
       1.      Take Peas in a large bowl add in water above the level of the peas and soak it overnight. In the morning take the soaked peas in a cooker add in salt and pressure cook for about 4 whistles or till it is done. Make sure the peas does not gets mashed.
       2.      Take the ingredients to grind mentioned in the ingredients table and blend it to form a fine puree .No need to add water for grinding as the water from the tomatoes would be sufficient.

    3.      In a pressure pan add in the butter once it is melted add in cumin seeds wait till it splutter and then add crushed ginger and garlic. Cook till the raw smell leaves.


    4.      Now add in the blended tomato and onion puree and mix well. Next add in Chilli powder, Coriander powder and Garam Masala powder and mix well. Cook till oil oozes out of the masala.

    5.      Now add in Water and cook till the water comes to a boil and then add in the cooked Green Peas. Now add in Salt .Add salt with care as the Green peas already has salt in it.


    6.      Pressure cook it for about 1 whistle .Once the pressure gets release by itself open in the cooker and again add the Paneer cubes and cook for about 2 mins .Garnish with fresh and finely chopped coriander leaves and switch off the flame.


    7.      Now add in the fresh cream and mix well .Creamy Butter Paneer Peas Masala is now ready. Serve hot with any Indian Flat Bread or Paratha..

    Notes:
     
    • Frozen peas can also be used. In that case no need for soaking and pressure cooking the green peas.
    • Panner can be toasted before adding into the gravy.
    • Use homemade panner for best results
    • The addition of Fresh cream gives a restaurant touch to this gravy is make it more creamy and rich.
    • You can also, replace cream with Milk.
    • Serve hot with any Phulks, Naan, Parata, Pulav, or Rotis.
    •  

    ★ Did you enjoy this recipe? If you happen to try it out, I would love to hear from you! I’d appreciate it if you could rate and leave a review below in the comments. Your reviews help others know the recipe better too. Thanks for your time. You can also follow me on Facebook, Pinterest, Instagram, Youtube and Twitter for more updates

    📖 Recipe

    Mutter Paneer Butter Masala
    Print Recipe Pin Recipe
    No ratings yet

    Mutter Paneer Butter Masala

    Mutter Panner Peas Masala is a tasty and creamy Gravy that is prepared by cooking the Peas and Panner in tomatoes and onions based gravy and finally garnished with fresh cream .
    Prep Time10 minutes mins
    Cook Time30 minutes mins
    Soaking Time8 hours hrs
    Total Time8 hours hrs 40 minutes mins
    Course: Gravy
    Cuisine: Indian
    Servings: 6
    Calories: 100kcal
    Author: Sharmila Kingsly
    Prevent your screen from going dark

    Standard 1 cup measures 240 ml

    Ingredients

    • ½ cup Green Peas
    • 200 gm Paneer cubes
    • 1 tbsp Butter
    • 1 tsp Cumin/Jeera Seeds
    • 1 tsp Crushed Ginger and Garlic
    • 1 tsp Chili powder
    • 1 tsp Coriander powder
    • 1 tsp Garam Masala powder
    • Salt as needed
    • 1 tbsp Coriander Leaves
    • ¼ cup Fresh cream
    • 1 cup Water

    To Grind :

    • 2 Onions
    • 1 Tomato
    • 6 Cashew nuts

    Instructions 

    •   Take Peas in a large bowl add in water above the level of the peas and soak it overnight. In the morning take the soaked peas in a cooker add in salt and pressure cook for about 4 whistles or till it is done. Make sure the peas do not get mashed.
    • Take the ingredients to grind mentioned in the ingredients table and blend it to form a fine puree.No need to add water for grinding as the water from the tomatoes would be sufficient.
    • In a pressure pan add in the butter once it is melted add in cumin seeds wait till it splutters and then add crushed ginger and garlic. Cook till the raw smell leaves.
    • Now add in the blended tomato and onion puree and mix well. Next, add in Chilli powder, Coriander powder and Garam Masala powder and mix well. Cook till oil oozes out of the masala.
    • Now add in Water and cook till the water comes to a boil and then add in the cooked Green Peas. Now add in Salt. Add salt with care as the Green peas already have salt in it.
    • Pressure cook it for about 1 whistle. Once the pressure gets released by itself open in the cooker and again add the Paneer cubes and cook for about 2 mins. Garnish with fresh and finely chopped coriander leaves and switch off the flame.
    • Now add in the fresh cream and mix well. Creamy Butter Paneer Peas Masala is now ready. Serve hot with any Indian Flat Bread or Paratha.

    Notes

    • Frozen peas can also be used. In that case no need for soaking and pressure cooking the green peas.
    • Panner can be toasted before adding into the gravy.
    • Use homemade panner for best results
    • The addition of Fresh cream gives a restaurant touch to this gravy is make it more creamy and rich.
    • You can also, replace cream with Milk.
    • Serve hot with any Phulks, Naan, Parata, Pulav, or Rotis.

    Nutrition

    Calories: 100kcal | Carbohydrates: 8.3g | Protein: 3.2g | Fat: 6.6g | Saturated Fat: 3.1g | Cholesterol: 10mg | Sodium: 220mg | Potassium: 228mg | Fiber: 2.4g | Sugar: 3.6g | Calcium: 34mg | Iron: 2mg
    Tried this recipe?Mention @happietrio or tag #happietrio
    Subscribe to my Channelclick for more videos

    Dry Baby Prawn Stir Fry

    July 27, 2016 By Sharmila Kingsly 1 Comment

    Baby Prawn Stir Fry
    Baby Prawn Stir Fry
    Prawns are loved by all the sea food lovers .Baby prawn is also a tasty delicacy .Last week when we went to supermarket  I saw a big packet of Dry Baby Prawns ,I immediately picked it .I love baby prawn stir fry it tastes to similar other veggie poriyal. It is because of the size of the baby prawns. Be it dry or fresh baby prawns we can follow the same method of cooking.

    I usually don’t eat dry fish but this baby prawn is an exception it doesn’t taste and smell like other dry fishes .Baby Prawn is called Kooni meen in tamil.

    Similar Recipes:

    Prawn pepper Roast

    Kerala Prawn Roast

    Baby Prawn Stir Fry
    Baby prawn stir fry Recipe
    Method:
       1.      In a blender add in the ingredients listed under “To Grind” table and blend it into a coarse mixture without adding water and set aside.
       2.      In a Kadai add in oil once it heats up ass in the Mustard seeds ,Urad Dal and then curry leaves once they splutter add in finely chopped onions and fry till they become soft.
       3.      In a big bowl take the baby prawns and wash well by adding water .Wash it thrice or four times. Once it is clean add it into the Kadai along with the onion and mix well.
       4.      Next add in turmeric powder and Salt and cook for about 5 mins or so. Next add in the ground coconut masala and stir well cook for another 3 minutes and switch off the flame. Serve with Steamed Rice.Tasty and delicious poriyal is now ready to be served.
     
    Notes:
     
    • If you are using Dry Baby Prawns do check while adding Salt as it will already have salt in it.
    • Tastes good when served with Steamed Rice and Sambar.
    Baby Prawn Stir Fry

    📖 Recipe

    Baby Prawn Stir Fry
    Print Recipe Pin Recipe
    No ratings yet

    Dry Baby Prawn Stir Fry

    Baby prawn Stir Fry is also a tasty delicacy cooked with small variety of the prawn.It tastes great with rasam
    Prep Time10 minutes mins
    Cook Time10 minutes mins
    Total Time20 minutes mins
    Course: Appetizer
    Cuisine: Indian
    Servings: 4
    Calories: 102kcal
    Author: Sharmila Kingsly
    Prevent your screen from going dark

    Standard 1 cup measures 240 ml

    Ingredients

    • 1 cup Baby prawns dry
    • 1 Onion
    • 1 tsp Mustard Seeds
    • 1 tbsp Urad Dal
    • 1 sprig Curry Leaves
    • Salt as needed
    • ½ tsp Turmeric Powder
    • 2 tsp Oil

    To Grind:

    • ¼ cup Coconut
    • 2 Dry Red Chilli
    • 4 Garlic pods
    • 1 tsp Jeera/Cumin seeds

    Instructions 

    • In a blender add in the ingredients listed under “To Grind” table and blend it into a coarse mixture without adding water and set aside.
    • In a Kadai add in oil once it heats up ass in the Mustard seeds ,Urad Dal and then curry leaves once they splutter add in finely chopped onions and fry till they become soft.
    • In a big bowl take the baby prawns and wash well by adding water .Wash it thrice or four times. Once it is clean add it into the Kadai along with the onion and mix well.
    • Next add in turmeric powder and Salt and cook for about 5 mins or so. Next add in the ground coconut masala and stir well cook for another 3 minutes and switch off the flame. Serve with Steamed Rice.

    Notes

    • If you are using Dry Baby Prawns do check while adding Salt as it will already have salt in it.
    • Tastes good when served with Steamed Rice and Sambar.

    Nutrition

    Calories: 102kcal | Carbohydrates: 7g | Protein: 7.8g | Fat: 5.1g | Saturated Fat: 2.3g | Cholesterol: 55mg | Sodium: 67mg | Potassium: 173mg | Fiber: 2.4g | Sugar: 1.6g | Calcium: 34mg | Iron: 3mg
    Tried this recipe?Mention @happietrio or tag #happietrio
    Subscribe to my Channelclick for more videos

    Scrambled Egg Biryani

    July 24, 2016 By Sharmila Kingsly Leave a Comment

    Scrambled Egg Biryani

    Scrambled Egg Biryani is a delightful alternative to traditional biryanis. It offers a tasty and filling meal with a satisfying combination of spices and textures. Enjoy this unique biryani with your favorite side dishes and relish the flavors!

    Scrambled Egg Biryani

    How to make Scrambled Egg Biryani

    Prepare Biryani

    Heat a heavy bottomed pan with oil. Once its hot add the whole spices along with cashew nuts. Sauté until golden. Next add green chili and sauté for few secs.

    Saute whole spices and green chilli in oil

    And then add onions. Cook until onions are glossy.

     add onions. Cook until onions are glossy.

    Next add tomatoes and cook until they are soft.

    add tomatoes and cook until they are soft.

    Add ginger garlic paste and cook till raw smell leaves.

    Add ginger garlic paste and cook till raw smell leaves.

    Next add Mint and coriander leaves. Saute till the leaves shrink.

    Next add Mint and coriander leaves. Saute till the leaves shrink.

    Add the spice powders for biryani along with the required salt.

    Add the spice powders for biryani along with the required salt.

    Now add yogurt and combine everything together. Cook for a min.

    add yogurt and combine everything together. Cook for a min.

    Soak basmati rice for 30 mins. Wash and drain excess water and then add the soaked basmati rice. Combine everything together and cook for a min.

     add the soaked basmati rice.

    Next add the measured water and cook in a medium flame.

    Next add the measured water and cook in a medium flame.

    Prepare the Scrambled Eggs:

    1. As the biryani gets cooked lets prepare the scrambled eggs. In a pan add oil , once its hot add onions and saute for a min.

    2. Next add ginger garlic paste and saute till raw smell leaves.

    saute onions in oil
    add ginger garlic paste

    3. Now add chopped tomatoes and cook for 2 mins.

    4. Next add turmeric powder, pepper powder and the required salt. Combine and cook for few secs.

    add tomatoes and cook for a min
    add spice powders

    Move the masala to an edge and break open 3 eggs. Scramble and cook the eggs.

    Once the eggs are cooked combine everything and switch off. Garnish with coriander leaves.

    break open 3 eggs
    scramble and cook

    Combine Rice and Eggs:

    The water is now evaporated and biryani is cooked. Switch off.

    biryani is ready

    Add the scrambled eggs to biryani and gently fluff rice.

    add scrambled eggs and cook

    Steam the Biryani:

    Switch on the stove to a very low flame and then place an iron dosa pan or a heavy iron pan and then place the biryani pot on top. Cook in the lowest flame for 10 mins and switch off.

    Let the pot remain closed for another 30 mins and then open.

    Delicious Scrambled egg biryani is now ready.

    Egg burji biryani

    📖 Recipe

    Scrambled Egg Biryani
    Print Recipe Pin Recipe
    5 from 1 vote

    Scrambled Egg Biryani

    Scrambled Egg Biryani is a delightful alternative to traditional biryanis. It offers a tasty and filling meal with a satisfying combination of spices and textures. Enjoy this unique biryani with your favorite side dishes and relish the flavors
    Prep Time15 minutes mins
    Cook Time30 minutes mins
    Total Time45 minutes mins
    Course: Main Course
    Cuisine: Indian
    Servings: 3
    Calories: 345kcal
    Author: Sharmila Kingsly
    Prevent your screen from going dark

    Standard 1 cup measures 240 ml

    Ingredients

    • 1 cup Basmati Rice
    • 1 tbsp Ginger Garlic paste
    • 2 Tomato
    • ¼ tsp Turmeric powder
    • 1 tsp Garam Masala
    • 1 tsp Chilli powder
    • ½ cup Coriander leaves +Mint Leaves loosely packed
    • Salt to taste
    • 1 tbsp Oil
    • 2 cups Water
    • 1 tsp Fennel Seeds
    • 1 Bay Leaves
    • 2 Cardamon
    • 1 inch Cinnamon stick

    Scrambled Eggs

    • 3 Egg
    • 2 Onions
    • ½ tsp Garam Masala
    • ½ tsp Chili powder
    • ½ tsp Pepper
    • ¼ tsp Turmeric powder
    • 2 tbsp Coriander leaves to garnish
    • 1 tsp Ginger garlic paste
    • 1 tsp Shahi Jeera
    • Salt as needed

    Instructions 

    Prepare Biryani

    • Heat a heavy bottomed pan with oil. Once its hot add the whole spices along with cashew nuts. Sauté until golden.
    • Next add green chili and sauté for few secs.
    • And then add onions. Cook until onions are glossy.
    • Next add tomatoes and cook until they are soft.
    • Add ginger garlic paste and cook till raw smell leaves.
    • Next add Mint and coriander leaves. Saute till the leaves shrink.
    • Add the spice powders for biryani along with the required salt.
    • Now add yogurt and combine everything together. Cook for a min.
    • Soak basmati rice for 30 mins. Wash and drain excess water and then add the soaked basmati rice. Combine everything together and cook for a min.
    • Next add the measured water and cook in a medium flame.

    Prepare the Scrambled Eggs:

    • As the biryani gets cooked lets prepare the scrambled eggs. In a pan add oil , once its hot add onions and saute for a min.
    • Next add ginger garlic paste and saute till raw smell leaves.
    • Now add chopped tomatoes and cook for 2 mins.
    • Next add turmeric powder, pepper powder and the required salt. Combine and cook for few secs.
    • Move the masala to an edge and break open 3 eggs. Scramble and cook the eggs.
    • Once the eggs are cooked combine everything and switch off. Garnish with coriander leaves.

    Combine Rice and Eggs:

    • The water is now evaporated and biryani is cooked. Switch off. Add the scrambled eggs to biryani and gently fluff rice.

    Steam the Biryani:

    • Switch on the stove to a very low flame and then place an iron dosa pan or a heavy iron pan and then place the biryani pot on top. Cook in the lowest flame for 10 mins and switch off.
    • Let the pot remain closed for another 30 mins and then open.
    • Delicious Scrambled egg biryani is now ready.

    Notes

    • You can also follow the pressure cooker method for cooking the rice.
    • In that case use 1 ¼ cup of water for 1 cup of rice
    • Always soak basmati rice for 30 mins before cooking.
    • Tastes good when served when onion raita and chips or any non veg fry.

    Nutrition

    Calories: 345kcal | Carbohydrates: 47.6g | Protein: 14.9g | Fat: 13.5g | Saturated Fat: 3.5g | Cholesterol: 120mg | Sodium: 550mg | Potassium: 473mg | Fiber: 9.5g | Sugar: 4.1g | Calcium: 292mg | Iron: 15mg
    Tried this recipe?Mention @happietrio or tag #happietrio
    Subscribe to my Channelclick for more videos

    Kerala style Parupu Curry

    July 20, 2016 By Sharmila Kingsly Leave a Comment

    Parupu Curry
     
     
    Parippu Curry | Dal Curry | Onam Sadhya Recipe |Kerala Style Parippu Curry
    Parippu curry /Dal curry is a Kerala delicacy served mainly during the Onam Sadhya .During the Onam festival they serve a huge spread of Vegetarian food in a big plantain/Banana Leaf and it comprises of Currry ,Thoran,Chips,Pachadi,Rasam,Payasma and Many more. Parippu curry is mainy used in that menu .It is served along with Ghee.
    As my native is also near Kerala Parippu Curry is one staple food in my home. Usually it is served along Aviyal it is one of the best combo. Now let’s see how to prepare Kerala Parippu Curry.
    Similar Recipes:
    Moru Curry
     
    Parippu Curry | Dal Curry | Onam Sadhya Recipe |Kerala Style Parippu Curry
    Parupu curry Recipe
    Method:
     
       1.      In a pressure Cooker add in Toor Dal ,Green Chilli ,Garlic Pods, Tomato ,Onion and Hing and Pressure cook for about 6 whistles or till the Dal will be cooked.

     2.      In a blender add in the Coconut and Cumin seeds and Blend it to for a coarse mixture.


        3.  Wait till all the pressure gets released by itself form pressure cooker and the open it and mash the Dal well. Add in Tamarind Water, Turmeric powder ground coconut paste and Salt and mix well.


     4.     Now cook the same in the medium flame until it starts boiling and then switch off the flame. Now prepare the tadka by the ingredients mentioned in the To Temper table and pour over the cooked Dal .Garnish with a tsp of ghee.


    Notes:
     
    • Tastes good when coconut oil is used for this recipe.
    • Usually parupu curry is had by mixing with ghee.
    Parippu Curry | Dal Curry | Onam Sadhya Recipe |Kerala Style Parippu Curry


    📖 Recipe

    Parupu Curry
    Print Recipe Pin Recipe
    5 from 1 vote

    Kerala Style Parupu Curry

    Parupu Curry or Parippu curry is a Kerala delicacy served mainly during the Onam Sadhya .It goes very well with Avial and Rice.
    Prep Time10 minutes mins
    Cook Time25 minutes mins
    Total Time35 minutes mins
    Course: Kuzhambu
    Cuisine: Kerala
    Servings: 4
    Calories: 120kcal
    Author: Sharmila Kingsly
    Prevent your screen from going dark

    Standard 1 cup measures 240 ml

    Ingredients

    • ½ cup Toor dal
    • 1 Tomato
    • 1 Onion
    • 4 Green chilli
    • 6 clove Garlic
    • Salt as needed
    • 1 tbsp Tamarind
    • ½ tsp Turmeric powder
    • Hing a generous pinch

    To grind:

    • ⅓ cup Coconut
    • 1.5 tsp Cumin/Jeera Seeds

    To Temper:

    • 1 tbsp Oil
    • 1 tsp Mustard Seeds
    • 3 Dry Red chilli
    • 1 sprig Curry Leaves

    Instructions 

    • In a pressure Cooker add in Toor Dal ,Green Chilli ,Garlic Pods, Tomato ,Onion and Hing and Pressure cook for about 6 whistles or till the Dal will be cooked.
    • In a blender add in the Coconut and Cumin seeds and Blend it to for a coarse mixture.
    • Wait till all the pressure gets released by itself form pressure cooker and the open it and mash the Dal well. Add in Tamarind Water, Turmeric powder ground coconut paste and Salt and mix well.
    • Now cook the same in the medium flame until it starts boiling and then switch off the flame. Now prepare the tadka by the ingredients mentioned in the To Temper table and pour over the cooked Dal .Garnish with a tsp of ghee.

    Notes

    • Tastes good when coconut oil is used for this recipe.
    • Usually parupu curry is had by mixing with ghee.

    Nutrition

    Calories: 120kcal | Carbohydrates: 14.6g | Protein: 4.6g | Fat: 5.9g | Saturated Fat: 0.5g | Sodium: 97mg | Potassium: 325mg | Fiber: 3.2g | Sugar: 2.9g | Calcium: 136mg | Iron: 8mg
    Tried this recipe?Mention @happietrio or tag #happietrio
    Subscribe to my Channelclick for more videos

    Soft Rava Idli

    July 16, 2016 By Sharmila Kingsly Leave a Comment

    Rava Idli
    How to prepare Rava Idli

     I never believed Rava Idli used to taste awesome until the day I tasted it in Hot chips Restaurant Chennai .I and Brother used to be a Regular visitor of Hot Chips Restaurant during our collage Days. I used to visit St Antony’s chapel in Paris Corner every Tuesday those days so after that I and my Brother used to dine at the nearby Hot chips Restaurant Good Old days J  

    The Recipe of Rava Idli is so simple and can be prepared in less than half an hour. It includes no soaking or no grinding. Hence can be prepared any time instantly. Whenever I run out of Idli Dosa batter Rava Idli used to be my Saviour. My Hubby who is a Picky Eater also likes Rava Idli so much. Hence I prepare Rava Idli's very Often !! Check out Chilli Idli and Mini Idli recipes too.

    Rava Idli

    How to Prepare Rava Idli

    In a Kadai dry roast the Rava for about 5 mins. Make sure the color of the Rava doesn’t change. Remove the rava to a plate and allow it to cool down. 

    In a Kadai dry roast the Rava for about 5 mins. Make sure the color of the Rava doesn’t change. Remove the rava to a plate and allow it to cool down.

    In the same Pan add in Oil. Once the oil heats up add in Mustard Seeds and Cumin seeds wait till they splutter and then add Urad Dal, Peppercorns, finely chopped ginger, and Green Chilli. Next, add in Chopped Cashew nuts and finely chopped Curry Leaves.

    In the same Pan add in Oil. Once the oil heats up add in Mustard Seeds and Cumin seeds wait till they splutter and then add Urad Dal, Peppercorns, finely chopped ginger, and Green Chilli. Next, add in Chopped Cashew nuts and finely chopped Curry Leaves.

    Now add tempering over the cooled Rava and mix well. 

    Now add tempering over the cooled Rava and mix well.

    Next add in the Fresh thick Curd or Yogurt.

    Next add in the Fresh thick Curd or Yogurt.

    Mix everything well and then add in finely chopped Coriander Leaves and the required Water. The consistency should be similar to the idly batter consistency. 

    Mix everything well and then add in finely chopped Coriander Leaves and the required Water. The consistency should be similar to the idly batter consistency.

    Finally, add in Cooking soda and Salt. And mix the batter well. The batter will now bubble up after adding the cooking soda. Leave the batter for 5 mins. the batter will thicken up. Add water to bring it back to consistency. Mix well.

    Finally, add in Cooking soda and Salt. And mix the batter well. The batter will now bubble up after adding the cooking soda. Leave the batter for 5 mins. the batter will thicken up. Add water to bring it back to consistency. Mix well.

    Now Prepare the idly pan by greasing it with oil. Pour the Prepared batter and cook for about 10-12 mins or until the idli is cooked. 

    Now Prepare the idly pan by greasing it with oil. Pour the Prepared batter and cook for about 10-12 mins or until the idli is cooked.

    Once cooked switch off the flame. Allow it to cool down and then remove the idly from the pan by sprinkling a little water over the idli. It will come out clean from the Idli pan.

    Rava Idly Recipe | How to prepare Rava Idli

    Tips

    • You can also add Eno fruit salt instead of cooking soda.
    • Tastes great when served hot along with chutney and sambar.
    • You can also add grated Carrot along with the batter.
    Rava Idly Recipe | How to prepare Rava Idli

    More Breakfast Recipes

    • Kodo Millet Dosa
      Kodo Millet Dosa | Varagu arisi dosa
    • Masala Paratha
      Masala Paratha
    • Egg Dosa
      Egg Dosa | Mutta Dosa Recipe
    • Air Fryer Granola

    ★ Did you enjoy this recipe? If you happen to try it out, I would love to hear from you! I’d appreciate it if you could rate and leave a review below in the comments. Your reviews help others know the recipe better too. Thanks for your time ? You can also follow me on Facebook, Pinterest, Instagram, Youtube and Twitter for more updates from me.

    📖 Recipe

    Rava Idli
    Print Recipe Pin Recipe
    5 from 1 vote

    Soft Rava Idli

    Rava idli or Semolina Idli is an easy and instant breakfast recipe made with Rava few spices and curd. It goes well with chutney and sambar.
    Prep Time15 minutes mins
    Cook Time12 minutes mins
    Total Time27 minutes mins
    Course: Breakfast
    Cuisine: Indian
    Servings: 2
    Calories: 183kcal
    Author: Sharmila Kingsly
    Prevent your screen from going dark

    Standard 1 cup measures 240 ml

    Ingredients

    • 1 cup Rava /sooji
    • 1 cup Thick Curd
    • 1 tsp Cooking soda
    • 1 tbsp Oil
    • 1 tsp Mustard Seeds
    • 1 tbsp Urad dal
    • 1 tsp Peppercorns
    • 1 inch Ginger
    • 1 Green Chili
    • 1 sprig Curry Leaves
    • 1 tsp Cumin Seeds
    • 1 tsp Cashew nuts
    • Coriander leaves to garnish
    • Salt as required
    • Water as required

    Instructions 

    • In a Kadai dry roast the Rava for about 5 mins. Make sure the color of the Rava doesn’t change. Remove the rava to a plate and allow it to cool down. In the same Kadai add in Oil.
    • Once the oil heats up add in Mustard Seeds and Cumin seeds wait till they splutter and then add Urad Dal, Peppercorns, finely chopped ginger, and Green Chilli. Next, add in Chopped Cashew nuts and finely chopped Curry Leaves.
    • Now add in the cooled Rava over the Tempering and mix well and switch off the flame. Take the Rava mixture in a bowl and add in the Fresh Curd.
    • Mix everything well and then add in salt finely chopped Coriander Leaves and the required Water. The consistency should be similar to the idly batter consistency. Finally, add in Cooking soda. And mix the batter well. The batter will now bubble up after adding the cooking soda. Now Prepare the idly pan by greasing it.
    • Pour the Prepared batter and cook for about 10-12 mins or until the idli is cooked. Once cooked switch off the flame. Allow it to cool down and then remove the idly from the pan by sprinkling a little water over the idli. It will come out clean from the Idli pan.

    Notes

    • You can also add Eno fruit salt instead of cooking soda.
    • Tastes great when served hot along with chutney and sambar.
    • You can also add grated Carrot along with the batter.

    Nutrition

    Calories: 183kcal | Carbohydrates: 25.9g | Protein: 6.7g | Fat: 5.3g | Saturated Fat: 0.8g | Cholesterol: 3mg | Sodium: 106mg | Potassium: 137mg | Fiber: 3.1g | Sugar: 8.4g | Calcium: 39mg | Iron: 2mg
    Tried this recipe?Mention @happietrio or tag #happietrio
    Subscribe to my Channelclick for more videos

    Disclaimer: I am not a nutritionist , the nutrition value provided here is an estimate.It will vary based on the quantity and brands of the products used.

    • « Previous Page
    • 1
    • …
    • 59
    • 60
    • 61
    • 62
    • 63
    • …
    • 67
    • Next Page »
    Sharmila Kingsly

    Hi, I'm Joshie!

    Food Blogger, Biryani Lover , Software Engineer .. In no particular order.I love to cook and that is why I am here!! Welcome to my space!!. 

    Read more about me!

    • Instagram
    • Facebook
    • YouTube
    • Pinterest
    • X

    Vegan Recipes

    • Tomato basil pasta
      Tomato Basil Pasta
    • Chickpea Spinach Curry
      Chickpea Spinach Curry
    • Vegan Chickpea Soup
      Vegan Chickpea Soup
    • Instant Pot Pumpkin Pasta
      Instant Pot Pumpkin Pasta
    • Basil Fried Rice
      Thai Basil Fried Rice
    • Lettuce Wraps
      Lettuce Wraps | Vegetable Lettuce Wraps

    Popular Posts

    • Nandu Rasam
      Nandu Rasam
    • Indian Dinner Party Menu Ideas, Sample Menus + Recipes
    • Nandu Kulambu
      Nandu Kuzhambu |Crab Curry |Nandu Kulambu
    • Instant Pot Peas Curry
      Instant Pot Peas Curry | Green Peas Curry
    • Payaru Kanji
      Payaru Kanji | Green Gram Porridge
    • Mushroom Egg Bhurji
      Mushroom Egg Burji

    Footer

    ↑ back to top

    As an Amazon Associate I earn from qualifying purchases.

    Copyright ©  2025 COOK WITH SHARMILA

    Rate This Recipe

    Your vote:


    A rating is required
    A name is required
    An email is required