Cook with Sharmila

  • Home
  • About Me
    • Video Recipes
    • Media Mentions
    • Privacy Policy
  • Recipe Index
    • Recipes
  • Nanjilnad Recipes
  • Shop
menu icon
go to homepage
  • Home
  • Recipe Index
  • Air Fryer
  • About Me
  • Subscribe
    • Facebook
    • Instagram
    • Pinterest
    • Twitter
    • YouTube
  • subscribe
    search icon
    Homepage link
    • Home
    • Recipe Index
    • Air Fryer
    • About Me
    • Subscribe
    • Facebook
    • Instagram
    • Pinterest
    • Twitter
    • YouTube
  • ×
    Home » Recipe Index

    Chicken Pakoda Recipe | How to make Chicken Pakora

    September 20, 2018 By Sharmila Kingsly Leave a Comment

    Chicken Pakoda Recipe | Chicken Pakora | How to make Chicken Pakora

    Chicken Pakoda or Pakora is a crispy appetizer and very common street food. Usually made as an evening snack or starter.

    Chicken Pakoda Recipe | Chicken Pakora | How to make Chicken Pakora

    Chicken Pakoda Recipe | Chicken Pakora | How to make Chicken Pakora with step by step pictures. Chicken Pakoda is a yummy appetizer and a very common street food in tamil nadu. Now that the weather is gloomy some hot hot pakoras and chai will be a perfect delight.

    It can be had with tomato sauce or just by itself tastes good either way. Boneless chicken pieces are best suited for this recipe.

    There may be many ways of preparing Chicken Pakodas and today im sharing one favorite family recipe which I have been trying for years and it never failed me.

    So now let’s see how to prepare Chicken Pakodas. Will be sharing another version of chicken pakoda soon.

    [feast_advanced_jump_to]

    Chicken Pakoda

    Chicken Pakoda or pakora is a crispy bite-sized chicken delight. Small chunky chicken cubes are coated in a batter prepared with gram flour, Eric flour along spices. The chicken cubes are then coated with the batter and deep-fried till perfection.

    Chicken Pakoda Recipe | Chicken Pakora

    Chicken Pakora, FAQ's

    Can chicken pakora be reheated?

    Chicken pakoda always goes well when served hot. You can reheat but you may lose the crispiness of the pakora. So my advice would be it tastes best when served hot and hence avoid reheating.

    Can you cook chicken pakora from frozen chicken?

    A big yes. You can use frozen chicken for the Pakora. Thaw the chicken and bring it to room temperature. And then dip in the batter and deep fry.

    Does chicken pakora contain gluten

    Since we use only Rice flour and Chickpea Flour in the chicken pakoda. Both the flours are gluten-free and hence Chicken pakora is gluten-free.

    Does chicken pakora contain dairy

    Chicken pakoda is dairy-free. We are not using any dairy products in the pakoda batter.

    How to Prepare Chicken Pakoda

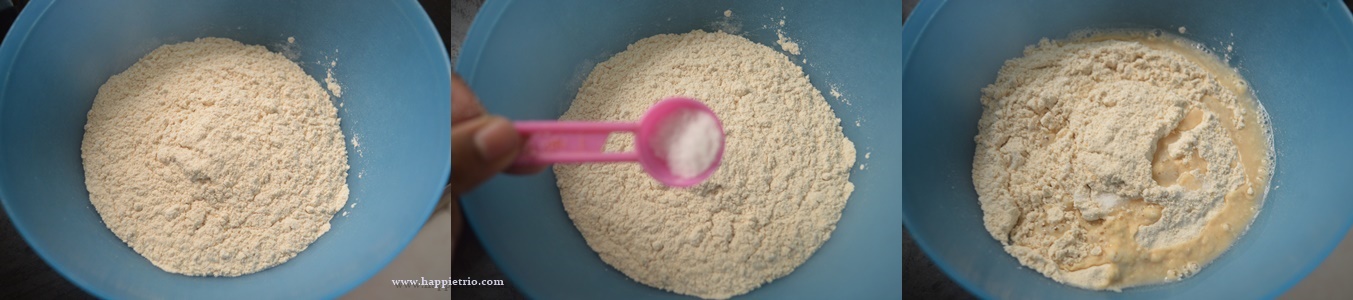
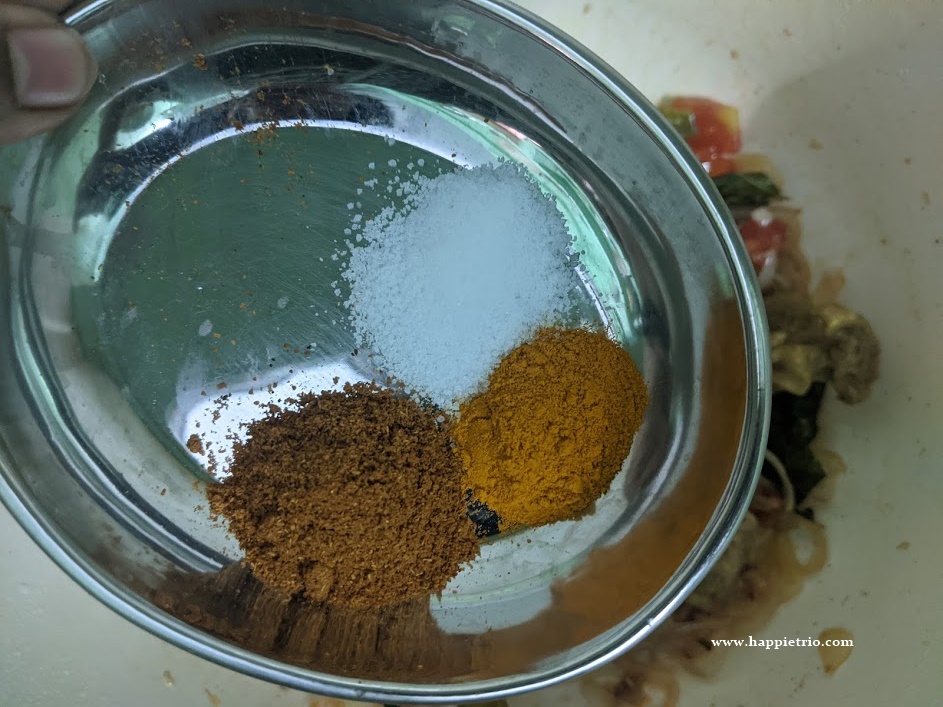
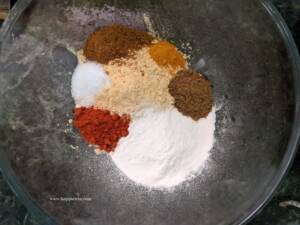
    1.    In a mixing bowl add in Gram Flour, Rice flour.

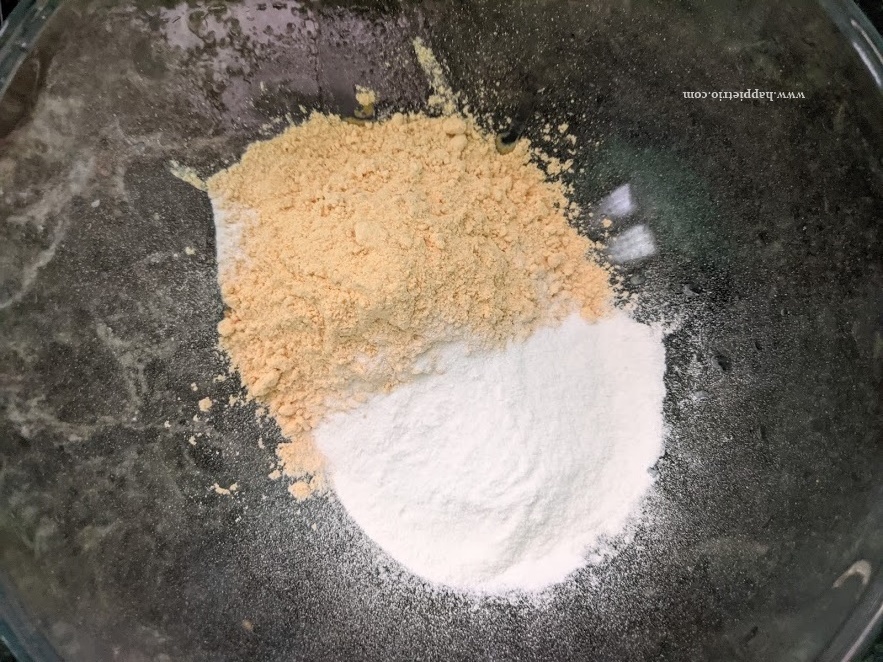
    2. Next add in Red Chilli powder, Coriander powder, Garam Masala, and Turmeric powder and Salt.

     3.  Then add in the ginger garlic paste

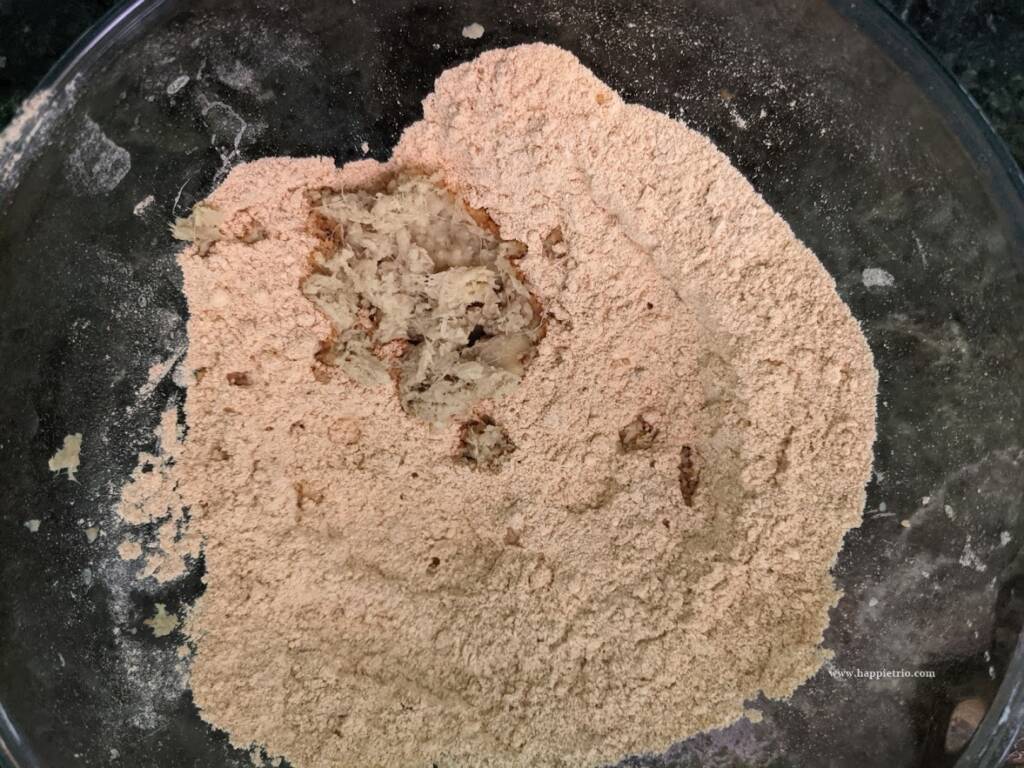
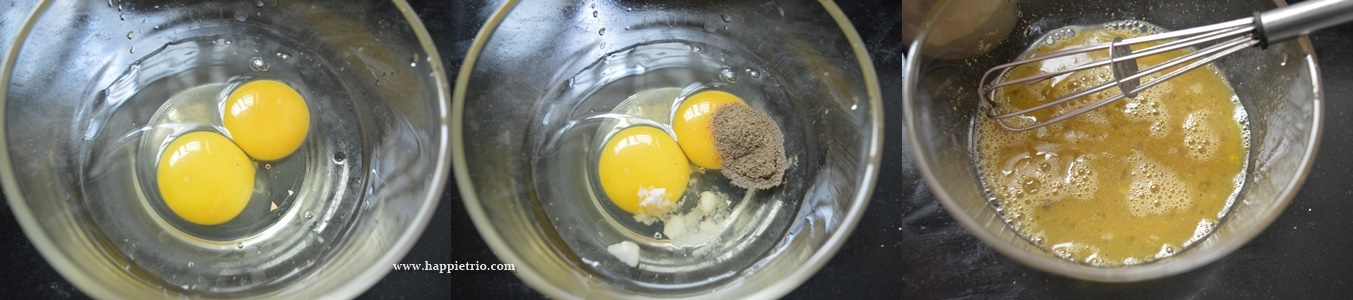
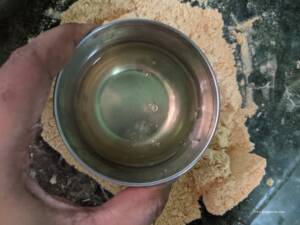
    4. Mix everything roughly it will resemble crumbs. Next, add in the egg white from 1 egg.

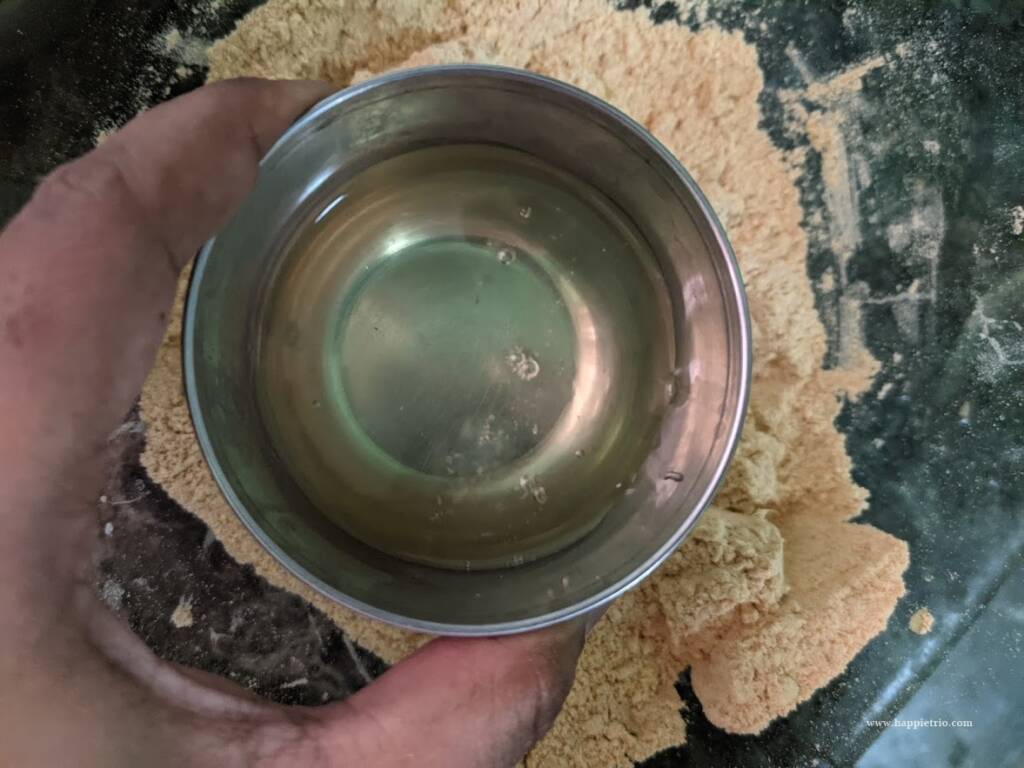
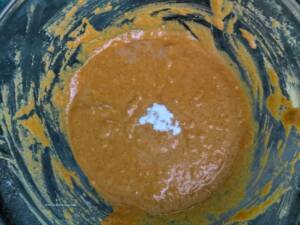
    5.    Mix everything with little water from a little thick batter. The consistency should be such that if you dip the chicken in batter it should coat it. Finally, add in Cooking Soda and combine everything.

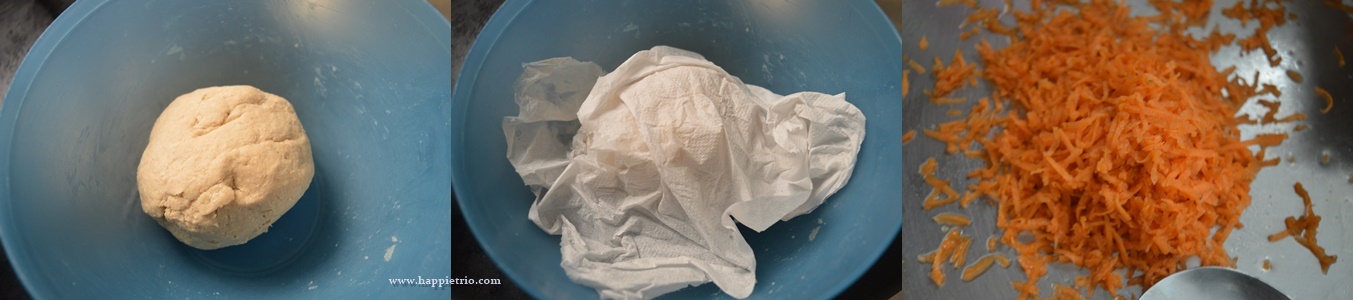
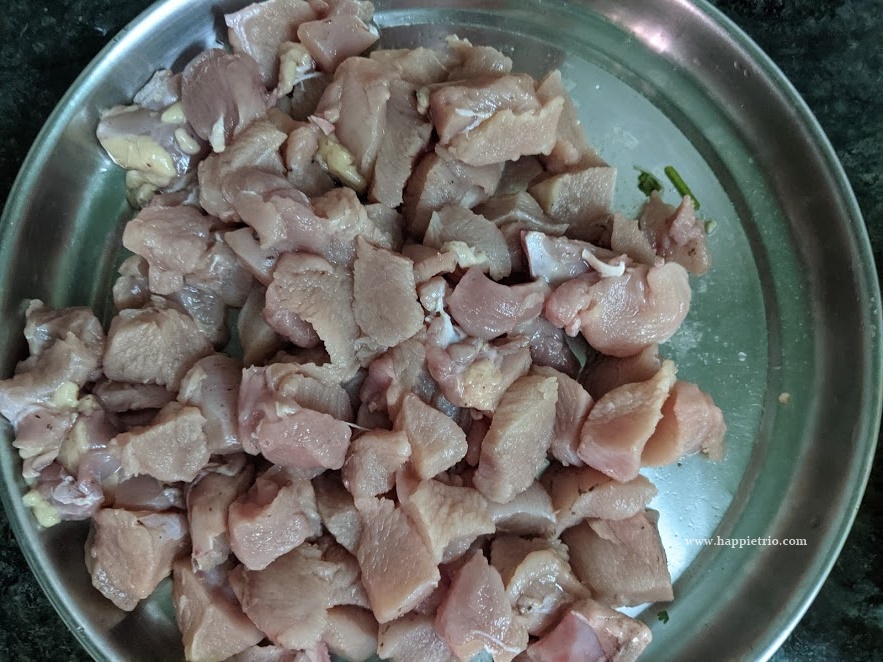
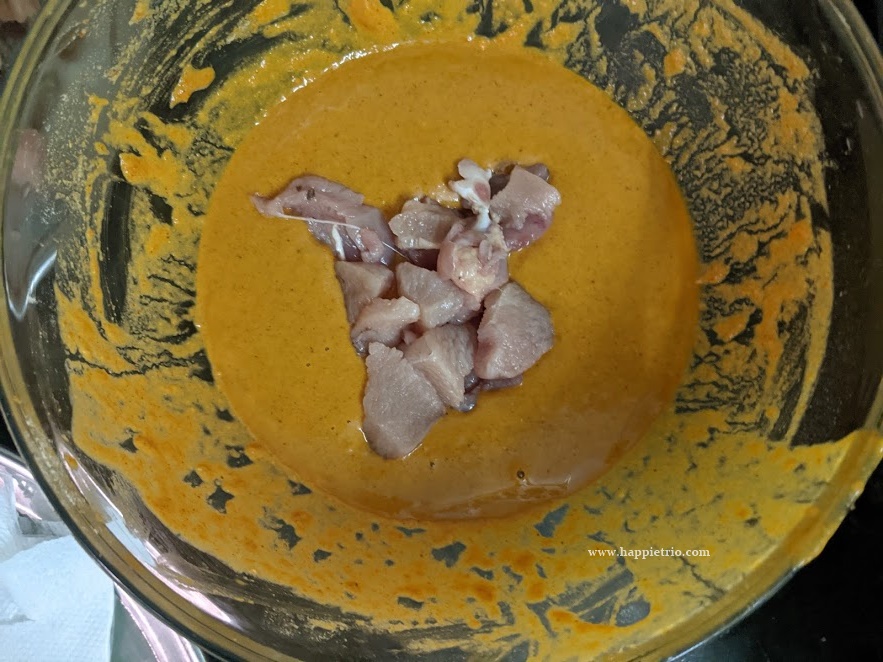
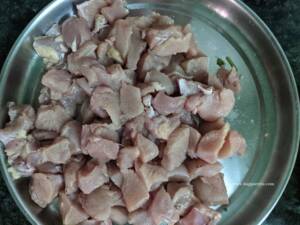
     6. Clean and chop the chicken into small cube-sized pieces. I prefer using boneless chicken pieces.    

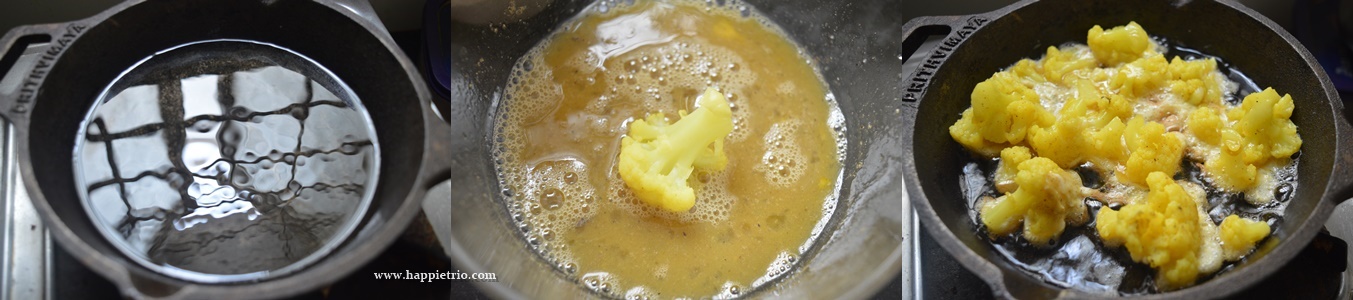
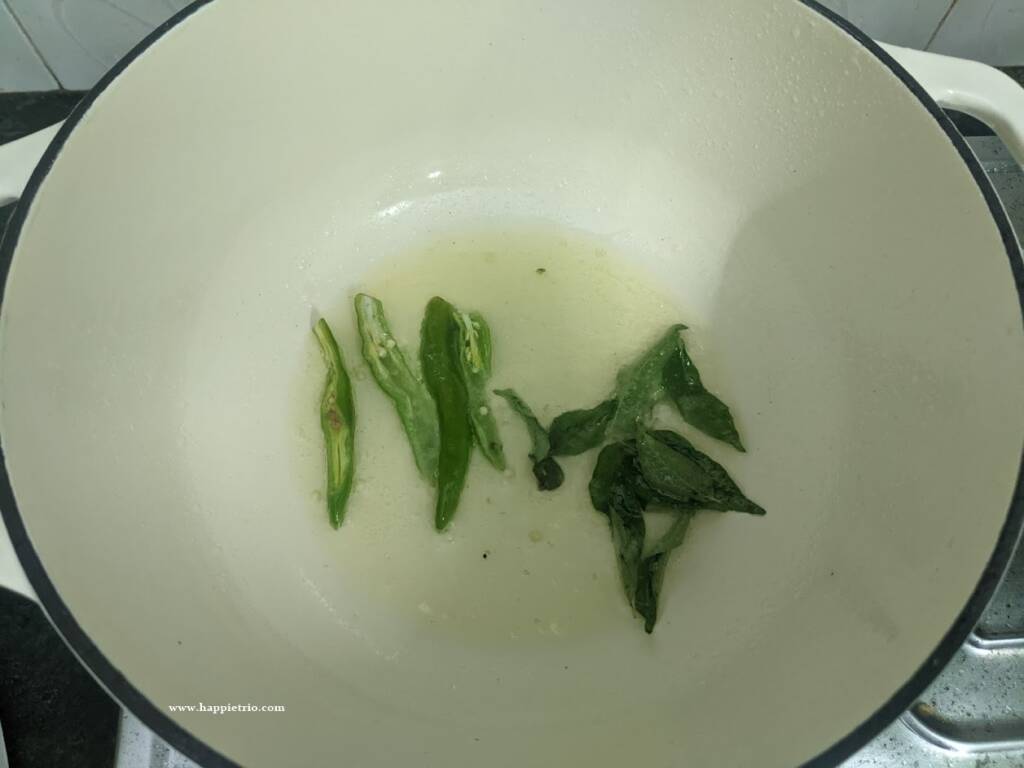
    7.    Now add the boneless chicken pieces to the prepared batter. Meanwhile, heat oil for deep frying. Add in Curry Leaves and green chili fry for a minute and set them aside, it gives a nice flavor to the oil.

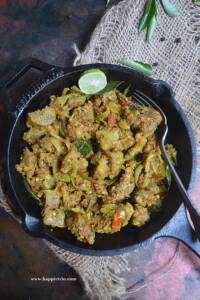
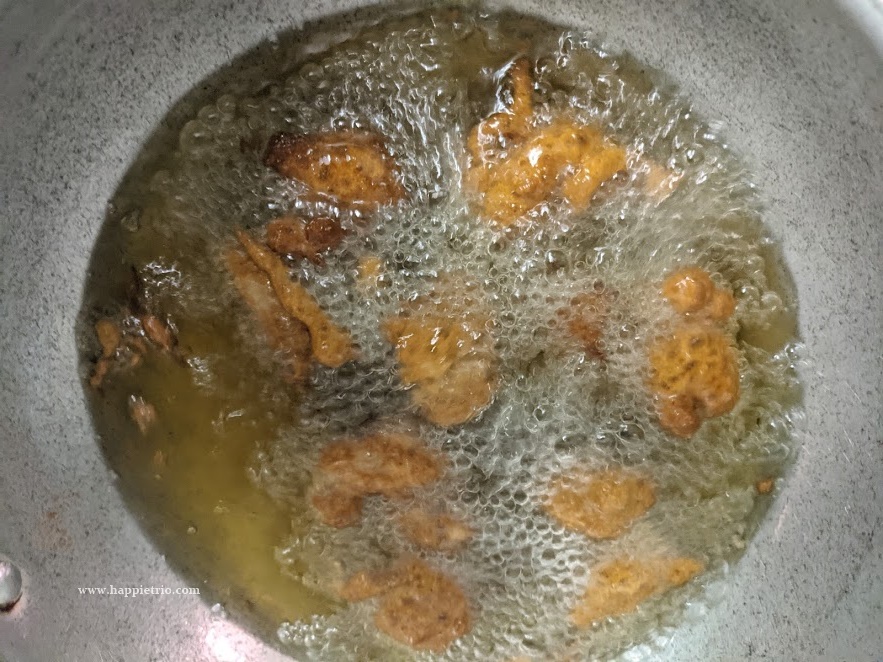
    8.    Next add in the batter coated chicken pieces and fry them in medium heat till its golden brown and fully cooked.

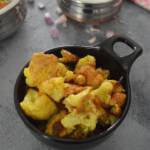
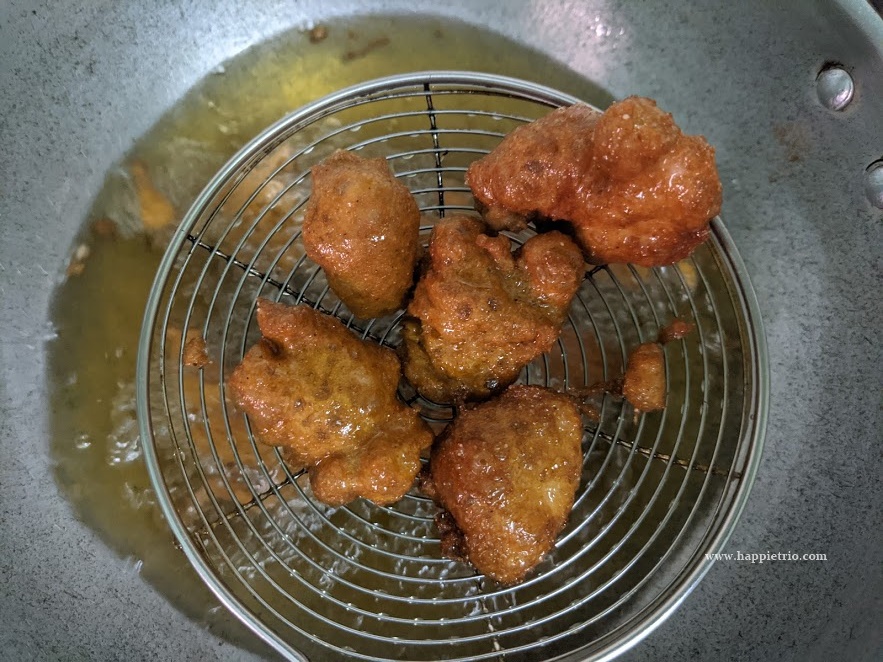
    9. Chicken pakora is ready. Drain in paper towels to remove excess oil.

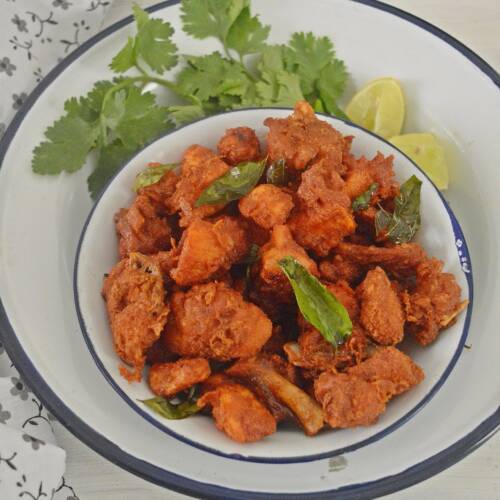
    Perfect for a party. Goes well just by itself or can be had with tomato ketchup.

    Chicken Pakoda Recipe | Chicken Pakora

    What to serve with chicken pakora:

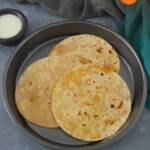
    Serve with some hot Ginger Tea. It also goes well with Tomato Ketchup and Mayonnaise.

    Similar Recipes:

    • Chicken 65
      Chicken 65 Recipe
    • Chicken Fry
      Chicken Fry | Crispy Chicken Varuval
    • Chicken Tikka
      Chicken Tikka Recipe - Stove Top / Air Fryer

    ★ Did you enjoy this recipe? If you happen to try it out, I would love to hear from you! I’d appreciate it if you could rate and leave a review below in the comments. Your reviews help others know the recipe better too. Thanks for your time ?

    You can also follow me on Facebook, Pinterest, Instagram, Youtube and Twitter for more updates

    📖 Recipe

    Chicken Pakoda Recipe | Chicken Pakora | How to make Chicken Pakora
    Print Recipe Pin Recipe
    5 from 2 votes

    Chicken Pakoda Recipe | Chicken Pakora | How to make Chicken Pakora

    Chicken Pakoda or Pakora is a crispy appetizer and very common street food. Usually made as an evening snack or starter.
    Prep Time10 minutes mins
    Cook Time10 minutes mins
    Total Time20 minutes mins
    Course: Appetizer
    Cuisine: Indian
    Servings: 3
    Calories: 331kcal
    Author: Sharmila Kingsly
    Prevent your screen from going dark

    Standard 1 cup measures 240 ml

    Ingredients

    • ¼ kg Boneless Chicken
    • ¼ cup Gram Flour/Besan Flour
    • 3 tbsp Rice Flour
    • 1 tsp Chilli powder
    • ½ tsp Coriander powder
    • ¼ tsp Turmeric powder
    • ½ tsp Garam Masala
    • 1 tbsp Ginger garlic paste
    • 1 Egg White From 1 egg
    • Salt as needed
    • ¼ tsp Cooking Soda
    • 2 springs Curry Leaves
    • 4 Green Chilli
    • Oil for deep frying

    Instructions 

    • In a mixing bowl add in Gram Flour, Rice flour.
      Add in gram flour and Rice Flour
    • Next add in Red Chilli powder, Coriander powder, Garam Masala, and Turmeric powder, and Salt.
      Add in all spice powders
    • Then add in the ginger-garlic paste
      Add in ginger garlic paste
    • Mix everything roughly it will resemble crumbs. Next, add in the egg white from 1 egg.
      Add Egg White
    • Mix everything with little water from a little thick batter. The consistency should be such that if you dip the chicken in batter it should coat it. Finally, add in Cooking Soda and combine everything.
      Add Cooking Soda
    • Clean and chop the chicken into small cube-sized pieces. I prefer using boneless chicken pieces.
      Use bonelessChicken pieces for the pakoda
    • Now add the boneless chicken pieces to the prepared batter. Meanwhile, heat oil for deep frying. Add in Curry Leaves and green chili fry for a minute and set them aside, it gives a nice flavor to the oil.
      Dip the Cicken in prepared Batter
    • Next add in the batter coated chicken pieces and fry them in medium heat till its golden brown and fully cooked.
      Fry the chicken pakoda
    • Chicken pakora is ready. Drain in paper towels to remove excess oil.
      Chicken Pakora is ready

    Notes

    • Use small and even sized chicken pieces, this will help the pakodas to cook quick and even.
    •  Serve hot with sauce.
    •  You can skip green chilli and curry leaves but it give a good flavour so I recommend adding it.
    •  Don’t keep the batter unattended for a longer time as it may leave water.

    Nutrition

    Calories: 331kcal | Carbohydrates: 7.9g | Protein: 16g | Fat: 26g | Saturated Fat: 3.9g | Cholesterol: 45mg | Sodium: 77mg | Potassium: 168mg | Fiber: 0.9g | Sugar: 0.5g | Calcium: 10mg | Iron: 1mg
    Tried this recipe?Mention @happietrio or tag #happietrio
    Subscribe to my Channelclick for more videos

    Tender Coconut Juice

    September 16, 2018 By Sharmila Kingsly Leave a Comment

    Tender Coconut Juice

    Creamy tender coconut juice is made from coconut pulp and water. Perfect summer cooler to beat the heat.

    Tender Coconut Juice

    Tender Coconut Juice | Elaneer Juice step by step pictures. Tender coconut is a natural coolant and it helps to keep the body hydrated. Actually I got this idea of preparing tender coconut juice from a tamil soap opera Saravanan Meenakshi ,where the hero tries to impress the heroine and prepares this yummy juice for her. I really liked the idea. Since then I used to prepare the juice once in a while.

    Tender Coconut Juice | Elaneer Juice

    How to make Tender Coconut Juice

     
        1.    In a blender add in the tender coconut and fresh cream along with tender coconut water.

      2.    Add in any sweetener if you are adding and then blend well until everything is well combined.

    3.    Serve immediately.

    Enjoy it during summer. Seasonal treat it is.
    Tender Coconut Juice | Elaneer Juice
    Yummy tender coconut juice.
     
    Tender Coconut Juice | Elaneer Juice

    ★ Did you enjoy this recipe? If you happen to try it out, I would love to hear from you! I’d appreciate it if you could rate and leave a review below in the comments. Your reviews help others know the recipe better too. Thanks for your time. You can also follow me on Facebook, Pinterest, Instagram, Youtube and Twitter for more updates from me.

    📖 Recipe

    Tender Coconut Juice
    Print Recipe Pin Recipe
    5 from 1 vote

    Tender coconut Juice

    Tender Coconut juice is made from coconut pulp and water. Perfect summer cooler to beat the heat.
    Prep Time5 minutes mins
    Cook Time0 minutes mins
    Total Time5 minutes mins
    Course: Drinks
    Cuisine: Indian
    Servings: 2
    Calories: 39kcal
    Author: Sharmila Kingsly
    Prevent your screen from going dark

    Standard 1 cup measures 240 ml

    Equipment

    • Blender
    • Blender

    Ingredients

    • ½ cup Tender coconut
    • 2 cup Tender coconut water
    • 2 tbsp Fresh cream
    • 2 tbsp Sugar optional

    Instructions 

    • In a blender add in the tender coconut and fresh cream along with tender coconut water.
    • Add in any sweetener if you are adding and then blend well until everything is well combined.
    • Serve immediately.

    Notes

    · Adding sugar is optional as the tender coconut is naturally sweet.
    · Serve immediately after preparing.

    Nutrition

    Serving: 1cup | Calories: 39kcal | Carbohydrates: 5.2g | Protein: 1.6g | Fat: 1.4g | Saturated Fat: 8g | Cholesterol: 5mg | Sodium: 50mg | Potassium: 299mg | Fiber: 4.4g | Sugar: 0.5g | Calcium: 446mg | Iron: 90mg
    Tried this recipe?Mention @happietrio or tag #happietrio
    Subscribe to my Channelclick for more videos

    Disclaimer: I am not a nutritionist, the nutrition value provided here is an estimate. It will vary based on the quantity and brands of the products used

    Chettinad Khara Kuzhi Paniyaram

    September 10, 2018 By Sharmila Kingsly Leave a Comment

    Chettinad Khara Kuzhi Paniyaram
    Chettinad Khara Kuzhi Paniyaram Recipe | Kuzhi Paniyaram | Kara Paniyaram

    Chettinad Khara Kuzhi Paniyaram Recipe | Kuzhi Paniyaram step by step pictures. Paniyaram is a very popular snack in the south india, however it is called with different names in different south indian states as Paddu, Ponganalu .It can be prepared with the Idli Dosa batter itself. However instead of idli rice you can use raw rice for crispier paniyaram. It goes well with any spicy chutney.

    Click here for more Chettinad Recipes

        Step by step Method with pictures: 
          1.    In a pan add in oil once it is hot add the Mustard seeds and Cumin seeds let it splutter and then add in the Channa Dal and Urad Dal fry till the turn golden brown.

    2.    Next add in ginger, curry leaves and green chilli. Fry well.Next add in the chopped onions.

     3.    Fry till they turn glossy and then switch off .

     4. Add this to the prepared idli ,dosa batter along with the required salt and mix well.

    5.    Heat a paniyaram (appe) pan with oil pour in the prepared batter and cook in a low flame.no need to cover and cook also don’t fill the holes with batter fully let it be little less so that when it cook it will get the right shape. Once the bottom of the paniyaram becomes crisp and start leaving the sides.

    6.    Flip it and continue cooking till it is fully cooked. Serve hot with kara chutney.

    Serve hot with some kaapi and chutney.
    Chettinad Khara Kuzhi Paniyaram Recipe | Kuzhi Paniyaram

    📖 Recipe

    Chettinad Khara Kuzhi Paniyaram
    Print Recipe Pin Recipe
    5 from 1 vote

    Chettinad Khara Kuzhi Paniyaram

    Paniyaram is a very popular snack in the south india, however it is called with different names in different south indian states
    Prep Time10 minutes mins
    Cook Time15 minutes mins
    Total Time25 minutes mins
    Course: Breakfast
    Cuisine: Chettinad
    Servings: 15 panniyaram
    Calories: 58kcal
    Author: Sharmila Kingsly
    Prevent your screen from going dark

    Standard 1 cup measures 240 ml

    Ingredients

    • 1 cup Idli Dosa Batter
    • 1 tbsp Oil
    • 1 tsp Mustard Seeds
    • ½ tsp Cumin seeds
    • 1 tsp Urad Dal
    • 1 tbsp Channa Dal
    • 1 tsp Ginger crushed
    • 1 Green Chili
    • 1 Onion
    • 1 sprig Curry leaves
    • Salt as needed
    • Oil

    Instructions 

    • In a pan add in oil once it is hot add the Mustard seeds and Cumin seeds let it splutter and then add in the Channa Dal and Urad Dal fry till the turn golden brown.
    • Next add in ginger, curry leaves and green chilli. Fry well.Next add in the chopped onions.
    • Fry till they turn glossy and then switch off .Add this to the prepared idli ,dosa batter along with the required salt and mix well.
    • Heat a paniyaram (appe) pan with oil pour in the prepared batter and cook in a low flame.no need to cover and cook also don’t fill the holes with batter fully let it be little less so that when it cook it will get the right shape. Once the bottom of the paniyaram becomes crisp and start leaving the sides.
    • Flip it and continue cooking till it is fully cooked. Serve hot with kara chutney.

    Notes

    •  Goes well with any spicy chutney
    •  Serve as a breakfast or even as a snack.

    Nutrition

    Calories: 58kcal | Carbohydrates: 10.1g | Protein: 2.1g | Fat: 1.2g | Saturated Fat: 0.2g | Sodium: 28mg | Potassium: 73mg | Fiber: 1.2g | Sugar: 0.9g | Calcium: 7mg
    Tried this recipe?Mention @happietrio or tag #happietrio
    Subscribe to my Channelclick for more videos

    Mackerel Fish Fry

    September 9, 2018 By Sharmila Kingsly Leave a Comment

    Ayala Fish Fry

    Ayala fish fry is crisp and perfect for a full lunch meal. The fish is juicy and perfect for frying.

     Mackerel Fish Fry

    Ayala Meen Varuval |  Mackerel Fish Fry | Fish Fry step by step pictures. Ayala fish is a perfect one for fry as we can fry as a whole fish. It goes well with rice and any kuzhambu. Now let’s see how to prepare ayala meen varuval.

    Ayala Meen Varuval

    How to prepare ayala fish fry

     
         1.    Take the cleaned fish and draw slits on both the sides. Add the chilli powder, Ginger garlic paste, Turmeric powder, Pepper powder, Garam Masala and Salt.

      2.    Mix the masala and apply over all the sides of the fish also apply the masala into the slits of the fish. Let it marinate for an hour. Heat a tawa with oil for frying.

    3.    Once it’s hot fry the fish on both sides till its crisp and cooked perfectly. Serve hot.

    I had ayala fish fry with rice and chettinad prawn kuzhambu.
    Ayala Meen Varuval |  Mackerel Fish Fry | Fish Fry
    Serve hot.
    Ayala Meen Varuval |  Mackerel Fish Fry | Fish Fry

    ★ Did you enjoy this recipe? If you happen to try it out, I would love to hear from you! I’d appreciate it if you could rate and leave a review below in the comments. Your reviews help others know the recipe better too. Thanks for your time ? You can also follow me on Facebook, Pinterest, Instagram, Youtube and Twitter for more updates

    📖 Recipe

    Ayala Fish Fry
    Print Recipe Pin Recipe
    No ratings yet

    Ayala Fish Fry

    Ayala fish fry is crisp and perfect for a full lunch meal. The fish is juicy and perfect for frying.
    Prep Time5 minutes mins
    Cook Time15 minutes mins
    Marination Time1 hour hr
    Course: Appetizer
    Cuisine: Indian
    Servings: 3
    Calories: 208kcal
    Author: Sharmila Kingsly
    Prevent your screen from going dark

    Standard 1 cup measures 240 ml

    Equipment

    • Skillet
    • Skillet

    Ingredients

    • 4 Ayala Fish
    • 1 tbsp Chilli powder
    • Salt as needed
    • 1 tsp Ginger garlic paste
    • ½ tsp Turmeric powder
    • ½ tsp Pepper powder
    • 1 tsp Garam Masala
    • Oil for frying

    Instructions 

    • Take the cleaned fish and draw slits on both the sides. Add the chilli powder, Ginger garlic paste, Turmeric powder, Pepper powder, Garam Masala and Salt.
    • Mix the masala and apply over all the sides of the fish also apply the masala into the slits of the fish. Let it marinate for an hour. Heat a tawa with oil for frying.
    • Once it’s hot fry the fish on both sides till its crisp and cooked perfectly. Serve hot.

    Video

    Notes

    · You can also deep fry if you prefer.
    · Add in few curry leaves while frying for flavour.
    · Serve with rice and fish curry.

    Nutrition

    Calories: 208kcal | Carbohydrates: 0.7g | Protein: 16.4g | Fat: 15.3g | Saturated Fat: 3.2g | Cholesterol: 50mg | Sodium: 97mg | Potassium: 274mg | Fiber: 0.4g | Calcium: 16mg | Iron: 3mg
    Tried this recipe?Mention @happietrio or tag #happietrio
    Subscribe to my Channelclick for more videos

    Disclaimer: I am not a nutritionist , the nutrition value provided here is an estimate. It will vary based on the quantity and brands of the products used.

    Egg Dipped Cauliflower Fry | Egg Gobi Roast

    September 9, 2018 By Sharmila Kingsly Leave a Comment

    Egg Dipped Cauliflower Fry Recipe | Egg Coated Gobi Florets Fry
    Egg Dipped Cauliflower Recipe | Egg Coated Gobi Florets

    Egg Dipped Cauliflower Fry Recipe | Egg Coated Gobi Florets Recipe step by step pictures. Egg coated cauliflower is an easy lunch side dish recipe. It is prepared with very few ingredients and the entire cooking can be done in 15 mins. It makes a good side dish for rice.

    How to cook Cauliflower

    I have adapted this recipe from Divya’s blog and I made it for lunch today. Couldn’t wait to share the recipe. And now let's see how to prepare egg dipped cauliflower.

    Egg Dipped Cauliflower Recipe | Egg Coated Gobi Florets
     

     Step by step Method with pictures: 

        1.    Chop the cauliflower into small-sized florets and in a vessel bring in water to boil, to this add in Salt and turmeric powder, and cook till the cauliflower is done. Once cooked strain the excess water and set aside.

    2.    Break open eggs in a bowl, to this add salt and pepper powder and beat well until well combined.

    3.    Heat a pan for shallow frying with oil, now take the cooked cauliflower florets and dip in the egg such its coasted fully and shallow fry.

    4.    Turn on both  sides and cook it the egg is completely cooked and turns crisp.

    ·       Serve with Sambar and Rice.
    Egg Dipped Cauliflower Recipe | Egg Coated Gobi Florets


    📖 Recipe

    Egg Dipped Cauliflower Fry Recipe | Egg Coated Gobi Florets Fry
    Print Recipe Pin Recipe
    4.50 from 2 votes

    Egg Dipped Cauliflower Fry Recipe | Egg Coated Gobi Florets Fry

     Egg coated cauliflower is a easy lunch side dish recipe. It is prepared with very less ingredients and the entire cooking can be done in 15 mins. It makes a good side dish for rice.
    Prep Time10 minutes mins
    Cook Time8 minutes mins
    Total Time18 minutes mins
    Course: Side Dish
    Cuisine: Indian
    Servings: 4
    Calories: 68kcal
    Author: Sharmila Kingsly
    Prevent your screen from going dark

    Standard 1 cup measures 240 ml

    Ingredients

    • 1 Cauliflower medium sized head
    • 2 Egg
    • 1 tsp Pepper powder
    • Salt as needed
    • ¼ tsp Turmeric powder
    • Oil as needed for shallow frying

    Instructions 

    • Chop the cauliflower into small sized florets and in a vessel bring in water to boil, to this add in Salt and turmeric powder and cook till the cauliflower is done. Once cooked strain the excess water and set aside.
    • Break open eggs in a bowl, to this add salt and pepper powder and beat well until well combined.
    • Heat a pan for shallow frying with oil, now take the cooked cauliflower florets and dip in the egg such its coasted fully and shallow fry.
    • Turn on both the sides and cook it the egg is completely cooked and turns crisp.

    Video

    Notes

    •  Goes well with Sambar and Rice.
    •  If there is remaining egg after dipping the cauliflower you can also add it in the pan and cook.
    •  Can add Garam Masala and Turmeric powder to the egg for extra flavour.

    Nutrition

    Calories: 68kcal | Carbohydrates: 7.9g | Protein: 5.6g | Fat: 2.3g | Saturated Fat: 0.7g | Cholesterol: 82mg | Sodium: 113mg | Potassium: 469mg | Fiber: 3.6g | Sugar: 3.6g | Calcium: 44mg | Iron: 1mg
    Tried this recipe?Mention @happietrio or tag #happietrio
    Subscribe to my Channelclick for more videos

    Payaru Kanji | Green Gram Porridge

    September 3, 2018 By Sharmila Kingsly Leave a Comment

    Payaru Kanji

    Payaru Kanji is a healthy superfood made of green gram, garlic, and Rice. It goes well with chamanthi or Thogayal.

    Follow us on Pinterest for delicious pins. Join our Facebook group for more Instant Pot and Air Fryer recipes.

    Payaru Kanji

    Green Gram Porridge | Pachai Payar Kanji | Green Moong Dal Porridge Step by step photos. Porridge is always a comfort food during sick days .It is so easy to prepare and healthy at the same time. We usually prepare porridge during all the Fridays during the lent season while fasting. Now lets see how to prepare green gram porridge.

    How to make Payaru Kanji

    In a pressure cooker add the Rice and green gram along with garlic pods. Wash well and then add the 4 cups of water.

    Close the cooker and allow it to cook for 5 whistles on a medium flame. Once the pressure releases on its own, open the cooker.

    To this add another 1 cup of hot water and cook for another 5-10 mins on medium flame. Now add the required salt and mix well.

    Green Gram Porridge | Pachai Payar Kanji | Green Moong Dal Porridge

    Next, add in the grated coconut and mix well. Once it comes to a boil switch it off and serve.

    Green Gram Porridge | Pachai Payar Kanji | Green Moong Dal Porridge

    Pachai Payiru Kanji or Green Moong Porridge is now ready to serve.

    Tips & Variations

    • Instead of water, you can also add Milk or coconut milk. It gives a creamy and rich texture to the porridge.
    •  Usually served with thengai thogayal.
    •  If you have added salt serve immediately. Otherwise, the porridge might turn sour. Else, add salt as and when you serve.
    •  Add lots of garlic if you prefer.
    •  Add more water if required as the porridge gets thick over time

    Similar Recipes

    • Ulundhu Kanji | Black Gram Porridge
      Ulundhu Kanji | Black Gram Porridge | Ulutham Kanji
    • Ragi Porridge
      Ragi Porridge | Sweet Ragi Koozh
    • Millet Porridge
      Millets Porridge, No Sugar Millet Flakes Porridge

    ★ Did you enjoy this recipe? If you happen to try it out, I would love to hear from you! I’d appreciate it if you could rate and leave a review below in the comments. Your reviews help others know the recipe better too. Thanks for your time. You can also follow me on Facebook, Pinterest, Instagram, Youtube and Twitter for more updates

    📖 Recipe

    Payaru Kanji
    Print Recipe Pin Recipe
    5 from 1 vote

    Payaru Kanji | Green Gram Porridge

    Payaru Kanji is a healthy superfood made of green gram, garlic, and Rice. It goes well with chamanthi or Thogayal.
    Prep Time10 minutes mins
    Cook Time20 minutes mins
    Total Time30 minutes mins
    Course: Breakfast
    Cuisine: Indian
    Servings: 4
    Calories: 261kcal
    Author: Sharmila Kingsly
    Prevent your screen from going dark

    Standard 1 cup measures 240 ml

    Ingredients

    • ½ cup Green Gram
    • ½ cup Rice
    • 10-15 Garlic pods
    • Salt as needed
    • 4+1 cups Water
    • ½ cup Grated coconut

    Instructions 

    • In a pressure cooker add the Rice and green gram along with garlic pods. Wash well and then add the 4 cups of water.
    • Close the cooker and allow it to cook for 5 whistles on a medium flame. Once the pressure releases on its own, open the cooker.
    • To this add another 1 cup of hot water and cook for another 5-10 mins on medium flame. Now add the required salt and mix well.
    • Next, add in the grated coconut and mix well. Once it comes to a boil switch it off and serve.

    Notes

    •  Instead of water you can also add in Milk or coconut milk.
    •  Usually served with thengai thogayal.
    •  If you have added salt serve immediately. Otherwise the porridge might turn sour. Otherwise add salt as and when you serve.
    •  Add in lots of garlic if you prefer.
    •  Add in more water if required as the porridge gets thick over time.

    Nutrition

    Serving: 1cup | Calories: 261kcal | Carbohydrates: 46g | Protein: 11.4g | Fat: 4g | Saturated Fat: 3g | Sodium: 10mg | Potassium: 560mg | Fiber: 7.5g | Sugar: 3.2g | Calcium: 69mg | Iron: 3mg
    Tried this recipe?Mention @happietrio or tag #happietrio
    Subscribe to my Channelclick for more videos

    Disclaimer: I am not a nutritionist, the nutrition value provided here is an estimate. It will vary based on the quantity and brands of the products used.

    How to make Carrot Paratha

    August 30, 2018 By Sharmila Kingsly Leave a Comment

    Carrot Paratha

    Carrot Paratha is a delicious and nutritious Indian flatbread made with grated carrots and whole wheat flour. It's a perfect option for a healthy breakfast or lunch, packed with the goodness of carrots which are rich in vitamins and fiber

    Carrot Paratha Recipe| Gajar ka Paratha | Carrot Stuffed Paratha


    Carrot Paratha Recipe| Gajar ka Paratha | Stuffed carrot paratha with Step by step photos. I simply love this idea of stuffed paratha, we can hide in any veggies and feed some healthy food for the family. Also, it tastes good with just Curd /Yogurt or pickle.

    Similar to sandwiches we can show our creativity by making some interesting filling. Carrot paratha has a beautiful tint of orange color and it's really healthy. Now let’s see how to make Carrot Paratha at home

    Carrot Paratha Recipe| Gajar ka Paratha | Carrot Stuffed Paratha

    How to make carrot paratha

        1.    In a mixing bowl add in the wheat flour along with salt mix well. Next add in water little by little and knead to a soft dough.
     

     2.    After kneading the dough cover it with a kitchen cloth and allow it to rest for 30 mins.Mean while grate the carrot.

     3.    Heat oil in a pan and add the carrot saute well. Add in Garam Masala and salt.

     4.    Cook till the moisture content is fully evaporated otherwise the parathas will become soggy.

    5.    Now pinch a lemon sized portion of the dough. Make it as a small open ball and keep a small amount of the prepared carrot filling. Flatten it lightly with the hands.

    6.    Now dust the surface with the required flour and flatten the prepared carrot filled dough like a paratha .Dont worry about the shape you can cut with a round vessel for the paratha. Make sure the carrot stuffing doesn’t come out.

    7.    Now heat a tawa and toast the paratha on both the sides by drizzling ghee. Serve hot.

    Smear in a generous dollop of ghee and serve the paratha hot with some Yogurt. Makes a perfect lunch box dish.
     

    Carrot Paratha Recipe| Gajar ka Paratha | Carrot Stuffed Paratha

    Similar Recipes

    • Rajma Paratha
      Stuffed Rajma Paratha
    • Lauki Paratha
      How to make Lauki Paratha

    ★ Did you enjoy this recipe? If you happen to try it out, I would love to hear from you! I’d appreciate it if you could rate and leave a review below in the comments. Your reviews help others know the recipe better too. Thanks for your time. You can also follow me on Facebook, Pinterest, Instagram,Youtube and Twitter for more updates

    📖 Recipe

    Carrot Paratha
    Print Recipe Pin Recipe
    No ratings yet

    Carrot paratha

    Carrot paratha is a healthy stuffed paratha .Carrot paratha has a beautiful tint of orange color and its really healthy and Served with curd.
    Prep Time30 minutes mins
    Cook Time3 minutes mins
    Total Time33 minutes mins
    Course: Breakfast
    Cuisine: Indian
    Servings: 5
    Calories: 77kcal
    Author: Sharmila Kingsly
    Prevent your screen from going dark

    Standard 1 cup measures 240 ml

    Ingredients

    • 1 cup Whole Wheat flour / Atta
    • ½ tsp Salt
    • Water as needed to knead the dough
    • Ghee as needed

    For Carrot Stuffing

    • 1 tsp Oil
    • ½ cup Carrot
    • Salt as needed
    • ½ tsp Garam Masala

    Instructions 

    • In a mixing bowl add in the wheat flour along with salt mix well. Next add in water little by little and knead to a soft dough.
    • After kneading the dough cover it with a kitchen cloth and allow it to rest for 30 mins.Mean while grate the carrot.
    • Heat oil in a pan and add the carrot saute well. Add in Garam Masala and salt.
    • Cook till the moisture content is fully evaporated otherwise the parathas will become soggy.
    • Now pinch a lemon sized portion of the dough. Make it as a small open ball and keep a small amount of the prepared carrot filling. Flatten it lightly with the hands.
    • Now dust the surface with the required flour and flatten the prepared carrot filled dough like a paratha .Dont worry about the shape you can cut with a round vessel for the paratha. Make sure the carrot stuffing doesn’t come out.
    • Now heat a tawa and toast the paratha on both the sides by drizzling ghee. Serve hot.

    Notes

    · Serve hot with curd.
    · Toasting with ghee will make the parathas soft and stay good for a long time.
    · Make sure carrot stuffing don’t have moisture otherwise the carrot paratha will get soggy.

    Nutrition

    Serving: 1paratha | Calories: 77kcal | Carbohydrates: 5.2g | Protein: 1.1g | Fat: 5.5g | Saturated Fat: 2.2g | Cholesterol: 7mg | Sodium: 654mg | Potassium: 34mg | Fiber: 1.1g | Sugar: 0.7g | Calcium: 10mg | Iron: 1mg
    Tried this recipe?Mention @happietrio or tag #happietrio
    Subscribe to my Channelclick for more videos

    Disclaimer: I am not a nutritionist, the nutrition value provided here is an estimate. It will vary based on the quantity and brands of the products used.

    Mutton Pepper Roast | Lamb Pepper Fry

    August 27, 2018 By Sharmila Kingsly Leave a Comment

    Mutton Pepper Roast

    Pepper Mutton Roast is a popular Mutton starter. It is so flavorful and delicious with just simple spices, It does wonder when cooked the right way.

    Pepper Mutton Roast is a popular Mutton recipe especially in Kerala.It is so flavorful and delicious with just simple spices , pepper does wonder when cooked the right way.

    I have tried Pepper roast with almost anything and everything, Pepper Chicken ,ShreddedPepper Chicken, Mutton Liver Pepper Fry are few of them. It goes very well with rice, Biryani, Roti or even Dosa or Idli.

    [feast_advanced_jump_to]

    Mutton Pepper Roast

    Pepper is a healthy and versatile spice in our south Indian cooking. We usually flavor many dishes especially meat recipes with Pepper. It in fact blends beautifully. If you are someone who loves rustic flavors then this recipe is for you. Mutton Pepper Roast has just the basic few ingredients, Still have the best of the best taste. Pair Mutton Pepper Roast with any fat bread, Rice, Pulao, or biryani.

    Ingredients for Mutton Pepper Roast

    Mutton - Use a good quality tender variety of lamb. Depending on the type of lamb we use the cooking time may vary. We usually cook it in a pressure cooker for 6 to 10 sounds. So check your meat type and cook accordingly.

    Onion, Tomato - As always we use the basic onion and tomato for the Muton Pepper Roast.

    Ginger Garlic paste - A mandatory ingredient in any nonveg dish. Use either ginger garlic paste or crushed ginger garlic.

    Spices - Just the very basic spices. Garam Masala and Turmeric powder for the flavor we use.

    Fennel seeds + Whole Pepper -So this is the secret ingredient for the Mutton Pepper Roast. We dry roast fennel seeds and whole pepper until aromatic and then grind it to a coarse powder and use.

    How to Prepare Mutton Pepper Roast, Pictorial

    1.    In a cooker add in the cleaned Mutton pieces along with salt and turmeric powder, add water till the immersing level of mutton, and pressure cook in a medium flame for 6 whistles. Wait till the pressure releases on its own and then open the cooker.

    2.    In a pan dry roast the whole pepper and fennel seeds till you get a nice aroma in a low flame. Allow it to cool down and then grind it to a fine powder and set aside.

     3.    Heat oil in a pan once it becomes hot add the Curry leaves, green chilli

    4. Add onion and cook till glossy.

    5. Next add in tomatoes and cook till mushy.

    6. Add the ginger garlic paste and cook till raw smell leaves

    7.  Now add in the cooked mutton pieces and roast in a low flame for a min.      

    8. Next add in Salt, Garam Masala Powder

    9. Finally add in fennel pepper powder and mix well.        

    10. Mix well and cook for another 5 mins and switch off the flame. Garnish with coriander leaves and serve.

    Mutton Pepper Roast

    Serve hot with biryani or Pulao.

    How to serve Lamb Pepper Roast

    Goat Pepper Roast is a spicy appetizer. It goes well with Pulao or any Flat bread. Biryani or Rice also. My Personal Favourite combination is Rice along with Rasam and Lamb Pepper Fry.

    Tips to get the Perfect Lamb Pepper Fry

    Cooking Lamb - This is a very important step. Based on the type of meat the cooking time varies. We usually pressure cook the meat and the cook. Never waste the liquid used in cooking the meat. Use it to prepare gravy or biryani or even Soups.

    Spice Powder - Never use Pepper powder in the recipe. Thoughts it's a simple tip. It makes a considerable flavor in taste. Always dry roast the whole pepper and use.

    Similar Mutton Recipes:

    • Thalapakatti Biryani
      Thalappakatti Biriyani ( Thalappakattu biriyani )
    • Mutton Kola Urundai
      Mutton Kola Urundai | Mutton Keema Balls
    • Mutton Biryani
      Home Style Mutton Biryani | Lamb Biryani
    • Mutton Liver Pepper Fry
      Mutton Liver Pepper Fry | Eeral Milagu Varuval

    ★ Did you enjoy this recipe? If you happen to try it out, I would love to hear from you! I’d appreciate it if you could rate and leave a review below in the comments. Your reviews help others know the recipe better too. Thanks so much ?

    You can also follow me on Facebook, Pinterest, Instagram, Youtube, and Twitter for more updates

    📖 Recipe

    Mutton Pepper Roast
    Print Recipe Pin Recipe
    5 from 1 vote

    Mutton Pepper Roast

    Pepper Mutton Roast is a popular Muttonstarter. It is so flavorful and delicious with just simple spices, pepper does wonder when cooked the right way.
    Prep Time15 minutes mins
    Cook Time30 minutes mins
    Total Time45 minutes mins
    Course: Appetizer
    Cuisine: Indian
    Servings: 4
    Calories: 276kcal
    Author: Sharmila Kingsly
    Prevent your screen from going dark

    Standard 1 cup measures 240 ml

    Ingredients

    To Pressure Cook:

    • ½ kg Mutton
    • Salt as needed
    • ¼ tsp Turmeric powder

    To Dry Roast:

    • 2 tsp Whole Pepper
    • 1 tsp Fennel Seeds

    Other Ingredients:

    • 2 tbsp Oil
    • 2 springs Curry Leaves
    • 2 Onion
    • 2 Green Chilli
    • 1 tbsp Ginger garlic paste
    • 1 Tomato
    • Salt as needed
    • ¼ tsp Turmericc powder
    • 1 tsp Garam Masala
    • Coriander leaves to garnish

    Instructions 

    • In a cooker add in the cleaned Mutton pieces along with salt and turmeric powder. Add water to the immersing level of mutton, and pressure cook in a medium flame for 6 whistles. Wait till the pressure releases on its own and then open the cooker.
    • In a pan dry roast the whole pepper and fennel seeds till you get a nice aroma on a low flame. Allow it to cool down and then grind it to a fine powder and set aside.
    • Heat oil in a pan once it becomes hot add the curry leaves, green chili
    • Add onion and cook till glossy.
    • Next add in tomatoes and cook till mushy.
    • Add the ginger garlic paste and cook till raw smell leaves
    • Now add in the cooked mutton pieces and roast on a low flame for a min.
    • Next add in Salt, Garam Masala Powder
    • Finally add in fennel pepper powder and mix well.
    • Mix well and cook for another 5 mins and switch off the flame. Garnish with coriander leaves and serve.

    Notes

    · Perfect with some Rasam and hot rice.
    · Add more curry leaves and cook in coconut oil for a rich flavour.
    · After cooking the mutton use the water to prepare soup, or you can add in the gravy.Dont waste.
    · Goes well with Roti or Phulkas too.

    Nutrition

    Calories: 276kcal | Carbohydrates: 4.9g | Protein: 28.9g | Fat: 15.1g | Saturated Fat: 4.1g | Cholesterol: 92mg | Sodium: 142mg | Potassium: 447mg | Fiber: 1.3g | Sugar: 2.2g | Calcium: 31mg | Iron: 2mg
    Tried this recipe?Mention @happietrio or tag #happietrio
    Subscribe to my Channelclick for more videos

    Disclaimer: I am not a nutritionist, the nutrition value provided here is an estimate. It will vary based on the quantity and brands of the products used.

    Note: This post is originally from 2018. Its now updated with new Recipe card, Pictures and Content.

    Chettinad Prawn Curry

    August 22, 2018 By Sharmila Kingsly Leave a Comment

    Chettinad Prawn Curry
    Chettinad Prawn Curry Recipe | Chettinad Iral Kuzhambu

    Chettinad Prawn Curry Recipe | Chettinad Iral Kuzhambu with Step by step photos. Sharing today a yummy kuzhmabu made with prawns and freshly ground masala which id cooked to perfection. It sure will never fail to please your taste buds. It goes very well Rice, Idli or Dosa. Check out the other Chettinad Recipes available in my space too. Now lets see how to prepare Chettinad Prawn Curry.

     
    Chettinad Prawn Curry Recipe | Chettinad Iral Kuzhambu
     
        Step by step Method with pictures: 
         1.    Dry roast the ingredients mentioned under “To Roast and Grind section” .Once it is roasted allow it to cool done and then add in little water and grind it to a fine paste. Set aside till use.

    2.    Heat oil in a pan ,once it is hot add in the Fennel seeds let it splutter and then add in the curry leaves next add in the onions and saute till glossy.

    3.    Next add in the ginger garlic paste and cook till the raw smell leaves and then add in the tomatoes and cook till it leaves oil. Next add in the ground masala paste.

    4.    Add in the required water and mix well. Now add in the Coriander powder, Red Chilli powder, Garam Masala, turmeric powder and salt. Mix well.

    5.    Let it come to a boil and then add in the cleaned prawns. Cover and cook.

    6.    Once the prawns are cooked simmer for few mins and then switch off the flame. Finally garnish with coriander leaves.

    Serve hot with Idli  ,Dosa or Rice.
    Chettinad Prawn Curry Recipe | Chettinad Iral Kuzhambu

    📖 Recipe

    Chettinad Prawn Curry
    Print Recipe Pin Recipe
    No ratings yet

    Chettinad Prawn Curry

    Chettinad Prawn Curry is a delicious chettinad style kuzhambu made with freshly ground spices.
    Prep Time30 minutes mins
    Cook Time20 minutes mins
    Total Time50 minutes mins
    Course: Kuzhambu
    Cuisine: Chettinad
    Servings: 5
    Calories: 134kcal
    Author: Sharmila Kingsly
    Prevent your screen from going dark

    Standard 1 cup measures 240 ml

    Ingredients

    • ¼ kg Prawn
    • 2 tbsp Oil
    • 1 tsp Fennel seeds
    • 1 sprig Curry leaves
    • 1 Onion
    • 1 tsp Ginger garlic paste
    • 2 Tomato
    • 1 tsp Red Chilli powder
    • 1 tsp Coriander powder
    • ½ tsp Garam Masala
    • ¼ tsp Turmeric powder
    • Salt as needed

    To Roast and Grind :

    • ¼ cup Coconut
    • 1 tsp Fennel seeds
    • 1 tsp Cumin seeds
    • ½ tsp Pepper Corns
    • ¼ tsp Fenugreek seeds
    • 2 Cloves
    • 2 Cardamom pods
    • 1 inch Cinnamon stick

    Instructions 

    • Dry roast the ingredients mentioned under “To Roast and Grind section” .Once it is roasted allow it to cool done and then add in little water and grind it to a fine paste. Set aside till use.
    • Heat oil in a pan ,once it is hot add in the Fennel seeds let it splutter and then add in the curry leaves next add in the onions and saute till glossy.
    • Next add in the ginger garlic paste and cook till the raw smell leaves and then add in the tomatoes and cook till it leaves oil. Next add in the ground masala paste.
    • Add in the required water and mix well. Now add in the Coriander powder, Red Chilli powder, Garam Masala, turmeric powder and salt. Mix well.
    • Let it come to a boil and then add in the cleaned prawns. Cover and cook.
    • Once the prawns are cooked simmer for few mins and then switch off the flame. Finally garnish with coriander leaves.

    Notes

           ·       Serve with hot rice or Idli ,Dosa.

    Nutrition

    Calories: 134kcal | Carbohydrates: 6.9g | Protein: 9.4g | Fat: 8.1g | Saturated Fat: 2.4g | Cholesterol: 72mg | Sodium: 117mg | Potassium: 333mg | Fiber: 2.7g | Sugar: 2.4g | Calcium: 70mg | Iron: 3mg
    Tried this recipe?Mention @happietrio or tag #happietrio
    Subscribe to my Channelclick for more videos

    Chilli Garlic Noodles in Instant Pot

    August 21, 2018 By Sharmila Kingsly Leave a Comment

    Chilli Garlic Noodles

    Chilli Garlic Noodles is a simple and yummy flavored noodle. It is so easy to prepare and goes really well with just tomato ketchup

    Chilli Garlic Noodles

    Chilli Garlic Noodles Recipe | Chilli Garlic Flavored Hakka Noodles with Step by step photos. Chilli Garlic Noodles is an simple and yummy flavored noodles. It is so easy to prepare and goes really well with just tomato ketchup. Can be easily prepared in just 10 mins. Now lets see how to prepare Chilli Garlic noodles.

    [feast_advanced_jump_to]

    Chilli Garlic Noodles

    Chilli garlic noodles are a quick and yummy vegan fix for the weekend or weeknight dinner. It has chili and garlic as the main ingredients along with the sauces. Adjust the chili added if you like a spicier version.

    Cooking noodles in Instant Pot makes the game totally easy. No need to cook the noodles separately and toss with the sauces. This is totally a one pot meal and makes a quick fix meal.

    How to Cook Noodles Perfectly.

    Just in case if you do not own an Instant Pot, you may cook the noodles in stovetop too. Usually, we cook noodles by bringing in excess water to boil. To this, we add oil and salt. And then we add the noodles and cook for 2 or 3 mins until al dente.

    Yet it's best to check the package instructions once before cooking.The amount of water and time may vary depending on the type of noodles and brand.

    Ingredients :

    Noodles - I am using rice noodles , you may use wheat noodles or spaghetti as you like. However the cooking time differs. If using wheat noodles cook for 8 mins. If using spaghetti cook for 7 mins in high pressure.

    Garlic - Use finely sliced garlic , it gives a nice flavor when roasted in oil

    Chilli - I prefer a spicier version and hence adding 5 to 6 red chilli. You can increase or decrease as you prefer.

    Onion - Use white or red onion and saute well. You can also use the white part of the green onions.

    Soy sauce - Gives the noodles a perfect flavor. Use tamari sauce for a gluten free noodles.

    Green chili Sauce - I personally like adding chili sauce. You can skip if you don't prefer.

    Add on's - Garnish the noodles with toasted white sesame seeds and spring onions (green onions)

    Salt and sugar - All the sauces has salt and hence ½ tsp of salt is sufficient for me. You can check and add more if needed. Adding sugar balance the flavors.

    How to prepare Chilli Garlic Noodles

    Instant Pot Method :

    1. Switch on the Instant pot in sauté mode. When it shows ON add in 2 tbsp of sesame Oil. Let it get hot.

    2. Next add in the chopped garlic and saute till it turn slightly golden. Next add in the dry red chili and Saute for few secs and then add in the onion. Saute till the onions turn soft.

    3. Next add in the Soy sauce, Green Chili Sauce, Sriracha Sauce and Rice Vinegar and stir everything together.

    4. Now add in 1.5 cups of water scrape the bottom and deglaze. Make sure nothing is stuck to the bottom of the pot.

    5. Mix well and then add in ½ tsp of salt and ¼ tsp of Sugar. All the sauces have salt so adjust and then add. ½ tsp Salt was perfect for me.

    6. Now add in the Rice Noodles. Layer it on top of the liquid. If your liquids start boiling you may press the cancel button and then layer the noodles. Using a spatula press the noodles so that it stays below the water level. You can also break and add the noodles so that it fits perfectly.

    7. Close the Instant Pot , Turn the pressure valve to sealing position. Set 4 mins in high pressure. Open the Instant Pot after 5 mins of natural pressure release.

    8. The noodles are perfectly cooked. Fluff them with a tongs.

    9. Garnish some toasted sesame seeds and spring onion and serve hot.

    Stove Top Version:

    1. In a vessel bring in water to boil, to this add in the noodles and cook as per the packet instructions.

    2. Once the noodles are cooked, switch off the flame and strain the noodles from excess water and wash well, and set aside. Heat a pan with oil.

    3. To this add in finely chopped garlic pods and dry red chili and sauté for a min and then add-in the onion and cook for another 1 min.

    4.Next add in the required salt and sugar. Then add in Green Chilli sauce, Soy sauce, Sriracha Sauce and Vinegar.

    5.    Mix well and cook for another 1 min and then add in the cooked noodles. Toss well so that the sauce is evenly coated over the noodles.

    6.  Finally garnish with spring onion , white sesame seeds and serve.

    Serve with any sauce as you prefer!! Easy and Yummy noodles.

    Chilli Garlic Noodles

    Tips to prepare noodles in stove top:

    • Always add oil while cooking the noodles. This will help the noodles without sticking to each other.
    • Also, add salt and cook the noodles.
    • Never ever close the pot while cooking noodles.
    • Noodles get cooked easily in 2 or 3 mins so keep the pot open and stir often.
    • After cooking noodles drain the excess water completely and then use.

    Serving Suggestions:

    ✔Goes well with any hot sauce or any Asian dry dish.

    ✔Can serve with Chilli Paneer or similar dry dishes.

    Similar Recipes:

    • Egg Fried Rice
      Egg Fried Rice
    • Veg Fried Rice
      Vegetable Fried Rice
    • Paneer Fried Rice
      Paneer Fried Rice

    ★ Did you enjoy this recipe? If you happen to try it out, I would love to hear from you! I’d appreciate it if you could rate and leave a review below in the comments. Your reviews help others know the recipe better too. Thanks for your time ? You can also follow me on Facebook, Pinterest, Instagram, Youtube and Twitter for more updates

    📖 Recipe

    Chilli Garlic Noodles
    Print Recipe Pin Recipe
    5 from 4 votes

    Chilli Garlic Noodles in Instant Pot

    Chilli Garlic Noodles is a simple and yummy flavored noodle. It is so easy to prepare and goes really well with just tomato ketchup
    Prep Time10 minutes mins
    Cook Time15 minutes mins
    Total Time25 minutes mins
    Course: Main Course
    Cuisine: Asian
    Servings: 2
    Calories: 280kcal
    Author: Sharmila Kingsly
    Prevent your screen from going dark

    Standard 1 cup measures 240 ml

    Equipment

    • Instant Pot 6 qt
    • Instant Pot 6 qt

    Ingredients

    • 200 gms Rice Noodles
    • 2 tbsp Sesame Oil
    • 3 tbsp Garlic chopped
    • 5 Dry Red Chilli
    • ⅓ cup Onion
    • 1 tbsp Green Chilli sauce
    • 2 tbsp Soy sauce
    • 1 tsp Sriracha Sauce
    • 1 tbsp Rice vinegar
    • ½ tsp Salt as needed
    • ¼ tsp Sugar
    • 1.5 cups Water
    • 1 tbsp White Sesame Seeds
    • 2 tbsp Spring Onion Green

    Instructions 

    • Switch on the Instant pot in sauté mode. When it shows ON add in 2 tbsp of sesame Oil. Let it get hot.
    • Next add in the chopped garlic and saute till it turn slightly golden. Next add in the dry red chili and Saute for few secs and then add in the onion. Saute till the onions turn soft.
    • Next add in the Soy sauce, Green Chili Sauce, Sriracha Sauce and Rice Vinegar and stir everything together.
    • Now add in 1.5 cups of water scrape the bottom and deglaze. Make sure nothing is stuck to the bottom of the pot.
    • Mix well and then add in ½ tsp of salt and ¼ tsp of Sugar. All the sauces have salt so adjust and then add. ½ tsp Salt was perfect for me.
    • Now add in the Rice Noodles. Layer it on top of the liquid. If your liquids start boiling you may press the cancel button and then layer the noodles. Using a spatula press the noodles so that it stays below the water level. You can also break and add the noodles so that it fits perfectly.
    • Close the Instant Pot and set 4 mins in high pressure. Open the Instant Pot after 5 mins of natural pressure release.
    • The noodles are perfectly cooked. Fluff them with a tongs.
    • Garnish some toasted sesame seeds and spring onion and serve hot.

    Video

    Notes

    Serve with any hot sauce as you like
    Adjust the no of chilli as you prefer. My version is lightly on a spicy side.

    Nutrition

    Calories: 280kcal | Carbohydrates: 42.7g | Protein: 6.6g | Fat: 9.1g | Saturated Fat: 1.2g | Sodium: 304mg | Potassium: 16mg | Fiber: 0.9g | Sugar: 1.4g | Calcium: 18mg | Iron: 1mg
    Tried this recipe?Mention @happietrio or tag #happietrio
    Subscribe to my Channelclick for more videos

    Disclaimer: I am not a nutritionist , the nutrition value provided here is an estimate. It may vary based on the quantity and brands of the products used.

    Note: This post is originally from 2016. I have updated with new Recipe card, Pictures and video now.

    • « Previous Page
    • 1
    • …
    • 43
    • 44
    • 45
    • 46
    • 47
    • …
    • 67
    • Next Page »
    Sharmila Kingsly

    Hi, I'm Joshie!

    Food Blogger, Biryani Lover , Software Engineer .. In no particular order.I love to cook and that is why I am here!! Welcome to my space!!. 

    Read more about me!

    • Instagram
    • Facebook
    • YouTube
    • Pinterest
    • X

    Vegan Recipes

    • Masala Paratha
      Masala Paratha
    • Tomato basil pasta
      Tomato Basil Pasta
    • Chickpea Spinach Curry
      Chickpea Spinach Curry
    • Vegan Chickpea Soup
      Vegan Chickpea Soup
    • Instant Pot Pumpkin Pasta
      Instant Pot Pumpkin Pasta
    • Basil Fried Rice
      Thai Basil Fried Rice

    Popular Posts

    • Nandu Rasam
      Nandu Rasam
    • Indian Dinner Party Menu Ideas, Sample Menus + Recipes
    • Nandu Kulambu
      Nandu Kuzhambu |Crab Curry |Nandu Kulambu
    • Instant Pot Peas Curry
      Instant Pot Peas Curry | Green Peas Curry
    • Payaru Kanji
      Payaru Kanji | Green Gram Porridge
    • Mushroom Egg Bhurji
      Mushroom Egg Burji

    Footer

    ↑ back to top

    As an Amazon Associate I earn from qualifying purchases.

    Copyright ©  2025 COOK WITH SHARMILA

    Rate This Recipe

    Your vote:


    A rating is required
    A name is required
    An email is required