Cook with Sharmila

  • Home
  • About Me
    • Video Recipes
    • Media Mentions
    • Privacy Policy
  • Recipe Index
    • Recipes
  • Nanjilnad Recipes
  • Shop
menu icon
go to homepage
  • Home
  • Recipe Index
  • Air Fryer
  • About Me
  • Subscribe
    • Facebook
    • Instagram
    • Pinterest
    • Twitter
    • YouTube
  • subscribe
    search icon
    Homepage link
    • Home
    • Recipe Index
    • Air Fryer
    • About Me
    • Subscribe
    • Facebook
    • Instagram
    • Pinterest
    • Twitter
    • YouTube
  • ×
    Home » Recipe Index

    Rose Cardamom Chia Pudding

    August 20, 2018 By Sharmila Kingsly 1 Comment

    Rose Cardamom Chia Pudding
    Rose Cardamom Chia Pudding Recipe | Chia Seed Recipes

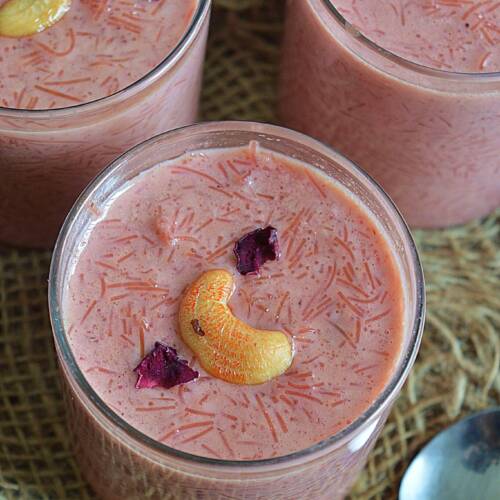
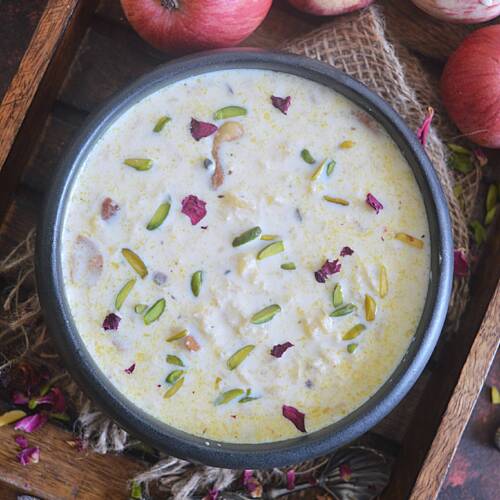
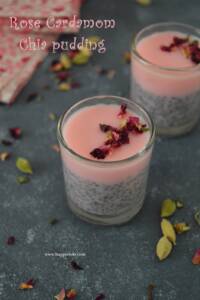
    Rose Cardamom Chia Pudding Recipe | Chia Seed Recipes with Step by step photos. Rose and cardamom flavor goes very well together. So I decided to make a quick pudding with chia seed as rose cardamom flavor. It is absolutely yummy and delicious. If you love rose flavor I tell you, it is a must try. Now lets see how to prepare Rose Cardamom Chia Pudding.


    Rose Cardamom Chia Pudding Recipe | Chia Seed Recipes

        Step by step Method with pictures: 

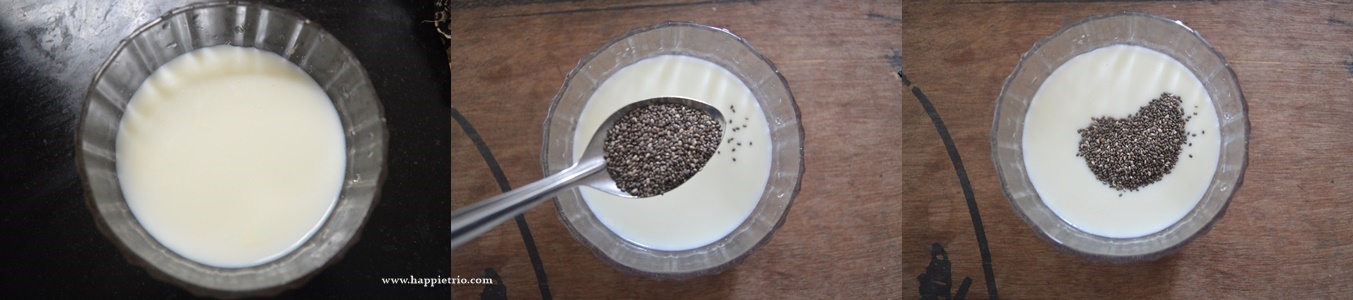
         1.    In a mixing bowl add in milk and to this add in chia seeds and mix well.
    2.    Allow it to sit in refrigerator overnight or a maximum of 4 hours. After 4 hours the chia seeds would have bloomed.
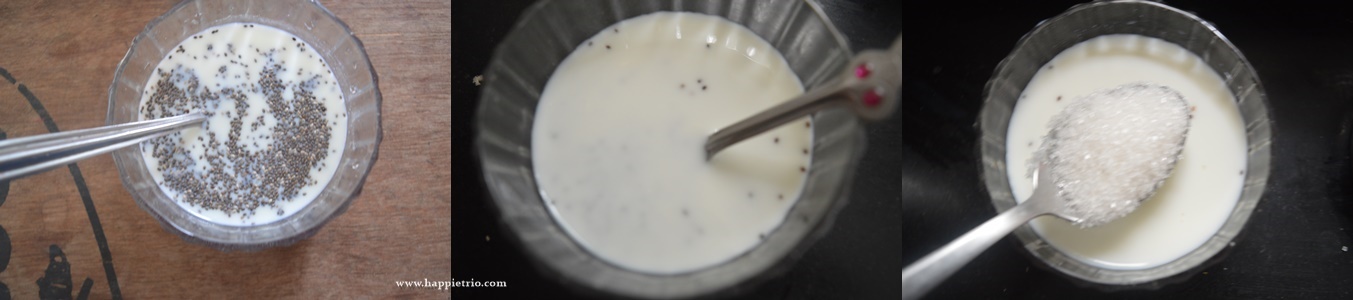
    3.    Now transfer this to a serving to this add in sugar and mix well. Next add in cardamom powder and rose essence.

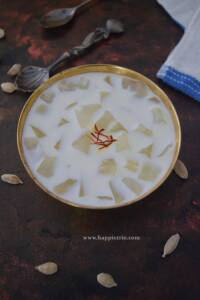
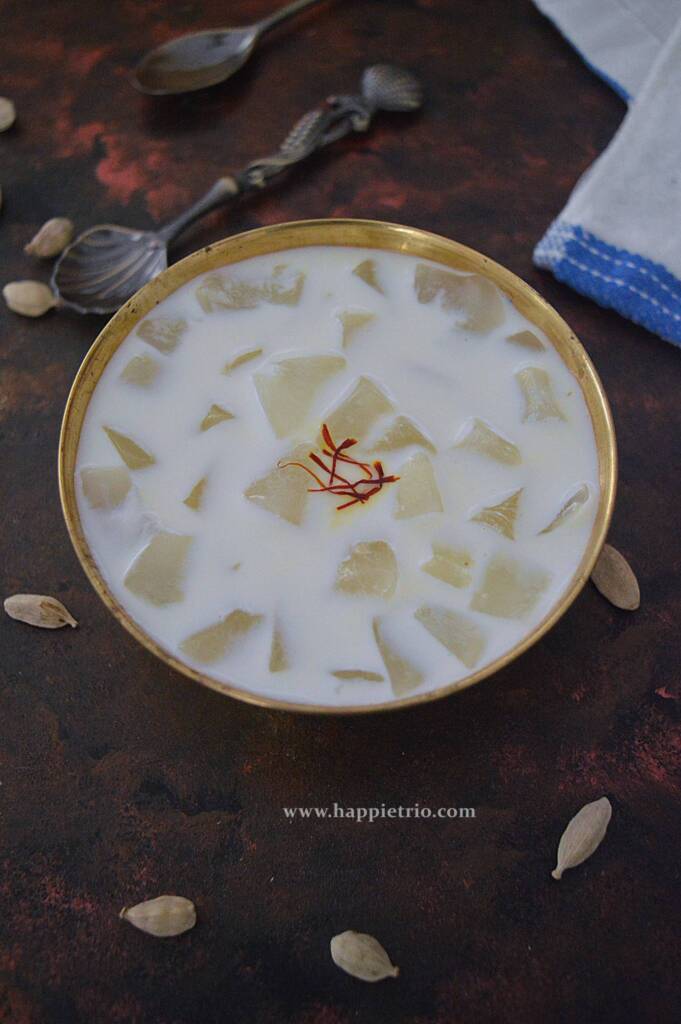
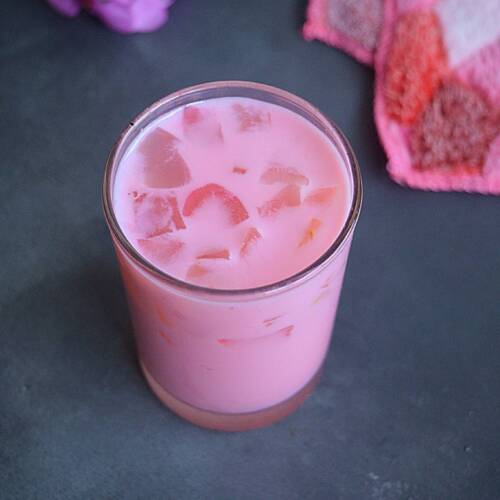
    4.    Mix well. Finally garnish with rose petals and serve.

    Rose Cardamom Chia Pudding Recipe | Chia Seed Recipes

    📖 Recipe

    Rose Cardamom Chia Pudding
    Print Recipe Pin Recipe
    5 from 1 vote

    Rose Cardamom Chia Pudding

    Rose Cardamom Chia Pudding Recipe Rose and cardamom flavor goes very well together. It is absolutely yummy and delicious
    Prep Time4 hours hrs
    Cook Time0 minutes mins
    Total Time4 hours hrs
    Course: Dessert
    Cuisine: International
    Servings: 2
    Calories: 108kcal
    Author: Sharmila Kingsly
    Prevent your screen from going dark

    Standard 1 cup measures 240 ml

    Ingredients

    • 2 cup Milk Chilled
    • ¼ cup Chia seeds
    • 1 tsp Rose extract or as needed
    • 2 tbsp maple syrup
    • ½ tsp Cardamom powder
    • Rose petals to garnish

    Instructions 

    • In a mixing bowl add in milk and to this add in chia seeds and mix well.
    • Allow it to sit in refrigerator overnight or a maximum of 4 hours. After 4 hours the chia seeds would have bloomed.
    • Now transfer this to a serving to this add in sugar and mix well. Next add in cardamom powder and rose essence.
    • Mix well. Finally garnish with rose petals and serve.

    Notes

    •  Adding Rose petals is optional but it has a very nice flavour.
    •  Makes a healthy breakfast option.

    Nutrition

    Calories: 108kcal | Carbohydrates: 16.5g | Protein: 4.2g | Fat: 4.8g | Saturated Fat: 1.1g | Cholesterol: 5mg | Sodium: 33mg | Potassium: 135mg | Fiber: 3.4g | Sugar: 10.9g | Calcium: 169mg | Iron: 1mg
    Tried this recipe?Mention @happietrio or tag #happietrio
    Subscribe to my Channelclick for more videos

    Homemade Ginger Garlic paste

    August 8, 2018 By Sharmila Kingsly Leave a Comment

    How to make Ginger Garlic paste

     Ginger garlic paste is an important ingredient when it comes to cooking. It can be made when ahead of time and stored for a longer use

    Follow us on Pinterest for delicious pins. Join our Facebook group for more Instant Pot and Air Fryer recipes.

    Homemade Ginger Garlic paste

    How to make Ginger Garlic paste | Homemade Ginger Garlic paste with Step by step photos. Ginger garlic paste is an important ingredient when it comes to cooking. The only time consuming part is the peeling and chopping of ginger and garlic.

    However it can be made when ahead of time and stored for longer use. I usually prepare my ginger garlic paste on Sunday so that I can use it for the week’s cooking. Now let’s see how to prepare ginger garlic paste.

    Ginger Garlic paste

    How to make Ginger Garlic Paste

    1.    Peel the skin of the Garlic pods. Wash the ginger well to remove any mud or dirt particles and then peel the skin of ginger and chop them into small pieces. Wipe of moisture content if any.

    Step 1 - Peel ginger and garlic and keep them ready

     2.    In a blender add in the ginger and garlic to this add in the salt and Oil.

    Step 2 - grind the ginger and garlic with some salt.

     3.    Blend well to a fine paste. Store in a container and refrigerate for use.

    Step  4 - Grind well with oil

    Ginger Garlic paste is now ready to be used in gravies and curries.

    How to make Ginger Garlic paste | Homemade Ginger Garlic paste

    Tips & Variations

    • We can store them for up to a month if used clean.
    • No need to add water while blending as it reduces the shelf life.
    • You can also add ¼ tsp of turmeric powder while grinding.
    • If you are going to use it the same day you can use water while grinding the ginger garlic paste else we can use oil.

    Similar Recipes

    • How to make Urad Dal Flour
      How to make Urad Dal Flour in Home
    • Idli Dosa Batter
      How to make Idli-Dosa Batter
    • Pepper Powder
      Pepper Powder | Homemade Pepper Powder
    • Homemade Butter
      How to make Butter in home

    ★ Did you enjoy this recipe? If you happen to try it out, I would love to hear from you! I’d appreciate it if you could rate and leave a review below in the comments. Your reviews help others know the recipe better too. Thanks so much. You can also follow me on Facebook, Pinterest, Instagram, Youtube, and Twitter for more updates

    📖 Recipe

    How to make Ginger Garlic paste
    Print Recipe Pin Recipe
    No ratings yet

    How to make Ginger Garlic paste

     Ginger garlic paste is an important ingredient when it comes to cooking. It can be made when ahead of time and stored for a longer use
    Prep Time30 minutes mins
    Cook Time0 minutes mins
    Total Time30 minutes mins
    Course: Cooking Basics
    Cuisine: Indian
    Servings: 2 cup
    Calories: 18kcal
    Author: Sharmila Kingsly
    Prevent your screen from going dark

    Standard 1 cup measures 240 ml

    Equipment

    • Blender
    • Blender

    Ingredients

    • 1 cup Ginger
    • 1 cup Garlic
    • 1 tsp Salt
    • 2 tbsp Oil

    Instructions 

    • Peel the skin of the Garlic pods. Wash the ginger well to remove any mud or dirt particles and then peel the skin of ginger and chop them into small pieces. Wipe of moisture content if any.
    • In a blender add in the ginger and garlic to this add in the salt and Oil.
    • Blend well to a fine paste. Store in a container and refrigerate for use.

    Notes

    We can store them for up to a month if used clean.
    No need to add water while blending as it reduces the shelf life.
    You can also add ¼ tsp of turmeric powder while grinding.
    If you are going to use it the same day you can use water while grinding the ginger garlic paste else we can use oil.

    Nutrition

    Serving: 1tbsp | Calories: 18kcal | Carbohydrates: 3.3g | Protein: 0.5g | Fat: 0.5g | Saturated Fat: 0.1g | Sodium: 521mg | Potassium: 54mg | Fiber: 0.4g | Sugar: 0.1g | Calcium: 12mg
    Tried this recipe?Mention @happietrio or tag #happietrio
    Subscribe to my Channelclick for more videos

    Disclaimer: I am not a nutritionist, the nutrition value provided here is an estimate. It will vary based on the quantity and brands of the products used.

    Kerala Vegetable Stew

    August 7, 2018 By Sharmila Kingsly Leave a Comment

    Vegetable Stew
    Vegetable Stew Recipe | How to make Kerala Style Vegetable Stew | Veg Stew for Appam

    Vegetable Stew Recipe | How to make Kerala Style Vegetable Stew | Veg Stew for Appam with Step by step photos. Stew is a coconut based gravy usually served along with appam, Idiappam in Kerala. It is so rich and creamy and makes a best pair with Appam. Vegetables like Carrot, Potato, Green peas, Beans, Cauliflower is cooked in a cashew and poppy seeds masala with the goodness of coconut milk. It can be made even with Chicken or Mutton. Now let’s see how to prepare Kerala style Vegetable Stew.

    Vegetable Stew Recipe | How to make Kerala Style Vegetable Stew | Veg Stew for Appam
        Step by step Method with pictures: 
       1.    Soak the green peas overnight .Cube the Potatoes and Carrot and keep ready. In a pressure cooker add the soaked green peas with little salt and water and the cubed carrot and potato. Pressure cook for 2 whistles and then wait till the pressure gets released by itself and then open. Drain excess water and set aside.

    2.    In a blender add in the cashew nuts, Poppy seeds, Roasted Gram Dal, Green Chilli, Cardamom pods, Clove and Cinnamon add little water and blend well to for a fine puree. Heat a pan with coconut oil, once it becomes hot add in Fennel seeds let it splutter and then add curry leaves. Next add chopped onions and the required salt and cook till glossy.

    3.    Add Crushed Ginger pieces and cook till the raw smell leaves. Now add the ground cashew puree and mix well, Cook in a low flame for 2 mins.

    4.    Next add in the cooked Vegetables and the thin coconut Flame and cook in a low flame for 5 more mins. Now the stew would have become slightly thick. Check for salt add in the thick coconut milk and switch off the flame.

    I served my vegetable stew with Appam. Both are a match made in heaven.
    Vegetable Stew Recipe | How to make Kerala Style Vegetable Stew | Veg Stew for Appam

    📖 Recipe

    Vegetable Stew
    Print Recipe Pin Recipe
    5 from 1 vote

    Vegetable Stew | Kerala Veg Stew

    Vegetable Stew is a coconut based gravy usually served along with appam or idiyappam in Kerala. It is so rich and creamy and makes a best pair with appam.
    Prep Time20 minutes mins
    Cook Time10 minutes mins
    Total Time30 minutes mins
    Course: Breakfast
    Cuisine: Kerala
    Servings: 4
    Calories: 154kcal
    Author: Sharmila Kingsly
    Prevent your screen from going dark

    Standard 1 cup measures 240 ml

    Ingredients

    • ½ cup Green Peas
    • ¼ cup Potato chopped
    • ¼ cup Carrot – ¼ cup chopped
    • Salt as needed
    • 1 Onion
    • 1 tbsp Coconut Oil
    • 1 tsp Fennel seeds
    • 1 sprig Curry Leaves
    • 1 tbsp Ginger crushed
    • ½ cup Thick Coconut Milk
    • 1 cup Thin Coconut Milk

    To Grind:

    • ¼ cup Cashew nuts
    • 1 tbsp Poppy Seeds
    • 2 tbsp Roasted Gram Dal
    • 2 Green chilli
    • 2 Cardamom pods
    • 1 Clove
    • 1 inch Cinnamon stick

    Instructions 

    • Soak the green peas overnight .Cube the Potatoes and Carrot and keep ready. In a pressure cooker add the soaked green peas with little salt and water and the cubed carrot and potato. Pressure cook for 2 whistles and then wait till the pressure gets released by itself and then open. Drain excess water and set aside.
    • In a blender add in the cashew nuts, Poppy seeds, Roasted Gram Dal, Green Chilli, Cardamom pods, Clove and Cinnamon add little water and blend well to for a fine puree. Heat a pan with coconut oil, once it becomes hot add in Fennel seeds let it splutter and then add curry leaves. Next add chopped onions and the required salt and cook till glossy.
    • Add Crushed Ginger pieces and cook till the raw smell leaves. Now add the ground cashew puree and mix well, Cook in a low flame for 2 mins.
    • Next add in the cooked Vegetables and the thin coconut Flame and cook in a low flame for 5 more mins. Now the stew would have become slightly thick. Check for salt add in the thick coconut milk and switch off the flame.

    Video

    Notes

    •  If you feel the stew is watery add 1 tsp pf rice flour or corn flour in water make a paste and add in the stew. But I dint add as it was thick and creamy for me.
    •  Make sure you don’t substitute coconut oil with any other cooking oil for best taste.
    •  You can also add cauliflower and beans long with the vegetables added.
    •  Don’t overcook as the stew might curdle.

    Nutrition

    Calories: 154kcal | Carbohydrates: 9g | Protein: 2.4g | Fat: 13g | Saturated Fat: 9.6g | Sodium: 12mg | Potassium: 233mg | Fiber: 2.7g | Sugar: 3.2g | Calcium: 48mg | Iron: 1mg
    Tried this recipe?Mention @happietrio or tag #happietrio
    Subscribe to my Channelclick for more videos

    Tender Coconut Kheer | Elaneer Payasam

    August 3, 2018 By Sharmila Kingsly Leave a Comment

    Tender Coconut Kheer

    Tender coconut kheer is a creamy no-cook instant kheer made with tender coconut pulp, condensed milk, and tender coconut water.

    Tender Coconut Kheer Recipe | Elaneer Payasam

    Tender Coconut Kheer or Elaneer payasam is an easy no cook kheer. It can be made in just a few mins. No hard and fast rule in the ingredients. Just need to whip everything and serve. Make sure you use good tasty tender coconut juice for tasty kheer. Now let’s see how to prepare Elaneer payasam

    [feast_advanced_jump_to]

    Tender Coconut:

    Tender coconut or Elaneer is a summer drink. It is very commonly known as coconut water. There are special variety of coconut that is specially grown for Tender coconut.

    In those coconut trees usually, water will be more and the coconut flesh is tender and soft. Whereas in the coconut that we use for cooking the flesh will be hard and water will be less. We only use a grater or scrapper to remove it.

    How to prepare Tender coconut Kheer

    Tender coconut kheer or Elaneer payasam is a no-cook kheer. Just add all the in minutes you get a tasty and delicious kheer. All you have to do is to blend and serve

    No-cook Kheer

    This is just an easy beginner lever dessert. Anybody can prepare this kheer in minutes. Make sure you have the ingredients ready. You can pressure it easily without any effort.

    Since it is a no-cook dessert it comes for rescue when you have to prepare anything quickly.

    Tender Coconut Kheer Recipe | Elaneer Payasam

    How to Prepare Tender Coconut Kheer, Pictorial

      1.    In a blender add in tender coconut pulp, fresh cream, and ¼ cup of tender coconut water.

    2.    Blend everything to form a fine puree. Transfer them to a serving bowl.

     3.    Add in the remaining tender coconut juice and condensed milk and mix well. Garnish with saffron strands and serve immediately.

    Tasty and yummy kheer.

    Tender Coconut Kheer Recipe | Elaneer Payasam

    How to serve Elaneer Payasam

    I like to serve the kheer child. You can serve chilled or just at room temperature. Garnish with saffron or any mixed nuts and serve.

    How to store Elaneer Payasam

    You can store the elaneer payasam in the fridge for up to 3 days. In case you wanted to freeze. You may freeze the ingredients and then thaw and prepare the kheer as and when needed.

    Other Kheer Recipes:

    • Moong Dhal Kheer
      Moong Dal Kheer | Paruppu Payasam
    • Sheer Khurma
      Eid Special Sheer Khurma
    • Beetroot Kheer
      Beetroot Vermicelli Kheer
    • Apple Kheer
      Apple Kheer Recipe | Apple Payasam

    ★ Did you enjoy this recipe? If you happen to try it out, I would love to hear from you! I’d appreciate it if you could rate and leave a review below in the comments. Your reviews help others know the recipe better too. Thanks for your time ?

    You can also follow me on Facebook, Pinterest, Instagram, Youtube and Twitter for more updates

    📖 Recipe

    Tender Coconut Kheer
    Print Recipe Pin Recipe
    5 from 1 vote

    Tender coconut kheer | Elaneer Payasam

    Tender coconut kheer is a creamy no-cook instant kheer made with tender coconut pulp, condensed milk, and tender coconut water.
    Prep Time10 minutes mins
    Cook Time0 minutes mins
    Total Time10 minutes mins
    Course: Dessert
    Cuisine: Indian
    Servings: 4
    Calories: 122kcal
    Author: Sharmila Kingsly
    Prevent your screen from going dark

    Standard 1 cup measures 240 ml

    Ingredients

    • 2 cups Tender Coconut water
    • ½ cup Tender coconut pulp
    • ¼ cup Condensed Milk
    • ¼ cup Fresh Cream
    • Saffron strands few

    Instructions 

    • In a blender add in tender coconut pulp ,fresh cream and ¼ cup of tender coconut water
    • Blend everything to form a fine puree. Transfer them to a serving bowl.
    • Add in the remaining tender coconut juice and condensed milk and mix well. Garnish with saffron strands and serve immediately.

    Video

    Notes

    •  You can also few more tender coconut pulp without grinding in the kheer.
    •  Fresh cream can also be replaced with boiled and cooled milk.

    Nutrition

    Calories: 122kcal | Carbohydrates: 16.9g | Protein: 1.9g | Fat: 5.2g | Saturated Fat: 3.7g | Cholesterol: 7mg | Sodium: 68mg | Potassium: 177mg | Fiber: 4.2g | Sugar: 12.6g | Calcium: 224mg | Iron: 9mg
    Tried this recipe?Mention @happietrio or tag #happietrio
    Subscribe to my Channelclick for more videos

    Green Peas Cutlet

    August 2, 2018 By Sharmila Kingsly Leave a Comment

    Green Peas Cutlet
    Green Peas Cutlet Recipe | Pachai Patani Cutlet | Matar Cutlet

    Green Peas Cutlet Recipe | Pachai Patani Cutlet | Matar Cutlet with Step by step photos. Cutlet is a yummy appetizer perfect to go with any dish. It can be served with Rice, Roti, and Biriyani or even had as such as a snack. I have made this cutlet using Potato and Green Peas, you can also add any favorite veggies or even paneer and follow the same method to prepare this culet. Now let’s see how to prepare Green Peas Cutlet.

    Green Peas Cutlet Recipe | Pachai Patani Cutlet | Matar Cutlet
    Similar Recipes:
     
    • Gobi PAnerr Tikki
    • Mushroom Cutlet
    • Green Peas Cutlet
    • Fish Cutlet
        Step by step Method with pictures: 
         1.    Cook the Potatoes in a pressure cooker for 3 whistles .Peel the skin and Keep it ready. Soak the Green Peas in water over night and pressure cook for 3 whistles and keep it ready. In a mixing bowl add in the cooked Potato and Green Peas. Mash well and mix together.
    Step 1 - Green Peas Cutlet Recipe | Pachai Patani Cutlet | Matar Cutlet

    2.    To this add in finely chopped Green Chilli, Curry Leaves, Onion, Ginger and the required Salt.

    Step 2 - Green Peas Cutlet Recipe | Pachai Patani Cutlet | Matar Cutlet

    3.    Next add in Rice flour and mix well to form a smooth dough. Shape them to form patties.

    Step 3 - Green Peas Cutlet Recipe | Pachai Patani Cutlet | Matar Cutlet

     4.    Dip each patties in egg and then coat it with bread crumbs and keep it ready.

    Step 4 - Green Peas Cutlet Recipe | Pachai Patani Cutlet | Matar Cutlet
          5.    Heat a pan with oil for shallow frying. Fry on both sides till crisp and golden brown in both the sides. Drain them in paper towels and serve
    Step 5 - Green Peas Cutlet Recipe | Pachai Patani Cutlet | Matar Cutlet
    Perfect evening snack. Can be had as a starter as well.
    Green Peas Cutlet Recipe | Pachai Patani Cutlet | Matar Cutlet

    📖 Recipe

    Green Peas Cutlet
    Print Recipe Pin Recipe
    5 from 1 vote

    Green Peas Cutlet

    Cutlet is a yummy appetizer perfect to go with any dish. It can be served with Rice, Roti, and Biriyani 
    Prep Time20 minutes mins
    Cook Time10 minutes mins
    Total Time30 minutes mins
    Course: Appetizer
    Cuisine: Indian
    Servings: 9
    Calories: 120kcal
    Author: Sharmila Kingsly
    Prevent your screen from going dark

    Standard 1 cup measures 240 ml

    Ingredients

    • 1 cup Green Peas
    • 2 Potato
    • 1 Onion
    • 1 Green Chilli
    • 1 tsp Ginger garlic paste
    • 1 sprig Curry Leaves
    • 3 tbsp Rice Flour
    • Salt as needed
    • 1 Egg
    • 1 cup Bread Crumbs
    • Oil for shallow frying

    Instructions 

    • Cook the Potatoes in a pressure cooker for 3 whistles .Peel the skin and Keep it ready. Soak the Green Peas in water over night and pressure cook for 3 whistles and keep it ready. In a mixing bowl add in the cooked Potato and Green Peas. Mash well and mix together.
    • To this add in finely chopped Green Chilli, Curry Leaves, Onion, Ginger and the required Salt.
    • Next add in Rice flour and mix well to form a smooth dough. Shape them to form patties.
    • Dip each patties in egg and then coat it with bread crumbs and keep it ready.
    • Heat a pan with oil for shallow frying. Fry on both sides till crisp and golden brown in both the sides.
    • Drain them in paper towels and serve

    Notes

    • Instead of Egg wash you can also make a paste with all-purpose flour.
    •  Add the rice flour little by little while combining the dough till you need.
    •  You can shape the cutlets in any desired shapes.
    •  Cutlets can also be deep fried instead of shallow frying.

    Nutrition

    Calories: 120kcal | Carbohydrates: 10.6g | Protein: 3.1g | Fat: 7.4g | Saturated Fat: 1.2g | Cholesterol: 41mg | Sodium: 41mg | Potassium: 160mg | Fiber: 1.5g | Sugar: 1.6g | Calcium: 20mg | Iron: 1mg
    Tried this recipe?Mention @happietrio or tag #happietrio
    Subscribe to my Channelclick for more videos

    Vegetable Fried Rice

    July 31, 2018 By Sharmila Kingsly Leave a Comment

    Veg Fried Rice
    Vegetable Fried Rice Recipe | How to make restaurant style Veg Fried Rice

    Vegetable Fried Rice Recipe | How to make restaurant-style Veg Fried Rice with Step by step photos. Veg Fried Rice is a popular Indo Chinese dish that can be prepared in just a few mins. It pairs well with any Manchurian dish and is simply yummy. I love to carry Fried Rice in my lunch box once in a while. But it tastes best when served hot. Now let’s see how to prepare restaurant style veg fried rice.

    I usually cook rice the previous night if I had to prepare fried rice the next day as a day old rice is preferred to cook fried rice than hot rice. Adding sugar is a secret ingredient in Fried Rice, it helps to maintain the color and crunch of the veggies and gives a nice texture so never mix that. Check out my Egg Fried Rice, Chicken Fried Rice, and Paneer Fried Rice recipes too

    Vegetable Fried Rice Recipe | How to make restaurant style Veg Fried Rice
     
        Step by step Method with pictures: 
         1.    Heat oil to this add in the finely chopped garlic pods and saute well, Next add in the Chopped onions and cook for 2 mins in a high flame. Next, add in the chopped Bell Peppers/Capsicum and mix well. Then add in the chopped Carrot, Beans, and Cabbage. Cook for 5 mins. The veggies should have a crunch and hence no need to cook fully.
    Step 1 - Vegetable Fried Rice Recipe | How to make restaurant style Veg Fried Rice

    2.    Next, add in Sugar and Salt and mix well. Then add in the Soy sauce and Green Chilli Sauce. Mix well so that everything mixes evenly. Finally, add in the pepper powder and give a good mix.

    Step 2 - Vegetable Fried Rice Recipe | How to make restaurant style Veg Fried Rice

    3.    Now add in the cooked Rice and mix well. Toss in high for 2 mins. Finally, garnish with spring onions and switch off the flame.

    Step 3 - Vegetable Fried Rice Recipe | How to make restaurant style Veg Fried Rice
    Serve hot ..
    Vegetable Fried Rice Recipe | How to make restaurant style Veg Fried Rice
    Yummy Vegetable Fried Rice is now ready.
    Vegetable Fried Rice Recipe | How to make restaurant style Veg Fried Rice

    📖 Recipe

    Veg Fried Rice
    Print Recipe Pin Recipe
    No ratings yet

    Vegetable Fried Rice

    Vegetable Fried Rice is a popular indo Chinese dish that can be prepare in a few mins. It goes well with any dry dish like Manchurian.
    Prep Time10 minutes mins
    Cook Time10 minutes mins
    Total Time20 minutes mins
    Course: Main Course
    Cuisine: Indo Chinese
    Servings: 2
    Calories: 243kcal
    Author: Sharmila Kingsly
    Prevent your screen from going dark

    Standard 1 cup measures 240 ml

    Equipment

    • Wok
    • Wok

    Ingredients

    • 1 cup Basmati Rice Cooked
    • 1 Onion
    • 5 clove Garlic
    • ½ cup Capsicum chopped
    • 3 tbsp Carrot
    • 3 tbsp Beans
    • 3 tbsp Cabbage
    • 1 tsp Sugar
    • Salt as needed
    • ½ tsp Soy Sauce
    • 1 tsp Green Chilli sauce
    • 1 tsp Pepper powder
    • Spring onion as needed

    Instructions 

    • Heat oil to this add in the finely chopped garlic pods and saute well, Next add in the Chopped onions and cook for 2 mins in a high flame. Next, add in the chopped Bell Peppers/Capsicum and mix well. Then add in the chopped Carrot, Beans, and Cabbage. Cook for 5 mins. The veggies should have a crunch and hence no need to cook fully.
    • Next, add in Sugar and Salt and mix well. Then add in the Soy sauce and Green Chilli Sauce. Mix well so that everything mixes evenly. Finally, add in the pepper powder and give a good mix.
    • Now add in the cooked Rice and mix well. Toss in high for 2 mins. Finally, garnish with spring onions and switch off the flame.

    Notes

    · Next miss to add Sugar as it helps to maintain the crunch and freshness of the veggies.
    · Always cook in a high flame while cooking fried rice.
    · Check here for how to cook rice perfectly for fried rice.

    Nutrition

    Calories: 243kcal | Carbohydrates: 45.2g | Protein: 6.9g | Fat: 6.2g | Saturated Fat: 0.7g | Sodium: 870mg | Potassium: 370mg | Fiber: 5.5g | Sugar: 6.3g | Calcium: 66mg | Iron: 2mg
    Tried this recipe?Mention @happietrio or tag #happietrio
    Subscribe to my Channelclick for more videos

    Muslim Wedding style Bread Halwa| Bread Halwa without Milk

    July 31, 2018 By Sharmila Kingsly 2 Comments

    Muslim Wedding style Bread Halwa

    Muslim Wedding style Bread Halwa is a perfect dessert for any occasion. Bread halwa is an easy and quick dessert perfect for parties.

    Muslim Wedding style Bread Halwa Recipe | Bread Halwa without Milk

    Muslim Wedding style Bread Halwa Recipe | Bread Halwa without Milk with Step by step photos. Bread halwa is an easy and quick dessert that can be made with just few ingredients.

    I have tasted bread halwa in my friend’s wedding. It is quite tasty than the Bread halwa compared to the one which is prepared with Milk and I wanted to give this authentic Muslim Wedding version and here is it.

    Similar Halwa Recipes that i have posted earlier:

    Sweet Potato Halwa

    Badam Halwa

    [feast_advanced_jump_to]

    Bread Halwa:

    Bread Halwa is a delicious dessert prepared with bread pieces toasted in ghee and then cooked in sugar. Finally tossed with ghee fried nuts and raisins.

    Muslim Wedding style Bread Halwa Recipe | Bread Halwa without Milk

    Bread Halwa, FAQ

    Do we need Milk to prepare Bread Halwa

    There are many ways to prepare Bread halwa. So we can prepare it with or without Milk. I have both versions in the milk. This particular recipe is the recipe without Milk.

    What is the Perfect trick to achieve the color in bread halwa

    The perfect bread halwa will have a golden color. We may achieve this by frying the bread slices in ghee until golden color. Another quick trick is to use wheat bread. Wheat bread already has a slight golden color and hence it's easy to get it right.

    How to prepare Bread Halwa, Pictorial

    1.    Trim the edges of bread slices and keep it ready. In a pan add in a tsp of ghee and roast the cashew nuts and till golden and then set aside. In the same pan roast the bread slices till they turn crisp and golden in ghee.

    2.    Set aside once all the slices are roasted. Tear them roughly into small slices and set them aside.

    3.    In the pan add in Sugar and Water cook till it becomes thick and starts bubbling. No one string consistency is required.

    4.    Next add in the ghee roasted bread. With a ladle mash it well. So that it gets the halwa consistency and becomes a thick mass.

    5.    Now start adding the ghee little by little till the ghee starts to ooze out. By this time the halwa becomes glossy and comes together. 

    6.    Add the ghee roasted cashew nuts and mix well. Switch off the flame and serve hot.

    Yummy and tasty bread halwa.

    Muslim Wedding style Bread Halwa Recipe | Bread Halwa without Milk

    Serving Suggestions:

    No introduction needed on this bread halwa. It is usually served in a Muslim wedding as a dessert. A big fat biryani meal is happy to finish with a bread halwa. Biryani and bread halwa are the perfect combination.

    Similar Recipes

    • Badam Halwa
      Badam Halwa Recipe | Almond Halwa
    • Asoka Halwa
      Asoka Halwa | Moong Dal Halwa
    • Muslim Wedding style Bread Halwa
      Muslim Wedding style Bread Halwa| Bread Halwa without Milk
    • Chakka Varatti
      Chakka Varatti Recipe | Jackfruit Halwa | Jackfruit Preserve | Chakka Varattiyathu

    ★ Did you enjoy this recipe? If you happen to try it out, I would love to hear from you! I’d appreciate it if you could rate and leave a review below in the comments. Your reviews help others know the recipe better too. Thanks for your time ? 

    You can also follow me on Facebook, Pinterest, Instagram, Youtube and Twitter for more updates from me.

    📖 Recipe

    Muslim Wedding style Bread Halwa
    Print Recipe Pin Recipe
    5 from 3 votes

    Muslim Wedding style Bread Halwa

    Muslim Wedding style Bread Halwa is a perfect dessert for any ocassion. Bread halwa is an easy and quick dessert perfect for parties .
    Prep Time10 minutes mins
    Cook Time10 minutes mins
    Total Time20 minutes mins
    Course: Dessert
    Cuisine: Indian
    Servings: 4
    Calories: 212kcal
    Author: Sharmila Kingsly
    Prevent your screen from going dark

    Standard 1 cup measures 240 ml

    Ingredients

    • 4 slice Bread Slices
    • ¼ cup Sugar
    • ½ cup Water
    • 3 tbsp Ghee
    • 8 Cashew nuts

    Instructions 

    • Trim the edges of bread slices and keep it ready. In a pan add in a tsp of ghee and roast the cashew nuts and till golden and then set aside. In the same pan roast the bread slices till they turn crisp and golden in ghee.
    • Set aside once all the slices are roasted. Tear them roughly into small slices and set them aside.
    • In the pan add in Sugar and Water cook till it becomes thick and start bubbling. No one string consistency is required.
    • Next add in the ghee roasted bread .With a ladle mash it well. So that it gets the halwa consistency and becomes a thick mass.
    • Now start adding the ghee little by little till the ghee starts to ooze out .By this time the halwa becomes glossy and comes together. Add the ghee roasted cashew nuts and mix well. Switch off the flame and serve hot.

    Notes

    · I used brown bread, you can use white bread also.
    · You can also use Almonds along with cashew nuts for the garnish.
    · If can definitely add more or less ghee as per your preference.

    Nutrition

    Calories: 212kcal | Carbohydrates: 24.8g | Protein: 4g | Fat: 11.5g | Saturated Fat: 6.4g | Cholesterol: 25mg | Sodium: 134mg | Potassium: 82mg | Fiber: 21g | Sugar: 14.2g | Calcium: 32mg | Iron: 1mg
    Tried this recipe?Mention @happietrio or tag #happietrio
    Subscribe to my Channelclick for more videos

    Nungu Payasam| Palm Fruit Kheer | Ice Apple Kheer | Nungu Paal Payasam

    July 27, 2018 By Sharmila Kingsly Leave a Comment

    Nungu Payasam

    Nungu Payasam is prepared by simmering the milk to get reduced milk and then flavoured with Cardamom and finally Nungu is added and chilled.

    Nungu Payasam

    Nungu Payasam | Palm Fruit Kheer | Ice Apple Kheer | Nungu Paal Payasam with Step by step photos. Palm Fruit is a seasonal summer fruit with so many health benefits. It is available in plenty in the road side shop vendors in my native during the summer. Nungu Payasam is prepared by simmering the milk to get reduced milk and then flavoured with Cardamom and finally Nungu is added and chilled.

    Cardamom flavored reduced milk along with chilled ice apple is a heavenly treat and a yummy delight during the summer.Few other common Ice Apple Recipes are Nungu Sarbath, Nungu Paal. Now let’s see how to prepare Ice Apple Kheer.

    [feast_advanced_jump_to]

    What is Nungu or Ice Apple

    Nungu or IceApple or Toddy Palm is a summer Fruit. Iceapple is from the Palmyra Plant. It is native to the Indian or Southeast Asian continent. It is known as Ice Apple in English. ThatiChettu, or Taati Munjalu in Telugu. Tadgola or taalegari in Kannada. Pananungu or Karimpana in malayalam. Taal, taad, trinaraaj in Hindi.

    It has a sweeter taste and it is usually found in the summer season. and is very popular street food in India.

    This is how Ice Apple Looks:

    Health benefits of Ice Apple or Palm Fruit.

    Palm fruit is usually used to cool the body. It keeps the body hydrated during the summer. It is also good for digestive and stomach issues.

    By-Products of Nungu or Ice Apple:

    Jaggery a natural sweetener is from the Ice apple. Toddy a type of sweet alcohol is also from the Palm Fruit.

    Iceapple Kheer

    How to Prepare Nungu Payasam, pictorial:

       1.    Peel the Skin of the Palm Fruit and then chop them into small pieces and set  aside.

    Step 1 - Nungu Payasam | Palm Fruit Kheer | Ice Apple Kheer | Nungu Paal Payasam

    2.    Heat Milk in a saucepan, once it comes to a boil simmer the flame and continue to cook till it is reduced to half .To the reduced milk add Condensed Milk.

    Step 2 - Nungu Payasam | Palm Fruit Kheer | Ice Apple Kheer | Nungu Paal Payasam

     3.    Next add in Cardamom powder. Boil for another 5 mins in a low flame and switch off. Allow it to cool down completely.

    Step 3 - Nungu Payasam | Palm Fruit Kheer | Ice Apple Kheer | Nungu Paal Payasam

    4.    Once it’s fully cooled down add in the chopped Ice Apple Pieces .Garnish with Saffron strands. Keep it in refrigerator till you serve.

    Step 4 - Nungu Payasam | Palm Fruit Kheer | Ice Apple Kheer | Nungu Paal Payasam

    More Ice Apple Recipes:

    • Elaneer Nungu Juice | Ice Apple Tender Coconut Juice
      Ice Apple Tender Coconut Juice
    • Ice Apple Rose Milk | Nungu Rose Milk Recipe | Palm Fruit Rose Milk
      Ice Apple Rose Milk ( Nungu Rose Milk )
    • Nungu Badam Milk
      Ice Apple Badam Milk | Nungu Badam Paal

    More Kheer Recipes:

    • Instant Pot Kheer
      Instant pot Kheer | Vermicelli Kheer
    • Badam Kheer
      Badam Kheer | Almond Payasam | Badam Payasam
    • Pazham Pradhaman
      Banana Kheer | Pazham Payasam | Pazham Pradhaman
    • Millet Rose Kheer
      Little Millet Rose Kheer

    ★ Did you enjoy this recipe? If you happen to try it out, I would love to hear from you! I’d appreciate it if you could rate and leave a review below in the comments. Your reviews help others know the recipe better too. Thanks for your time ? 

    You can also follow me on Facebook, Pinterest, Instagram, Youtube and Twitter for more updates

    📖 Recipe

    Nungu Payasam
    Print Recipe Pin Recipe
    5 from 2 votes

    Nungu Payasam

    Nungu Payasam is prepared by simmering the milk to get reduced milk and then flavoured with Cardamom and finally Nungu is added and chilled.
    Prep Time15 minutes mins
    Cook Time15 minutes mins
    Total Time30 minutes mins
    Course: Dessert
    Cuisine: Indian
    Servings: 4
    Calories: 198kcal
    Author: Sharmila Kingsly
    Prevent your screen from going dark

    Standard 1 cup measures 240 ml

    Ingredients

    • 5 Palm fruit / Ice Apple / Nungu
    • 1 lit Milk
    • ⅓ cup Condensed Milk
    • ½ tsp Cardamom powder
    • Saffron few strands

    Instructions 

    • Peel the Skin of the Palm Fruit and then chop them into small pieces and set aside.
    • Heat Milk in a sauce pan, once it comes to a boil simmer the flame and continue to cook till it is reduced to half .To the reduced milk add in Condensed Milk.
    • Next add in Cardamom powder. Boil for another 5 mins in a low flame and switch off .Allow it to cool down completely.
    • Once it’s fully cooled down add in the chopped Ice Apple Pieces .Garnish with Saffron strands. Keep it in refrigerator till you serve.

    Notes

    • Ice Apple Kheer tastes best when served chilled.
    •  You can also garnish with ghee toasted nuts and dry fruits.

    Nutrition

    Calories: 198kcal | Carbohydrates: 18.7g | Protein: 5.6g | Fat: 4.3g | Saturated Fat: 1.4g | Cholesterol: 10mg | Sodium: 65mg | Potassium: 192mg | Fiber: 0.1g | Sugar: 16.9g | Calcium: 148mg
    Tried this recipe?Mention @happietrio or tag #happietrio
    Subscribe to my Channelclick for more videos

    Thengai Thogayal | Coconut Thuvayal

    July 25, 2018 By Sharmila Kingsly Leave a Comment

    Thengai Thogayal

    Thenga thogayal is a type of thick dry chutney usually made of coconut, dry red chili, and a few other ingredients. It is an excellent side dish to go with any porridge.

    Follow us on Pinterest for delicious pins. Join our Facebook group for more Instant Pot and Air Fryer recipes.

    Thengai Thogayal

    Thengai Thogayal | Coconut Thuvayal | How to make Coconut Thogayal with Step by step photos. Thogayal is a classic and perfect side dish to pair with Porridge. It is a comfort food.

    So many variations are there in the thogayal we can also dry roast and add the dals too. But my mom prepares this way and I learned this recipe from her. Showing the Dry red chili in open flames gives a nice smoky flavor to the thogayal. It is easy and comes in handy if we are running out of time. Now let’s see how to prepare thengai thogayal at home.

    [feast_advanced_jump_to]

    What is Thogayal

    Thogayal is a traditional dish very popular in south India. It is a type of dry chutney made with coconut, tamarind, and spices It is called by different names across states. It goes as a side dish for rice, idli, or dosa too. You can also serve them with porridge.

    Ingredients

    Coconut - Use freshly grated coconut for a perfect thogayal. If you don't have access to fresh coconut you may also use frozen coconut, you can thaw and use them dry.

    Red chili - Adjust the no of chili as per your spice levels. I usually fire roast them and use them for the thogayal. It gives an amazing smokey flavor.

    Garlic and Tamarind - Gives a perfect taste so do not skip them.

    Cumin seeds - Gives the thogayal a nutty taste.

    FAQ's

    What is the difference between chutney and thogayal?

    The difference between chutney and thogayl is the difference in the addition of a few ingredients. We usually grind the thogayal dry and think. Chutney is watery, unlike thogayal. Also, we add tempering to the chutney but don't add for a thogayal. Chutney has a smooth texture and thogayal is usually ground to a coarse texture.

    How to make Thenga Thogayal

        1.    In a blender add in the grated coconut. Show the dry red chilli in open flame till it changes colour, say 5-10 secs.
    How to make Coconut Thogayal

      2.    Next add the Cumin seeds, Dry Red Chilli, Required Salt, Garlic pods and Tamarind.

    Step 2 - How to make Coconut Thogayal

    3.    Blend it to a coarse paste by adding a very little water and the thengai thogayal is ready.

    Step 3 - Thengai Thogayal | Coconut Thuvayal | How to make Coconut Thogayal
    I served thengai thogayal with Green Gram Porridge (Pachai Payaru Kanji) will share the recipe soon.
     
    Thenga Thogayal
    thenga thogayal

    Top Tips

    • Goes very well with Porridge. You can also mix and have them with rice and hot ghee. We call this Thogayal Sadam in Tamil.
    • Also goes well with idli or dosa.
    • Tastes best when served fresh. We usually do not refrigerate the ground thuvaiyal.
    • In some regions they add urad dal also to the thogayal. If adding you may dry roast them in oil and add them to the thogayal.

    Similar Recipes

    • Kollu Thogayal Recipe | Horsegram Chutney
      Kollu Thogayal | Horsegram Chutney
    • Ginger Thogayal
      Ginger Thogayal| Inji Thogayal | Ginger Chutney
    • Kothamalli Thogayal
      kothamalli thogayal | Coriander Leaves Thogayal

    ★ Did you enjoy this recipe? If you happen to try it out, I would love to hear from you! I’d appreciate it if you could rate and leave a review below in the comments. Your reviews help others know the recipe better too. Thanks for your time. You can also follow me on Facebook, Pinterest, Instagram, Youtube and Twitter for more updates

    📖 Recipe

    Thengai Thogayal
    Print Recipe Pin Recipe
    No ratings yet

    Thengai Thogayal

    Thenga thogayal is a type of thick dry chutney usually made of coconut, dry red chili, and a few other ingredients. It is an excellent side dish to go with any porridge.
    Prep Time10 minutes mins
    Cook Time1 minute min
    Total Time11 minutes mins
    Course: Side Dish
    Cuisine: Indian
    Servings: 3
    Calories: 56kcal
    Author: Sharmila Kingsly
    Prevent your screen from going dark

    Standard 1 cup measures 240 ml

    Equipment

    • Blender
    • Blender

    Ingredients

    • ½ cup Grated Coconut
    • 3 Dry Red Chilli adjust the no of chilli as per your preference
    • Salt as needed
    • 2 clove Garlic pods
    • Tamarind a small piece
    • ½ tsp Cumin seeds

    Instructions 

    • In a blender add in the grated coconut. Show the dry red chilli in open flame till it changes colour, say 5-10 secs.
    • Next add the Cumin seeds, Dry Red Chilli, Required Salt, Garlic pods and Tamarind.
    • Blend it to a coarse paste by adding a very little water and the thengai thogayal is ready.

    Notes

    • Goes very well with Porridge. You can also mix and have them with rice and hot ghee. We call this Thogayal Sadam in Tamil.
    • Also goes well with idli or dosa.

    Nutrition

    Calories: 56kcal | Carbohydrates: 3.9g | Protein: 0.8g | Fat: 4.6g | Saturated Fat: 4g | Sodium: 3mg | Potassium: 90mg | Fiber: 1.4g | Sugar: 1.6g | Calcium: 9mg | Iron: 2mg
    Tried this recipe?Mention @happietrio or tag #happietrio
    Subscribe to my Channelclick for more videos

    Disclaimer: I am not a nutritionist, the nutrition value provided here is an estimate. It will vary based on the quantity and brands of the products used.

    Jackfruit Kheer with Jaggery (Chakka Pradhaman)

    July 24, 2018 By Sharmila Kingsly Leave a Comment

    Chakka payasam

    Chakka payasam also known as Chakka pradhaman is a traditional Kerala style kheer made with jackfruit, and coconut milk and sweetened with jaggery.

    Follow us on Pinterest for delicious pins. Join our Facebook group for more Instant Pot and Air Fryer recipes.

    Chakka payasam

    This traditional beauty in a banana leaf after a heavy meal is like heaven. If you have tasted you will definitely nod with me.

    Almost in all the Onam or Vishu lunches, we can see this payasam. Make the best out of the jackfruit now when they are in season.

    [feast_advanced_jump_to]

    What is Pradhaman

    Pradhaman is a traditional Kerala dessert. It is a payasam or Kheer Prepared with jaggery and coconut milk along with any main ingredient. We can prepare Pradhaman with a variety of ingredients.

    There will be at least one pradhaman in the Onam Sadhya. It is one mandatory food during the sadhya. Ada Pradhaman, paruppu pradhaman are the most popular ones.

    Prep Work

    • If extracting coconut milk in home. prepare it first
    • Also, prepare the Jaggery syrup.
    • If you have cardamom and dry ginger powder handy use that. Else dry roast them and make them a fine powder.
    Chakka Pradhaman

    How to make Chakka Pradhaman

    1.Remove the seed from the Jackfruit arils. In a pressure cooker add the jackfruit arils after removing the seed add in little water and pressure cook for 2 whistles.

    2. Allow the pressure to release naturally and then open. Wait till it cools down and then add the cooked jackfruit pieces to a blender and blend it into a fine puree and set aside.

    3. Heat Ghee in a pan add cashew nuts and coconut chunks and roast till golden brown and set aside.

    4. In another saucepan add the jaggery pieces and water. Cook in a low flame till the jaggery is completely dissolved. Strain for impurities and continue cooking till it becomes slightly thick. Now add in the ground jackfruit puree and mix well till it is completely dissolved.

    5. Next, add the thin coconut milk and cook for 5 mins in low flame.

    6. Next, add the crushed cardamom or cardamom powder. Combine and cook for 2 mins.

    7. finally add in the thick coconut milk and switch off the flame.

    8. Garnish with ghee-fried cashew nuts and coconut.

    Chakka payasam

    Tips & Variations

    •  Serve as an after meal dessert.
    •  If you feel the kheer is very thin, make a slurry of 1 tsp rice flour and 2 tbsp water and add to thick the kheer.
    •  Prepare it when the jackfruit is in season.
    •  Adjust the sweetness as per your taste.

    Serving Suggestions

    Makes an amazing after meal dessert or a festival dessert.

    Similar Recipes

    • chakka varatti payasam
      Chakka Varatti Payasam | Chakka Varatti Pradhaman
    • Rice Ada Payasam
      Kerala Ada Pradhaman
    • Pazham Pradhaman
      Banana Kheer | Pazham Payasam | Pazham Pradhaman
    • Traditional Kerala palada PRadhaman served in a bowl garnished with cashews.
      Traditional Kerala Style Palada Payasam

    ★ Did you enjoy this recipe? If you happen to try it out, I would love to hear from you! I’d appreciate it if you could rate and leave a review below in the comments. Your reviews help others know the recipe better too. Thanks for your time. You can also follow me on Facebook, Pinterest, Instagram, Youtube and Twitter for more updates

    📖 Recipe

    Chakka payasam
    Print Recipe Pin Recipe
    5 from 1 vote

    Chakka payasam

    Chakka payasam also known as Chakka pradhaman is a kheer made with jackfruit , coconut milk and sweetened with jaggery.
    Prep Time10 minutes mins
    Cook Time15 minutes mins
    Total Time25 minutes mins
    Course: Dessert
    Cuisine: Kerala
    Servings: 6
    Calories: 266kcal
    Author: Sharmila Kingsly
    Prevent your screen from going dark

    Standard 1 cup measures 240 ml

    Ingredients

    • 20 Jackfruit
    • 1.5 cups Jaggery
    • ½ cup Water
    • ¾ cup Thin coconut milk
    • ½ tsp Cardamom powder
    • ½ cup Thick coconut milk
    • 10 Cashew nuts
    • 1 tbsp Coconut chunks
    • 2 tbsp Ghee

    Instructions 

    • Remove the seed from the Jackfruit arils. In a pressure cooker add the jackfruit arils after removing the seed add in little water and pressure cook for 2 whistles.
    • Allow the pressure to release naturally and then open. Wait till it cools down and then add the cooked jackfruit pieces to a blender and blend it into a fine puree and set aside.
    • Heat Ghee in a pan add cashew nuts and coconut chunks and roast till golden brown and set aside.
    • In another saucepan add the jaggery pieces and water. Cook in a low flame till the jaggery is completely dissolved. Strain for impurities and continue cooking till it becomes slightly thick. Now add in the ground jackfruit puree and mix well till it is completely dissolved.
    • Next, add the thin coconut milk and cook for 5 mins.
    • Next, add the crushed cardamom or cardamom powder.
    • And then add in the roasted nuts and mix well and finally add in the thick coconut milk and switch off the flame.

    Notes

    •       Serve as an after meal dessert.
    •  If you feel the kheer is very thin, make a slurry 1 tsp rice flour and 2 tbsp  water and add to thick the kheer.
    •  Prepare it when the jackfruit is in season.
    •  Adjust the sweetness as per your taste.
    •  I used impurities free organic jaggery and hence I dint strain for impurities. It is a must if using normal jaggery.

    Nutrition

    Calories: 266kcal | Carbohydrates: 34.3g | Protein: 1.7g | Fat: 14.7g | Saturated Fat: 11.3g | Cholesterol: 11mg | Sodium: 226mg | Potassium: 1216mg | Fiber: 1.4g | Sugar: 25.3g | Calcium: 22mg | Iron: 1mg
    Tried this recipe?Mention @happietrio or tag #happietrio
    Subscribe to my Channelclick for more videos

    Disclaimer: I am not a nutritionist, the nutrition value provided here is an estimate. It will vary based on the quantity and brands of the products used.

    This post is originally from 2018. It is now updated with new pictures, details, and recipe cards.

    • « Previous Page
    • 1
    • …
    • 44
    • 45
    • 46
    • 47
    • 48
    • …
    • 67
    • Next Page »
    Sharmila Kingsly

    Hi, I'm Joshie!

    Food Blogger, Biryani Lover , Software Engineer .. In no particular order.I love to cook and that is why I am here!! Welcome to my space!!. 

    Read more about me!

    • Instagram
    • Facebook
    • YouTube
    • Pinterest
    • X

    Vegan Recipes

    • Masala Paratha
      Masala Paratha
    • Tomato basil pasta
      Tomato Basil Pasta
    • Chickpea Spinach Curry
      Chickpea Spinach Curry
    • Vegan Chickpea Soup
      Vegan Chickpea Soup
    • Instant Pot Pumpkin Pasta
      Instant Pot Pumpkin Pasta
    • Basil Fried Rice
      Thai Basil Fried Rice

    Popular Posts

    • Nandu Rasam
      Nandu Rasam
    • Indian Dinner Party Menu Ideas, Sample Menus + Recipes
    • Nandu Kulambu
      Nandu Kuzhambu |Crab Curry |Nandu Kulambu
    • Instant Pot Peas Curry
      Instant Pot Peas Curry | Green Peas Curry
    • Payaru Kanji
      Payaru Kanji | Green Gram Porridge
    • Mushroom Egg Bhurji
      Mushroom Egg Burji

    Footer

    ↑ back to top

    As an Amazon Associate I earn from qualifying purchases.

    Copyright ©  2025 COOK WITH SHARMILA

    Rate This Recipe

    Your vote:


    A rating is required
    A name is required
    An email is required