Cook with Sharmila

  • Home
  • About Me
    • Video Recipes
    • Media Mentions
    • Privacy Policy
  • Recipe Index
    • Recipes
  • Nanjilnad Recipes
  • Shop
menu icon
go to homepage
  • Home
  • Recipe Index
  • Air Fryer
  • About Me
  • Subscribe
    • Facebook
    • Instagram
    • Pinterest
    • Twitter
    • YouTube
  • subscribe
    search icon
    Homepage link
    • Home
    • Recipe Index
    • Air Fryer
    • About Me
    • Subscribe
    • Facebook
    • Instagram
    • Pinterest
    • Twitter
    • YouTube
  • ร—
    Home ยป Recipe Index

    Mushroom Egg Burji

    October 4, 2020 By Sharmila Kingsly Leave a Comment

    Mushroom Egg Bhurji

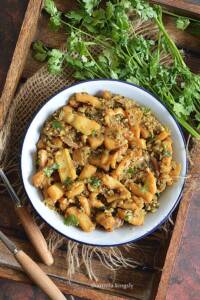
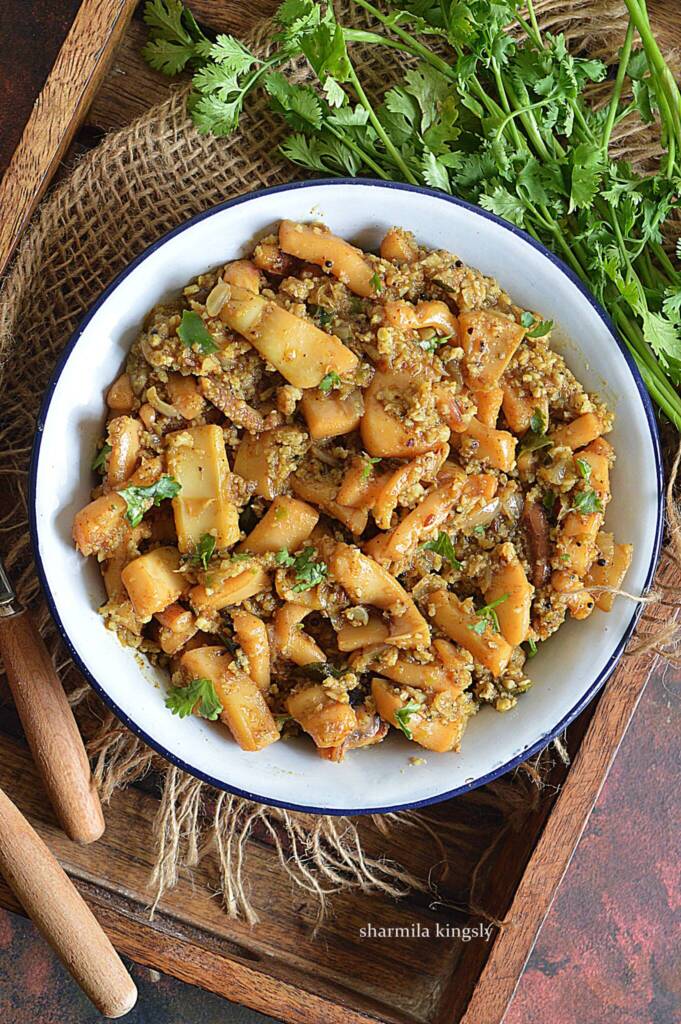
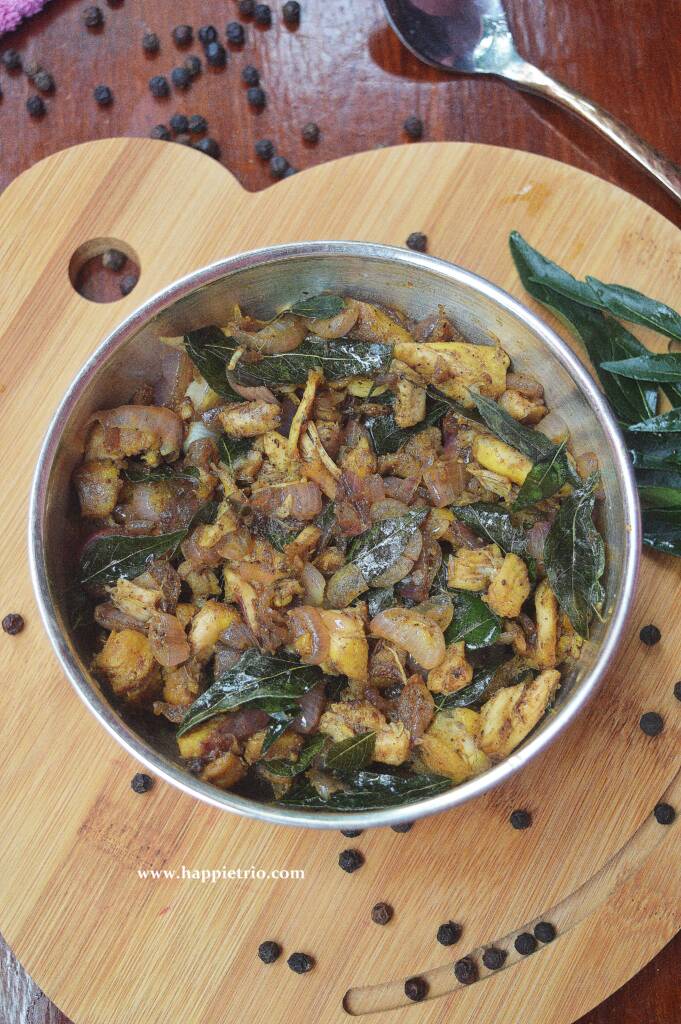
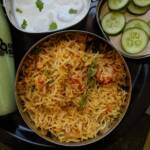
    Mushroom Egg Bhurji is an easy and yummy Indian Style Scrambled Eggs , Mushroom Along with eggs makes a delight. Mushroom Egg stir Fry - Scrambled Eggs and Mushrooms.

    Mushroom Egg Bhurji

    The egg is a savior to most of the ladies. When we are about to whip up a quick side dish we just search for eggs from our refrigerator. So I made this mushroom egg burji one fine day when I had to prepare a quick breakfast and added mushroom to make to tastier.

    Mushroom and Eggs go very well together. Somehow, I feel it tastes blank. Mushroom acquires the taste very well from the ingredients it gets cooked together.

    In this version of Egg Podimas, I have added my favorite masala blend and it elevates the taste levels and I am sure it will be on repeat mode once you try this out.

    How can we use Mushroom Egg Bhurji

    The beauty of this dish is that it goes very well as a lunch side dish, Can be had with Rice, Roti , Pulao or even we can use it as a stuffing for sandwich . I made one more interesting dish with Mushroom Egg bhurji , Will post the recipe tomorrow.

    What is Podimas:

    Podimas literally translates to โ€œMashโ€. Egg Podimas is a very famous food in South India, especially in the roadside shops. It tastes the best in the local parotta stalls than in the big restaurants.

    Prepared with Eggs, Onions, Tomatoes and the spice powders. Finally, egg is added and then scrambled. They use big spoons and tap the pan and that makes the egg to get torn into small pieces, which is why it is called as podimas.

    Variations in Podimas:

    Initially, Podimas was made only with eggs, slowly the fashion changes and potato Podimas is another famous dish and I have posted this recipe in the blog as well.

    Also the vegetables goes very well when cooked with Egg. Few Recipes I have already posted in blog:

    Cauliflower Egg bhurji

    Similar Mushroom Recipes:

    Mushroom Cutlet

    Chettinad Mushrrom Gravy

    How to Prepare Mushroom Egg Bhurji:

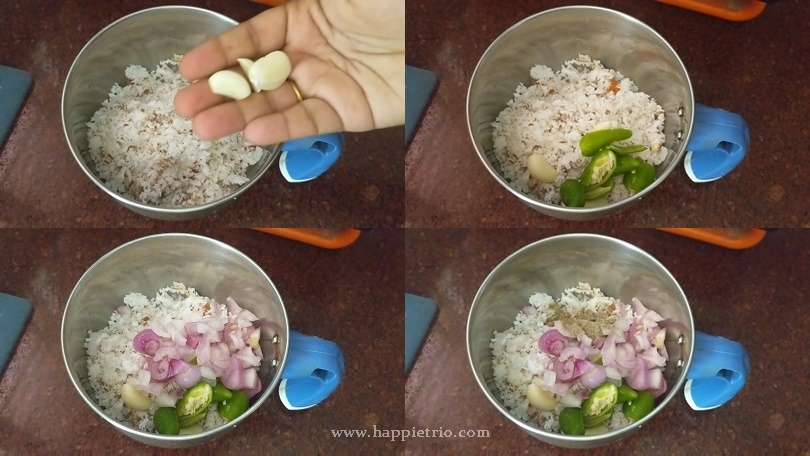
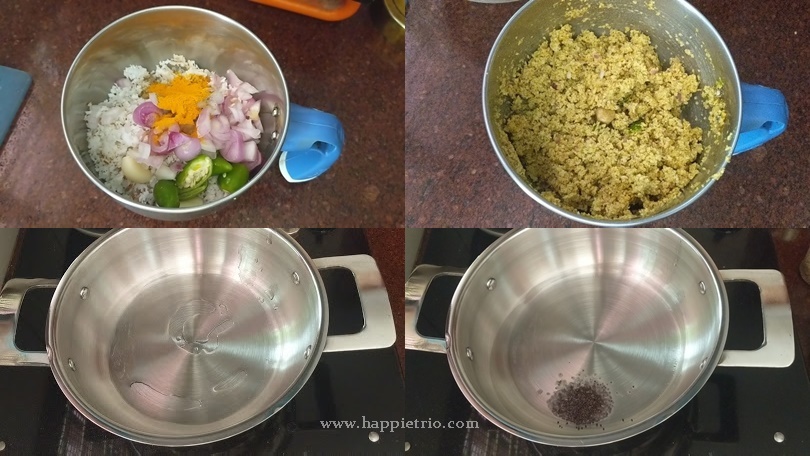
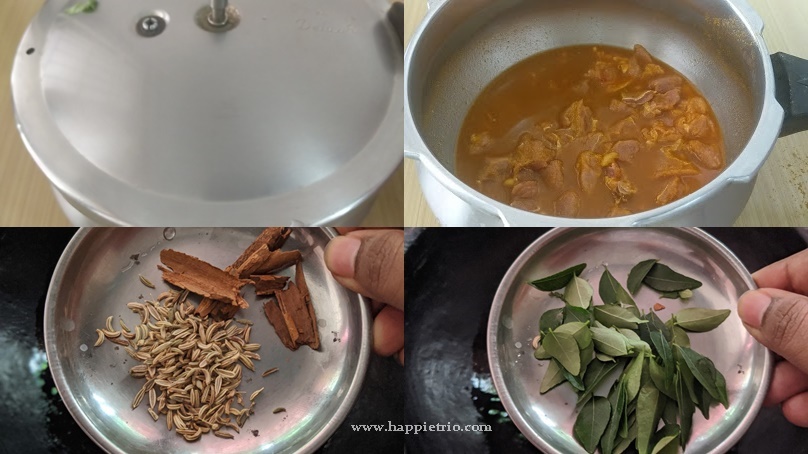
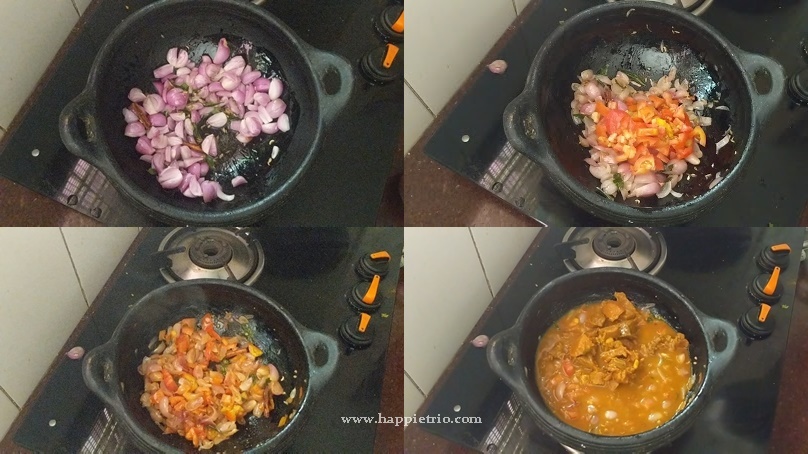
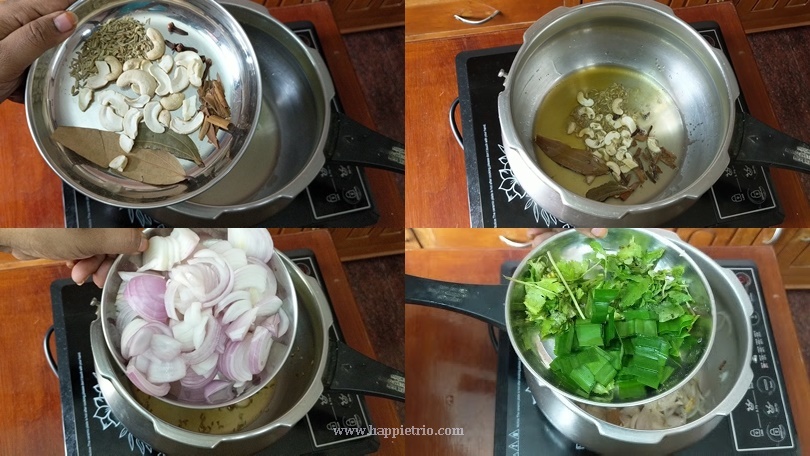
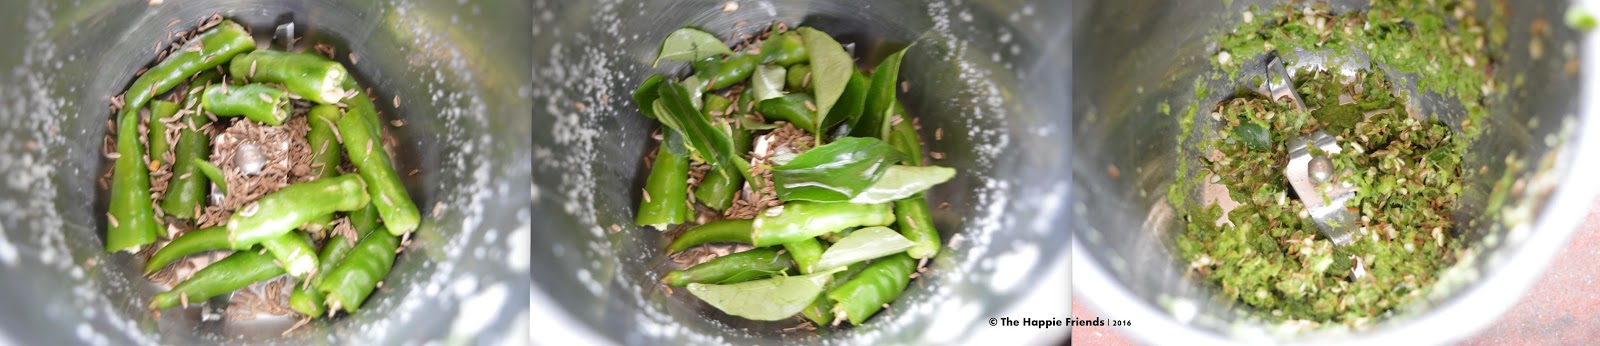
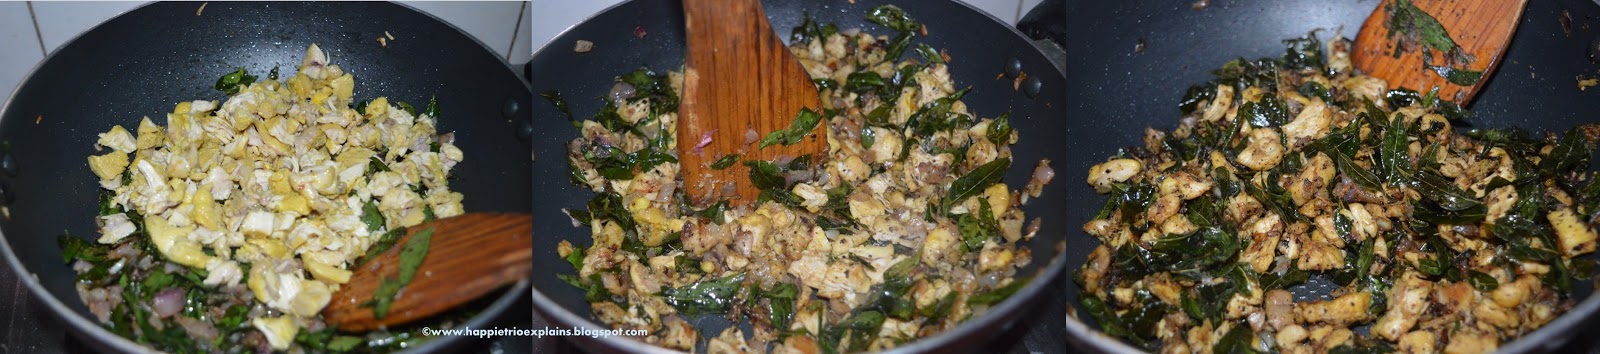
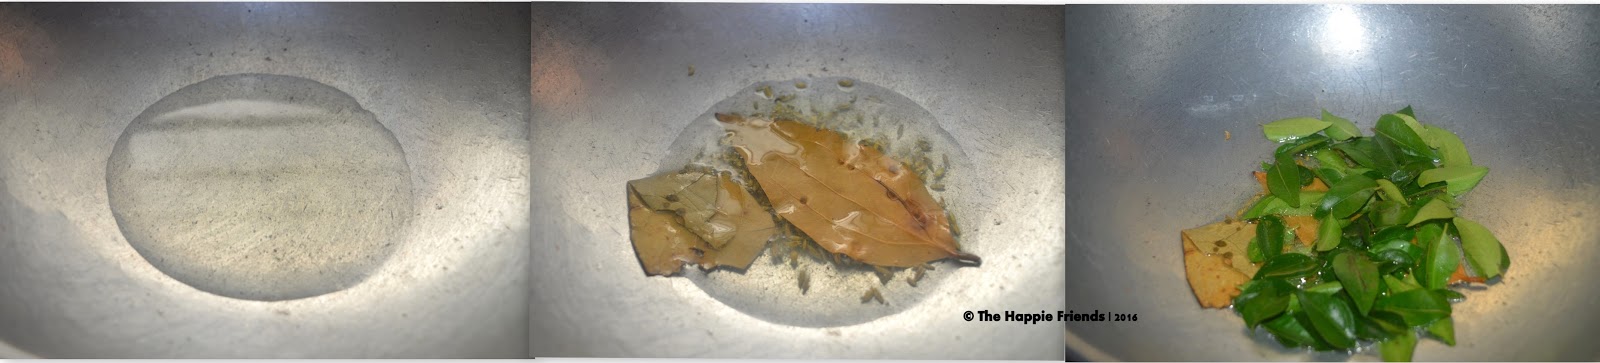
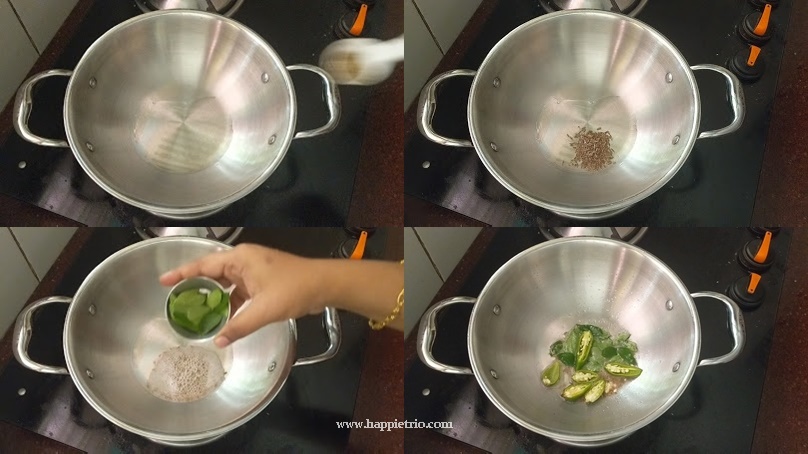
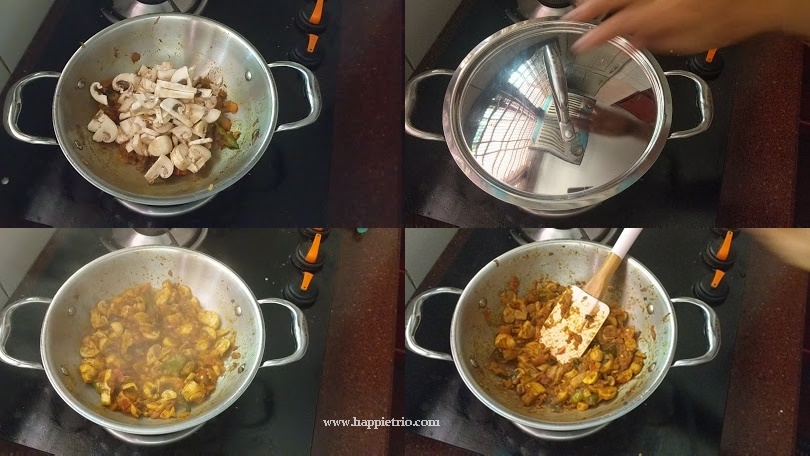
    1.Clean the mushroom and set aside. Now in a kadai/Pan add in oil once the oil heats up add in the cumin seeds and wait till it splutters and then add the curry leaves and slit opened green chilies.

    Step 1: Mushroom Masala Dosa

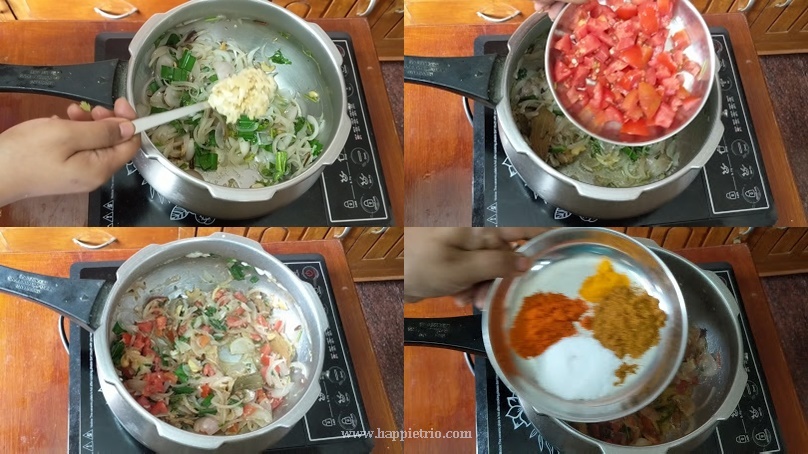
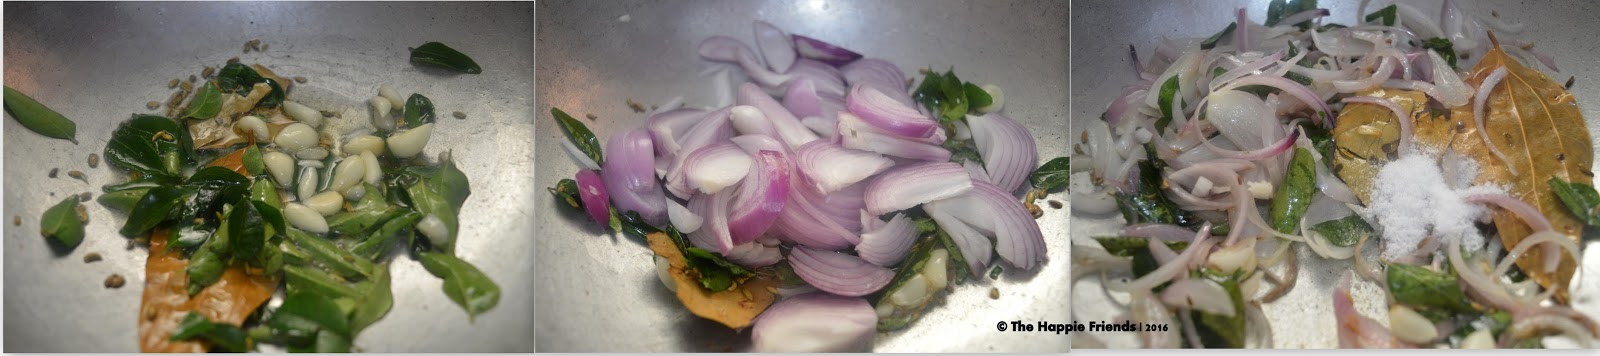
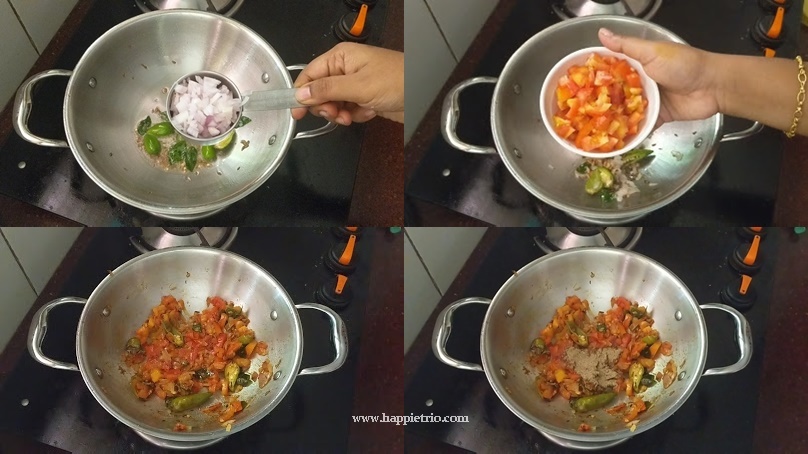
    2.Next, add in the finely chopped onions and fry till they are nicely cooked and then add in the chopped tomatoes.

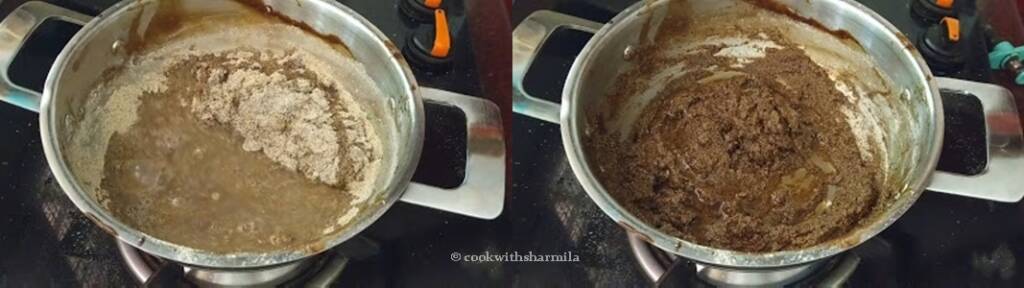
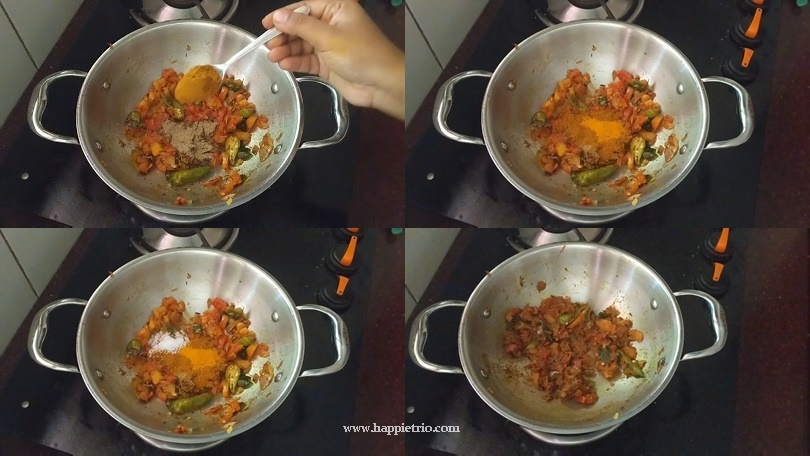
    3.Cook till the tomatoes turn mushy. Then add the Pepper powder

    Step 2 : Saute the masala for the dosa

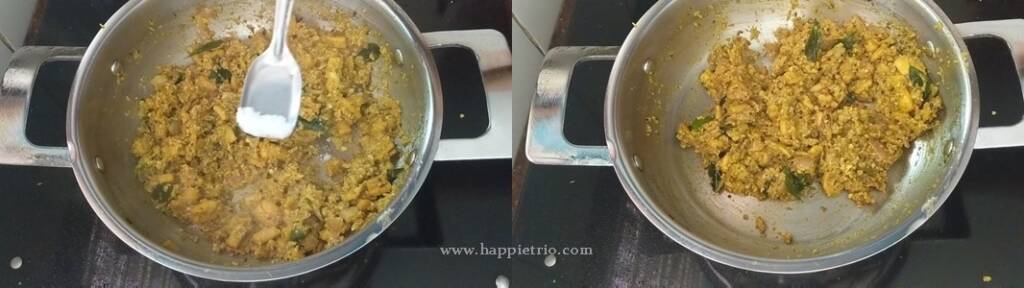
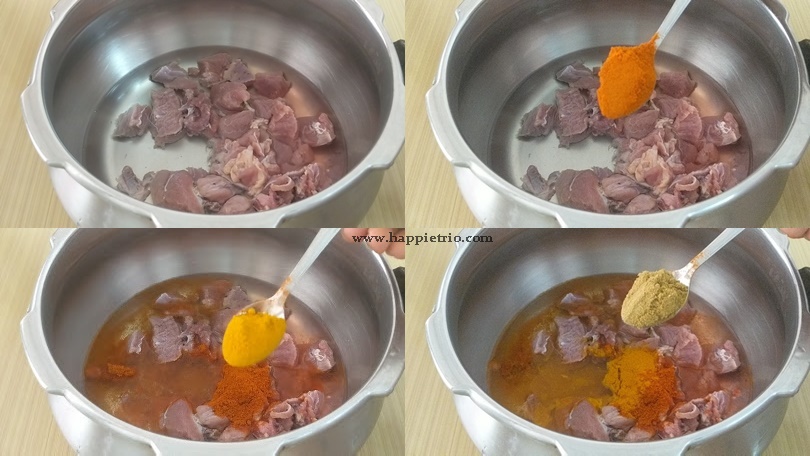
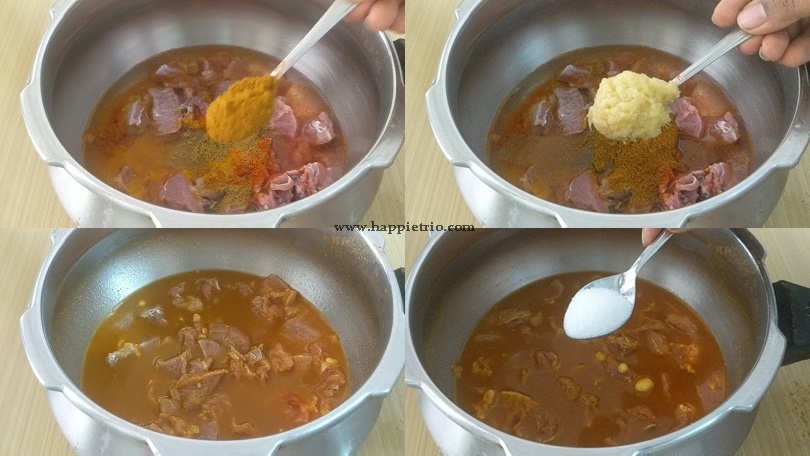
    4.Next add in the Garam Masala powder, Turmeric powder, and salt and mix well such that the spice powders are mixed well with the cooked onions and tomatoes.

    Step 3: Add in the spice powders

    5.Next, add in the cleaned and chopped button mushrooms and mix well and allow it to get cooked. No need to add water as the water from the mushroom is enough to cook.

    6. Cover and cook so after that the mushroom gets cooked quickly. Stir in regular intervals to avoid burning at the bottom.

    Step 4:Cook the Mushrooms

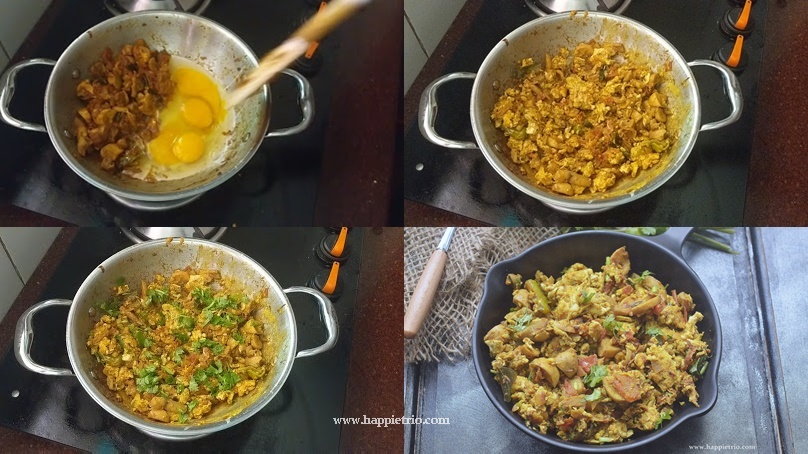
    7.Once the mushrooms are cooked completely move the mushroom along with tomatoes and onions to one corner of the pan and then break open four eggs.

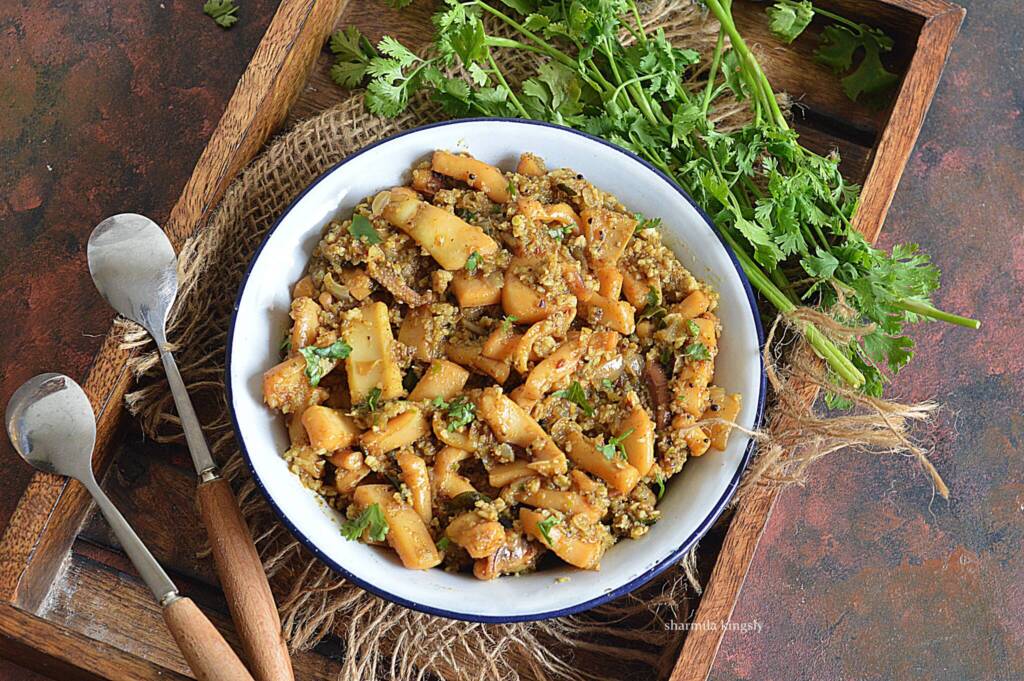
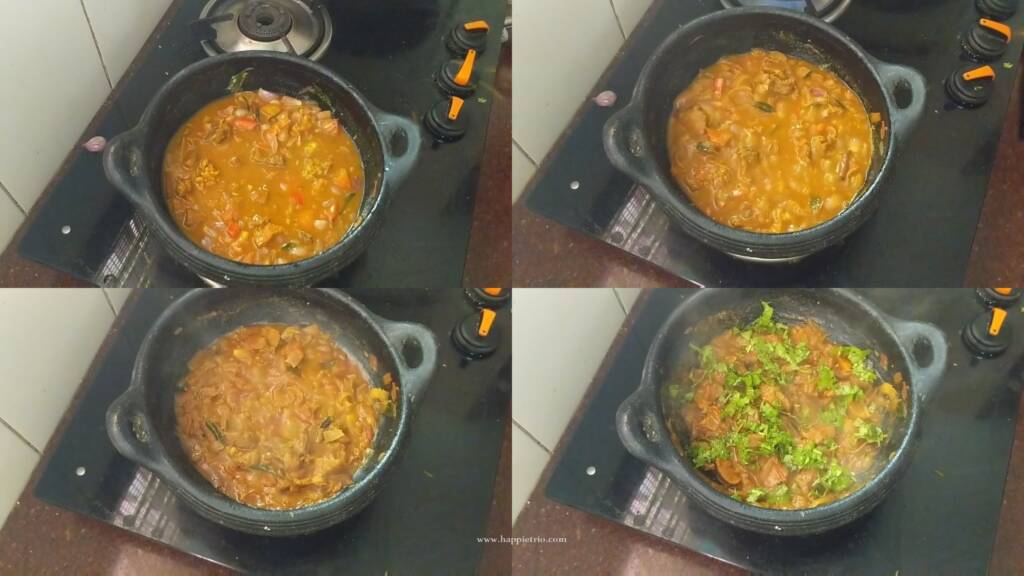
    8.Scramble the eggs well without mixing the mushroom. Once the eggs get cooked mix everything and keep at low flame for about a min and switch off the flame. Finally In addition garnish with chopped coriander leaves.

    Step 5: Mushroom Egg bhurji is now ready

    ๐Ÿ“– Recipe

    Mushroom Egg Bhurji
    Print Recipe Pin Recipe
    5 from 3 votes

    Mushroom Egg Bhurji

    Mushroom Egg Bhurji is an easy and yummy Indian Style Scrambled Eggs along with Mushroom It is so delicious and flavourful.
    Prep Time10 minutes mins
    Cook Time15 minutes mins
    Total Time25 minutes mins
    Course: Side Dish
    Cuisine: Indian
    Servings: 4
    Calories: 209kcal
    Author: Sharmila Kingsly
    Prevent your screen from going dark

    Standard 1 cup measures 240 ml

    Equipment

    • Kadai
    • Kadai

    Ingredients

    • 1ยฝ cups Button Mushroom
    • 4 Egg
    • 1 Onion finely chopped
    • 2 Tomato
    • 3 Green chili sliced
    • ยผ teaspoon Turmeric powder
    • 1 teaspoon Garam masala Powder
    • ยฝ teaspoon Pepper powder
    • Salt โ€“ as needed
    • 2 tablespoon Coriander Leaves

    To Temper:

    • 2 teaspoon Cooking Oil
    • ยฝ teaspoon Cumin Seeds
    • 1 spring Curry Leaves

    Instructions 

    • Clean the mushroom and set aside. Now in a kadai/Pan add in oil once the oil heats up add in the cumin seeds and wait till it splutters and then add the curry leaves and slit opened green chilies. Next, add in the finely chopped onions and fry till they are nicely cooked and then add in the chopped tomatoes.
    • Cook till the tomatoes turn mushy. Next add in the Turmeric powder, Garam Masala powder, Pepper powder, and salt and mix well such that the spice powders are mixed well with the cooked onions and tomatoes. Next, add in the cleaned and chopped button mushrooms and mix well and allow it to get cooked.No need to add water as the water from the mushroom is enough to cook.
    • Once the mushrooms are cooked completely move the mushroom along with tomatoes and onions to one corner of the pan and then break open two eggs. Scramble the eggs well without mixing the mushroom. Once the eggs get cooked mix everything and keep at low flame for about a min and switch off the flame. Add in chopped coriander leaves at last.

    Video

    Notes

    • You can add crushed pepper corn powder, crushed garlic pods for an extra punch instead of pepper powder.
    • Tastes good with Roti or steamed Rice

    Nutrition

    Calories: 209kcal | Carbohydrates: 13.5g | Protein: 14.1g | Fat: 11.6g | Saturated Fat: 3.1g | Cholesterol: 327mg | Sodium: 316mg | Potassium: 536mg | Fiber: 2.6g | Sugar: 7.1g | Calcium: 76mg | Iron: 4mg
    Tried this recipe?Mention @happietrio or tag #happietrio
    Subscribe to my Channelclick for more videos

    Disclaimer: I am not a nutritionist, the nutrition value provided here is an estimate. It will vary based on the quantity and brands of the products used.

    Note: This post is originally from 2016 . I have updated with new Recipe card, Pictures and video now.

    Kanava Aviyal | Squid Aviyal |Koonthal Masala

    October 3, 2020 By Sharmila Kingsly Leave a Comment

    Kannava aviyal

    Kanava Aviyal is a delicious lunch side dish prepared with Squid or Calamari fish. It is prepared with a yummy coconut masala.

    Follow us on Pinterest for delicious pins. Join our Facebook group for more Instant Pot and Air Fryer recipes.

    Kannava aviyal
    [feast_advanced_jump_to]

    Squid Aviyal:

    Squid is otherwise referred as Calamari. It is a very popular seafood. It is very staple in the middle east and many other African, American Countries.

    The squid looks little different from the normal fishes. However once cleaned it is easy to handle. It is usually cut into rings or into square pieces.

    Mostly is it being deep fried and served along with chips and itโ€™s a common dish in the food joints.

    Today Iโ€™m sharing an Indian version of Squid, to be more precise it is a south Indian Version of Squid prepared with loads of coconut and a special masala prepared with coconut.

    What is Squid:

    Squid is called as Kanava or Kadamba in Tamil. Koonthal Fish in Malayalam. It is one of the oldest existed fish.

    It resembles the octopus to some extend but they are different creatures altogether. The both have suckers on their arms.

    Popular Squid Recipes:

    Usually when it come to Indian Cooking, Squid Masala and Squid Roast are common squid recipes.

    How to clean Squid:

    Usually, the arms of the squid are removed first and then the skin is peeled completely. You can also cook with skin, but it gives a good texture without skin. You can slice them into rings of chop them like squares.

    Kannava aviyal

    How to make Squid / Kannava Aviyal

    1.In a pressure cooker add in 300gms of cleaned squid. To this add in Pepper powder, Salt, and Turmeric powder.

    2.Next add in Ginger garlic paste. Squid releases water while cooking, so itโ€™s not necessary to add water while pressure cooking. But if you prefer you can add ยผth cup of water. Mix well and pressure cook for 1 whistle in high flame. Wait for the pressure to release on its own and then open the cooker.

    3. In a blender add in Grated coconut, to this add Garlic pods, Green Chilli, Pepper powder.

    4. Also add Turmeric powder and grind it to a coarse paste. Set it aside and heat a kadai with Oil. I have used Coconut Oil.

    5. Once the oil gets hot add in Mustard seeds and Cumin seeds. Let it splutter. Next, add in the curry leaves.

    6. Add in 1 finely chopped onion, Saute till it gets glossy.

    7. Next add in the squid along with the water. Cook in a medium flame until the masala gets thick.

    8. Next add in the ground coconut paste. Give a good mix and cook for another 2 mins in a low flame.

    9. Finally add in the required salt and mix well. Cook for 1 more min. Drizzle in 1 teaspoon of coconut oil mix well and switch off the flame.

    Squid Aviyal is now for serving.Serve hot with Rice.

    Kannava aviyal

    Similar Sea Food Recipes

    • Prawn Thokku
      Prawn Masala | Prawn Thokku | Shrimp Masala
    • Prawn Chukka topped with Cilantro in a serving bowl.
      Prawn Chukka Masala
    • Crab Masala
      Crab Masala ( Nandu Varuval )
    • Nandu Kulambu
      Nandu Kuzhambu |Crab Curry |Nandu Kulambu

    โ˜… Did you enjoy this recipe? If you happen to try it out, I would love to hear from you! Iโ€™d appreciate it if you could rate and leave a review below in the comments. Your reviews help others know the recipe better too. Thanks for your time. You can also follow me on Facebook, Pinterest, Instagram, Youtube and Twitter for more updates from me.

    ๐Ÿ“– Recipe

    Kannava aviyal
    Print Recipe Pin Recipe
    5 from 3 votes

    Kanava Aviyal | Squid Coconut Masala | Kadamba Aviyal

    Kanava Aviyal is a delicious lunch side dish prepared with Squid or Calamari fish. It is prepared with a yummy coconut masala.
    Prep Time20 minutes mins
    Cook Time20 minutes mins
    Total Time40 minutes mins
    Course: Side Dish
    Cuisine: Indian
    Servings: 4
    Calories: 371kcal
    Author: Sharmila Kingsly
    Prevent your screen from going dark

    Standard 1 cup measures 240 ml

    Equipment

    • Pressure Cooker
    • Saute Pan
    • Pressure Cooker
    • Saute Pan

    Ingredients

    To Pressure Cook:

    • 300 gms Squid | Calamari
    • ยฝ teaspoon Pepper Powder
    • โ…› teaspoon Turmeric powder
    • ยฝ teaspoon Ginger Garlic paste
    • ยผ teaspoon Salt
    • ยผ cup Water

    To Grind:

    • ยฝ cup Grated Coconut tightly packed
    • 3 Garlic pods
    • 3 Green Chili
    • 4 Small Onions
    • ยผ teaspoon Pepper Powder
    • ยผ teaspoon Turmeric powder

    Other Ingredients

    • 1 tablespoon Coconut Oil
    • ยฝ teaspoon Mustard Seeds
    • ยฝ teaspoon Cumin Seeds
    • 1 spring Curry Leaves
    • 1 Onion
    • Salt as needed
    • 1 teaspoon Coconut Oil to garnish (optional)

    Instructions 

    • In a pressure cooker add in 300gms of cleaned squid. To this add in Pepper powder, Salt, and Turmeric powder.
    • Next add in Ginger garlic paste. Squid releases water while cooking, so itโ€™s not necessary to add water while pressure cooking. But if you prefer you can add ยผth cup of water. Mix well and pressure cook for 1 whistle in high flame. Wait for the pressure to release on its own and then open the cooker.
    • In a blender add in Grated coconut, to this add Garlic pods, Green Chilli, Pepper powder.
    • Also add Turmeric powder and grind it to a coarse paste. Set it aside and heat a kadai with Oil. I have used Coconut Oil.
    • Once the oil gets hot add in Mustard seeds and Cumin seeds. Let it splutter. Next, add in the curry leaves.
    • Add in 1 finely chopped onion, Saute till it gets glossy.
    • Next add in the squid along with the water. Cook in a medium flame until the masala gets thick.
    • Next add in the ground coconut paste. Give a good mix and cook for another 2 mins in a low flame.
    • Finally add in the required salt and mix well. Cook for 1 more min. Drizzle in 1 teaspoon of coconut oil mix well and switch off the flame. Squid Aviyal is now ready to be served.

    Video

    Notes

    • Serve with rice and any spicy curry.
    • Adjust the no of green chilies as per your spice levels.

    Nutrition

    Calories: 371kcal | Carbohydrates: 17.6g | Protein: 29.7g | Fat: 18.9g | Saturated Fat: 13.3g | Cholesterol: 426mg | Sodium: 271mg | Potassium: 192mg | Fiber: 3.7g | Calcium: 89mg | Iron: 5mg
    Tried this recipe?Mention @happietrio or tag #happietrio
    Subscribe to my Channelclick for more videos

    Mutton Masala Roast , Easy Lamb Roast

    September 26, 2020 By Sharmila Kingsly Leave a Comment

    Mutton Masala
    Mutton Masala Roast is a delicious Mutton starter, It is so easy to prepare but it tastes extremely delicious. It goes well with Rice, Roti, or even Biryani.
    Mutton Masala Roast

    Mutton is the most popular nonveg ingredient and it tastes delicious when cooked perfectly by adding the right ingredients.

    How to cook Mutton:

    Mutton is partly a lean meat and therefore it requires a slightly more cooking time. Lean meats are nothing but meats with relatively low-fat content.

    Usually for cooking we use the tender or younger meat. It is easier to cook and delicious.

    Lean meat is a very good source of protein, omega-3 fatty acids, vitamin B12, niacin, zinc, and iron. so it is very important to include in our food..

    Variations in Mutton Masala:

    Mutton Masala is prepared in different ways based on the region. I have today prepared it with just the basic ingredients.

    Usually a special masala is prepared and can be used in the Mutton Masala.

    Similar Mutton Recipes I have already posted in blog:

    Mutton Chops

    Mutton Pepper Roast

    Slow Cooked Mutton

    Mutton Masala

    ๐Ÿ“– Recipe

    Mutton Masala
    Print Recipe Pin Recipe
    5 from 4 votes

    Mutton Masala Roast

    Mutton Masala is a delicious Mutton starter, It is so easy to prepare but it tastes extremely delicious. It goes well with Rice, Roti, or even Biryani.
    Prep Time30 minutes mins
    Cook Time20 minutes mins
    Total Time50 minutes mins
    Course: Appetizer
    Cuisine: Indian
    Servings: 3
    Calories: 419kcal
    Author: Sharmila Kingsly
    Prevent your screen from going dark

    Standard 1 cup measures 240 ml

    Ingredients

    To Pressure Cook:

    • ยฝ kg Mutton
    • 1 teaspoon Red Chilli powder
    • ยฝ teaspoon Coriander Powder
    • ยผ teaspoon Turmeric powder
    • ยฝ teaspoon Garam Masala
    • 1 tablespoon Ginger Garlic paste
    • Salt as needed
    • 1 cup Water

    Other Ingredients:

    • 1 tablespoon Oil
    • 1 teaspoon Fennel Seeds
    • 1 inch Cinnamon Stick
    • 15 Shallots | Small Onions
    • 2 Tomato
    • 1 spring Curry Leaves
    • 2 tablespoon Coriander leaves finely chopped

    Instructions 

    To Pressure Cook

    • In a pressure cooker add in ยฝ kg of Cleaned Mutton. To this add in 1 cup of water. Next, add in Red Chilli powder.
    • Next, add in Turmeric powder and Coriander Powder.
    • Add in the Garam Masala and ginger garlic paste.
    • Mix well and add in the required salt.
    • Pressure cook for 8 whistles or until the mutton is cooked well. Wait till the pressure is released on its own and then open the cooker and set aside.

    How to Prepare Mutton Masala:

    • Heat a kadai with oil, once its hot add in the Fennel Seeds and cinnamon sticks let it splutter, and then add in the curry leaves. Saute for few secs.
    • Next, add in the Shallots. Slice them into small pieces and saute until they turn glossy.
    • Add the tomatoes and cook till they turn soft.
    • Next, add in the cooked Mutton Along with the water and keep cooking in a medium flame.
    • Slowly the moisture will get evaporated and the masala will thicken, Cook until the masala becomes a semi-dry gravy.
    • Garnish with coriander leaves and switch off the flame.Mutton Masala is now ready to serve.

    Video

    Notes

    Goes well with Rice, Roti, or Biryani.

    Nutrition

    Calories: 419kcal | Carbohydrates: 9g | Protein: 18g | Fat: 34g | Saturated Fat: 11g | Cholesterol: 74mg | Sodium: 480mg | Potassium: 402mg | Fiber: 2g | Sugar: 3g | Vitamin A: 179IU | Vitamin C: 6.1mg | Calcium: 56mg | Iron: 13mg
    Tried this recipe?Mention @happietrio or tag #happietrio
    Subscribe to my Channelclick for more videos

    How to prepare Mutton Masala, Step by Step pics:

    1. In a pressure cooker add in ยฝ kg of Cleaned Mutton. To this add in 1 cup of water. Next, add in Red Chilli powder.

    2. Next, add in Turmeric powder and Coriander Powder.

    Step 1 : How to Prepare Mutton Masala

    3. Add in the Garam Masala and ginger garlic paste.

    4. Mix well and add in the required salt.

    Step 2 : How to Prepare Mutton Masala Curry

    5. Pressure cook for 8 whistles or until the mutton is cooked well. Wait till the pressure is released on its own and then open the cooker and set aside

    6. Heat a kadai with oil, once its hot add in the Fennel Seeds and cinnamon sticks let it splutter, and then add in the curry leaves. Saute for few secs.

    Step 3 : How to Prepare Mutton Masala

    7. Next, add in the Shallots. Slice them into small pieces and saute until they turn glossy.

    8. Add the tomatoes and cook till they turn soft.

    9. Next, add in the cooked Mutton Along with the water and keep cooking in a medium flame.

    Step 4 : Cooking Mutton in Calypot

    10. Slowly the moisture will get evaporated and the masala will thicken, Cook until the masala becomes a semi-dry gravy.

    11. Garnish with coriander leaves and switch off the flame.Mutton Masala is now ready to serve.

    Step 5: Mutton Masala is ready
    Mutton Masala Roast

    Achari Paneer Pulao , Paneer Pulao

    September 24, 2020 By Sharmila Kingsly Leave a Comment

    Achari Paneer Pulao

    Achari Paneer Pulao is a flavorful Pulao made with the spices used in Pickles along with Cottage Cheese Cubes and Cooked to Perfection.

    Follow us on Pinterest for delicious pins. Join our Facebook group for more Instant Pot and Air Fryer recipes.

    Achari Paneer Pulao

    Achari Paneer Pulao is an authentic Pulao prepared with the pickle masala. Achar in Hindi means Pickle.
    If you love including pickles in your food, I bet you will love this pulao. It is so flavourful, lip-smacking with the grandees of turning a simple meal into a feast.

    Check out Paneer Biryani in cooker and Paneer Tikka Biryani recipes too

    [feast_advanced_jump_to]

    What is Achar Masala

    Achar Masala is a spice blend made with all the spices used in pickles. It usually has Cumin Seeds, Mustard, Fenugreek, and other spices. We can customize very well to suit our taste buds.

    Pickle In India

    We usually include a variety of veggies or sometimes fruit in pickles. It contains oil, Salt, Vinegar, and the Achar Masala.
    Oil, Salt content will be slightly on a higher note for the pickles considering, it has to stay good for more days.

    Achari Paneer :

    The Pickle masala goes very well together with paneer. Paneer or Cottage Cheese is very soft and has a bland nature. So yes Achar Masala makes Paneer super delicious.

    Similar Panner Rice Recipes :

    Paneer Tikka Biryani

    Paneer biryani in Pressure Cooker

    Paneer Fried Rice

    How to Prepare Achari Paneer Pulao:

    To Prepare the Achari Masala

    1.In a pan add in the Fennel Seeds, Cumin Seeds, Fenugreek Seeds, Mustard, Dry Red Chilli and start roasting in a low flame until you get a nice aroma.

    2. I didn't have coriander seeds, So I have added coriander powder If you have coriander seeds, you can use ยฝ teaspoon of coriander seeds and start roasting along with the other spices. Since the coriander powder is already roasted I'm adding in the last.

    3. Just before you switch ff add in the coriander powder and roast for another 10 secs and switch off the flame. Allow it to cool down and then grind to a fine powder.

    Step 1 : Prepare the Achari Masala

    To Prepare Achari Paneer Pulao

    4. Heat a Pressure Cooker with 1 tablespoon of oil and 1 tablespoon of Ghee. Wait till it gets hot and then add in Fennel Seeds, Cloves, Cinnamon Sticks, Bay Leaf, and Cashew nuts.

    5. Cook in a low flame until you get a nice aroma and then Cashew nuts turn slightly golden.

    6. Add in the Onions, slice thinly, and then add. cook until the onions turn glossy.

    7. Next add in the Pandan Leaves, Mint, Coriander Leaves, and Green Chilli. Pandan leaves are very aromatic and adds a nice flavor to the pulao, so try adding it. Saute everything together until the leaves shrink.

    Step 2 : Saute the onions and herbs for Achari Paneer Pulao

    8.Next, add the ginger-garlic paste and cook until the raw smell leaves.

    9. Add in 2 tomatoes chopped finely and cook until they turn soft.

    10. Next add the Red Chilli powder, Garam Masala, Turmeric powder, and the required Salt. Mix well and cook until the raw smell of the masala leaves.

    Step 3 : Prepare the Achari Masala Masala
    How to prepare

    11.Add in 1 teaspoon of the Pickle Oil, You can collect oil from any pickle and add, It gives a very nice flavor to the pulao. I have used the homemade gooseberry pickle oil.

    12. Next, add in about 3 tablespoon of the ground pickle masala. Mix everything together and cook for a minute.

    13.Add in ยฝ cup of Bellpepper / Capsicum. I used Red and Green Coloured Bell pepper. Chop them into cubes and add.

    Step 4 : Add pickle oil and Achar Masala

    14.Mix once and then add in ยฝ cup of Green Peas. If using fresh or frozen green peas you can add directly. If using dried green peas. Soak it overnight and, Pressure cook it for 4 whistles and then use. I used dried Green peas only.

    15.Next, add in 200 gms of Paneer Cubes. Soak the Paneer in lukewarm Water for about 15 mins and then add.

    16.Mix the paneer once and then add in the Basmati Rice. Wash the basmati rice well and soak in water for 30 mins and then use.

    15.For 2 cups of Basmati Rice add in 2.5 cups of water. Add in the measured water and mix gently without breaking the Paneer.

    Step 5 : add the peas, Paneer , Rice and Water

    16.Next, add in ยผ of Yogurt and Lemon Juice from ยฝ lemon. Combine everything together and mix once. Check for salt and spice and add if anything is required.

    17.Once the water comes to a boil Close the Pressure Cooker and Wait till the Steam comes vigorously and then put the whistle.

    18. Cook in a high flame for 3 minutes and then switch off the flame

    Step 7 : Add , Curd, Lemon and check for Salt and spices

    18. Allow the pressure to release naturally and then open the cooker. Carefully fluff the rice without breaking the grains. Achari Paneer Pulao is now ready.

    Achari Paneer Pulao cooked perfectly
    Achari Paneer Pulao

    โ˜… Did you enjoy this recipe? If you happen to try it out, I would love to hear from you! Iโ€™d appreciate it if you could rate and leave a review below in the comments. Your reviews help others know the recipe better too. Thanks for your time ? You can also follow me on Facebook, Pinterest, Instagram, Youtube and Twitter for more updates

    ๐Ÿ“– Recipe

    Achari Paneer Pulao
    Print Recipe Pin Recipe
    5 from 4 votes

    Achari Paneer Pulao

    Achari Paneer Pulao is a flavorful Pulao made with the spices used in Pickles along with Cottage Cheese Cubes and Cooked to Perfection.
    Prep Time30 minutes mins
    Cook Time30 minutes mins
    Total Time1 hour hr
    Course: Main Course
    Cuisine: Indian
    Servings: 4
    Calories: 581kcal
    Author: Sharmila Kingsly
    Prevent your screen from going dark

    Standard 1 cup measures 240 ml

    Equipment

    • Presurre Cooker
    • Kadai
    • Presurre Cooker
    • Kadai

    Ingredients

    For Achari Masala

    • 1 tablespoon Fennel Seeds
    • 1 teaspoon Cumin Seeds
    • ยฝ teaspoon Mustard Seeds
    • ยพ teaspoon Coriander Powder if using Whole Corainder use ยฝ tsp
    • ยผ teaspoon Fenugreek Seeds
    • 2 Dry Red Chilli

    Other Ingredients

    • 2 cup Basmati Rice
    • 1 tablespoon Oil
    • 1 tablespoon Ghee
    • ยฝ teaspoon Fennel seeds
    • 4 Cloves
    • 2 inch Cinnamon Stick
    • 10 Cashewnuts
    • 3 Onions Medium Sized
    • 2 Bay Leaves
    • 2 Pandan Leaves Skip if you cant source
    • 2 Green Chilli
    • ยผ cup Mint Leaves
    • ยผ cup Coriander Leaves
    • 1 tablespoon Ginger Garlic paste
    • 2 Tomato Big
    • 1 teaspoon Red Chilli powder
    • 1 teaspoon Garam Masala
    • ยผ teaspoon Turmeric powder
    • Salt as needed
    • 1 teaspoon Pickle Oil
    • ยฝ cup Green Peas
    • ยฝ cup Bell Pepper
    • 200 gms Paneer
    • 2ยฝ cups Water
    • ยผ cup Yogurt Curd
    • ยฝ Lemon

    Instructions 

    To Prepare the Achari Masala

    • In a pan add in the Fennel Seeds, Cumin Seeds, Fenugreek Seeds, Mustard, Dry Red Chilli and start roasting in a low flame until you get a nice aroma.
    • I didn't have coriander seeds, So I have added coriander powder If you have coriander seeds, you can use ยฝ teaspoon of coriander seeds and start roasting along with the other spices. Since the coriander powder is already roasted I'm adding in the last.
    • Just before you switch ff add in the coriander powder and roast for another 10 secs and switch off the flame. Allow it to cool down and then grind to a fine powder.

    Achari Paneer Pulao

    • Heat a Pressure Cooker with 1 tablespoon of oil and 1 tablespoon of Ghee. Wait till it gets hot and then add in Fennel Seeds, Cloves, Cinnamon Sticks, Bay Leaf, and Cashew nuts.
    • Cook in a low flame until you get a nice aroma and then Cashew nuts turn slightly golden.
    • Add in the Onions, slice thinly and then add. cook until the onions turn glossy.
    • Next add in the Pandan Leaves, Mint, Coriander Leaves, and Green Chilli. Pandan leaves are very aromatic and add a nice flavor to the pulao, so try adding it. Saute everything together until the leaves shrink.
    • Next, add the ginger-garlic paste and cook until the raw smell leaves.
    • Add in 2 tomatoes chopped finely and cook until they turn soft.
    • Next add the Red Chilli powder, Garam Masala, Turmeric powder, and the required Salt. Mix well and cook until the raw smell of the masala leaves.
    • Add in 1 teaspoon of the Pickle Oil, You can collect oil from any pickle and add, It gives a very nice flavor to the pulao. I have used the homemade gooseberry pickle oil.
    • Next, add in about 3 tablespoon of the ground pickle masala. Mix everything together and cook for a minute.
    • Add in ยฝ cup of Bellpepper / Capsicum. I used Red and Green Coloured Bell pepper. Chop them into cubes and add.
    • Mix once and then add in ยฝ cup of Green Peas. If using fresh or frozen green peas you can add directly . If using dried green peas. Soak it overnight, Pressure cook it for 4 whistles and then use. I used dried Green peas only.
    • Next, add in 200 gms of Paneer Cubes. Soak the Paneer in lukewarm Water for about 15 mins and then add.
    • Mix the paneer once and then add in the Basmati Rice. Wash the basmati rice well and soak in Water for 30 mins and then use.
    • For 2 cups of Basmati Rice add in 2.5 cups of water. Add in the measured water and mix gently without breaking the Paneer.
    • Next, add in ยผ of Yogurt and Lemon Juice from ยฝ lemon. Combine everything together and mix once. Check for salt and spice and add if anything is required.
    • Once the water comes to a boil Close the Pressure Cooker and Wait till the Steam comes vigorously and then put the whistle. Cook in a high flame for 3 minutes and then switch off the flame
    • Allow the pressure to release naturally and then open the cooker. Carefully fluff the rice without breaking the grains. Achari Paneer Pulao is now ready.

    Video

    Notes

    • Serve with Onion Raita and Chips.
    • If you can get the Pickle Oil, you can skip but adding it gives a very nice flavor.
    • You can use the pickle oil from any pickle. It used gooseberry pickle oil.

    Nutrition

    Calories: 581kcal | Carbohydrates: 46g | Protein: 17g | Fat: 37g | Saturated Fat: 14g | Cholesterol: 55mg | Sodium: 30mg | Potassium: 192mg | Fiber: 2g | Sugar: 3g | Vitamin A: 499IU | Vitamin C: 42mg | Calcium: 344mg | Iron: 2mg
    Tried this recipe?Mention @happietrio or tag #happietrio
    Subscribe to my Channelclick for more videos

    Disclaimer: I am not a nutritionist , the nutrition value provided here is an estimate. It will vary based on the quantity and brands of the products used.

    Millets Porridge, No Sugar Millet Flakes Porridge

    September 18, 2020 By Sharmila Kingsly Leave a Comment

    Millet Porridge

    Millets Porridge, A healthy No - sugar breakfast Porridge made with Millet flakes, Milk and dried fruits, and Nuts. Power food for a bright day start.

    Millet Porridge

    Millets Porridge is a healthy dish made with Millets, Milk, and then dried fruits and Nuts. I wanted to make this as a filling and guilt-free version and hence I made a no-sugar version.

    The Sweetness of the porridge is only from the dried fruits used and it was sufficient. You can add dried Apricots, Raisins, Dates for this reason.

    However, if you want you can add Palm Sugar, Jaggery, or even the country Sugar.

    I used Millet Flakes for these recipes. Millet Flakes are available for all the varieties. I used Kodo Millet Flakes in this recipe, but then any variety of flakes can be used.

    I used Milk in this recipe, You can replace milk with Soy Milk or almond milk for a Vegan version.

    What is Millet Flakes:

    Millet Flakes are prepared from Millets. Millet Flakes are nothing but Poha. It is the beaten Millets. It is very thin and gets cooked easily compared to Millets.

    What is Porridge:

    Porridge is typically a breakfast dish made with rice, grains, or any cereal made as a sweet or savory version.

    Porridges are healthy and keep us full for a long time. Also , we usually prepare it with ingredients that are rich in fiber.

    Why it is called Porridge :

    The word porridge is coined from the English term "doing Porridge" which means "being in Prison" it is prepared as food for the prisoners.

    Porridges are also easy to digest and considered healthy food. It is given for kids and toddlers.

    Few Millet Porridge recipes :

    FingerMillet Sweet Porridge

    Ragi Malt

    Millets Porridge

    ๐Ÿ“– Recipe

    Millet Porridge
    Print Recipe Pin Recipe
    5 from 2 votes

    Millets Porridge | No Sugar Millet flakes Porridge

    Millets Porridge is a healthy dish made with Millets, Milk, and Nuts.This is a no-sugar version dried fruits are used for sweetness.
    Prep Time15 minutes mins
    Cook Time3 minutes mins
    Total Time18 minutes mins
    Course: Breakfast
    Cuisine: Indian
    Servings: 1
    Calories: 595kcal
    Author: Sharmila Kingsly
    Prevent your screen from going dark

    Standard 1 cup measures 240 ml

    Equipment

    • Sauce pan
    • Sauce pan

    Ingredients

    • ยผ cup Millet Flakes I used Kodo Millet Flakes
    • 1 cup Water
    • ยฝ cup Milk

    To Garnish the Porridge

    • 2 tablespoon Sliced Almonds
    • 2 tablespoon Pumpkin Seeds
    • 3 tablespoon Dried Apricots
    • 1 teaspoon Chia Seeds

    Instructions 

    • In a bowl add in ยผth cup of Millet Flakes. To this add in ยฝ cup of Water.
    • Let it soak for 15 mins. After 15 mins. The water will be absorbed by the millet flakes.
    • Transfer it to a blender and grind it to a fine paste.
    • Add the ground Millets paste to a saucepan and start cooking in a very low flame. Slowly it will start to boil.S crape the edges , stir well and keep cooking.
    • Add in a pinch of salt and mix well. The Millets will get cooked in almost 3 mins. So switch off the flame.
    • Add in ยฝ cup of Milk and combine well. Transfer the porridge to a serving bowl.
    • Garnish with Sliced Almonds, Pumpkin Seeds, Dried Apricots , and Chia Seeds. Serve immediately.,

    Video

    Notes

    I used Kodo Millet Flakes for this recipe.
    This is a no sugar Porridge, I used dry fruits for the sweetness.
    I have used Dried Apricots for sweetness, You can also use, Rasisins, Dates in this recipe for the sweetnees.
    If you need more sweetness you can add Country Sugar or Jaggery . Anything should work.
    It's a filling porridge. It is perfect for breakfast.
    ย 

    Nutrition

    Calories: 595kcal | Carbohydrates: 85.8g | Protein: 24g | Fat: 22.8g | Saturated Fat: 3.7g | Cholesterol: 6mg | Sodium: 69mg | Potassium: 760mg | Fiber: 18g | Sugar: 9.2g | Calcium: 398mg | Iron: 8mg
    Tried this recipe?Mention @happietrio or tag #happietrio
    Subscribe to my Channelclick for more videos

    Step by Step Picture Instructions on , How to Prepare Millets Porridge with Millet Flakes:

    1. In a bowl add in ยผth cup of Millet Flakes. To this add in ยฝ cup of Water.

    2. Let it soak for 15 mins. After 15 mins. Millet flakes will absorb the water and will be soft.

    Step 1 - How to Prepare Millets Porridge

    3. Transfer it to a blender and grind it to a fine paste.

    4. Add the ground Millets paste to a sauce pan and start cooking in a very low flame. Slowy it will start to boil.Scrape the edges ,stir well and keep cooking

    Step 2 - How to Prepare Millet Flakes Porridge

    5. Add in a pinch of salt and mix well. The Millets will be cook in almost 3 mins. So switch off the flame.

    6. Add in ยฝ cup of Milk and combine well. Transfer the porridge to a serving bowl.

    Step 3 - How to Prepare Millet Flakes Porridge

    7. Garnish with Sliced Almonds, Pumpkin Seeds, Dried Apricots and Chia Seeds. Serve immediately.,

    Step 4 - How to Prepare Millet Flakes Porridge
    Millets Porridge

    Honey Roasted Almonds , Candied Almonds

    September 15, 2020 By Sharmila Kingsly 7 Comments

    Honey Roasted Almonds

    Honey Roasted Almonds is a delicious snack, which is perfect for parties or even for gifting. It is packed with flavors and nutrients.

    Follow us onย Pinterestย for delicious pins. Join ourย Facebook groupย for moreย Instant Potย andย Air Fryerย Recipes.

    Honey Roasted Almonds

    Honey Roasted Almonds is a delicious snack made with Almonds, Sugar, Honey, and Oil. Perfect munch on during a Movienight or a Match.

    It is so addictive and we can't just stop on, It is a great snack for the evening.

    [feast_advanced_jump_to]

    What is Honey Roasted Almonds:

    Almonds are cooked in a honey sauce and then coated with sugar. Traditionally granulated white sugar is used for the honey roasted almonds. But it can be definitely replaced with Brown sugar or Coconut Sugar.

    We usually receive goodie bags in Office during festivals either Candied Nuts or Honey Roasted Almonds will be there.

    It is like a temptation , As soon as we open the goodies bag the nuts are the ones to disappear first.

    Variations in Candied Almonds:

    So many variations can be done with these humble Candied Almonds, We can add Cardamom powder or Cinnamon or Nutmeg powder.

    Also, cocoa powder can be added to make it as Chocolate Honey Roasted Almonds. I have a similar post coming soon on Chocolate Flavor, So watch this space.

    Is it okay to use Almonds with Skin:

    The skin of Almonds contains tannins a molecule, which prevents us from using the complete nutrients of Almonds, also skin is hard to digest which is why we soak the almonds and peel the skins, and then consume the Almonds.

    However Almond skin has few health benefits, It prevents LDL cholesterol from being oxidized, which is very important for health,

    It also lowers the cholesterol level and is good for our Skin.

    So yes, Once in a while it is okay to include Almond skin as well in our food.

    Similar Almond Recipes:

    Homemade Almond Powder

    Almond Coconut Cookies

    Almond Butter Granola Bars

    Honey Roasted Almonds

    Check the video for Candied Almonds in Pan:

    How to prepare Honey Roasted Almond

    1. Heat a pan, Once hot add in ยฝ cup of almonds. Roast the almonds until they are fragrant and toasted. It may take about 12 to 15 mins.
    2. Combine Salt and Sugar in a bowl and set aside.
    Step 1 :  Toast the Almonds and prepare the sugar mix.

    3. In another bowl add in the Water, Oil and honey and combine well until it forms a homogeneous mixture.

    Step 2 :  Prepare the honey mix for Honey Roasted Almonds

    4. Heat a pan and then add in the honey solution. Cook in a low flame and cook till it starts to boil. Once it starts to boil add in the toasted Almonds.

    5. Cook until the moisture is completely evaporated and the honey is fully coating the Almonds. It will take approximately 5-7 mins

    Step 3 :  Toss the toasted almonds with honey.

    6. Transfer the Almonds to a bowl and add in the salt and sugar mixture. Combine evenly

    7. Transfer these almonds to a parchment paper and spread evenly with the almonds not touching each other.

    Step 4:Mix the honey glazed Almonds with sugar mix.

    8. Let it dry completely and then store in air tight containers.

    Honey Roasted Almonds

    Similar Recipes

    • Almond Flour Cake
      Almond Flour Cake | Gluten-Free Almond Cake
    • Badam Kheer
      Badam Kheer | Almond Payasam | Badam Payasam
    • Badam Halwa
      Badam Halwa Recipe | Almond Halwa
    • Almond Butter Granola Bars
      Almond Butter Granola Bars | No Bake Granola Bars

    โ˜… Did you enjoy this recipe? If you happen to try it out, I would love to hear from you! Iโ€™d appreciate it if you could rate and leave a review below in the comments. Your reviews help others know the recipe better too.ย Thanks for your time ?ย You can also follow me onย Facebook,ย Pinterest,ย Instagram,Youtubeย andย Twitterย for more updates

    ๐Ÿ“– Recipe

    Honey Roasted Almonds
    Print Recipe Pin Recipe
    4.86 from 14 votes

    Honey Roasted Almonds

    Honey Roasted Almonds is a delicious snack , which is perfect for parties or even for gifting .It is packed with flavors and nutrients.
    Prep Time5 minutes mins
    Cook Time20 minutes mins
    Total Time25 minutes mins
    Course: Snack
    Cuisine: American
    Servings: 2
    Calories: 228kcal
    Author: Sharmila Kingsly
    Prevent your screen from going dark

    Standard 1 cup measures 240 ml

    Equipment

    • Pan
    • Pan

    Ingredients

    • ยฝ cup Almonds
    • 1 tablespoon Sugar
    • โ…› teaspoon Salt
    • 2 tablespoon Water
    • 1 teaspoon Oil
    • 1.5 tablespoon Honey

    Instructions 

    • Heat a pan , Once hot add in ยฝ cup of almonds.
    • Roast the Almonds until they are fragrant and toasted. It may taake about 12 to 15 mins.
    • Combine Salt and Sugar in a bowl and set aside.
    • In another bowl add in the Water, Oil and honey and combine well until it forms a homogenous Mixture.
    • Heta a pan and then add in the honey solution.Cook in a low flame and cook till it starts to boil.Once it starts to boil add in the toasted Almonds.
    • Cook intl the moisture is completey evaporated and the honey is fully coated over the Almonds.It will take approximately 5-7 mins
    • Transfer the Almonds to a bowl and add in the salt and sugar mixture. Combine evenly
    • Transfer these almonds to a parchment paper and spread evenly with the almonds not touching each other. Let it dry completely and then store in air tight containers.

    Video

    Notes

    Allow it to dry completely and then store.

    Nutrition

    Calories: 228kcal | Carbohydrates: 24.1g | Protein: 5.1g | Fat: 14.2g | Saturated Fat: 1.2g | Cholesterol: 0mg | Sodium: 1mg | Potassium: 182mg | Fiber: 3g | Sugar: 19.9g | Calcium: 65mg | Iron: 1mg
    Tried this recipe?Mention @happietrio or tag #happietrio
    Subscribe to my Channelclick for more videos

    Disclaimer: I am not a nutritionist, the nutrition value provided here is an estimate. It will vary based on the quantity and brands of the products used.

    Country Chicken Bone Curry (Naatu Kozhi Elumbu Kuzhambu)

    September 9, 2020 By Sharmila Kingsly 1 Comment

    Chicken Bones Curry

    Country Chicken Bone Curry a delicious stew from left over bone pieces without adding much spices in a coconut based gravy .It is so flavourful and watery.

    Chicken Bones Curry

    Country Chicken Bone Curry | Desi Chicken Bones Gravy | Naatu Kozhu Elumbu Kuzhambu is usually prepared whenever there is a big gathering or a feast in houses.

    I have already posted the Shredded Chicken Roast recipe, Where we use country chicken meat as the base and we do not use the bones. So after preparing the roast we use the bones to prepare this gravy.

    [feast_advanced_jump_to]

    Chicken Curry with Bones

    It is such mild and flavorful gravy. Usually, it is cooked with the left out bone pieces without adding many spices in a coconut-based gravy. Let's see how to prepare Country Chicken Bone Curry

    Elumbu Kuzhamb is more like a watery kuzhambu , the main flavors come from the Chicken broth used. Usually, we slow cook the chicken bones along with onion, tomato, ginger-garlic paste.

    How to prepare Elumbu Kuzhambu

    However we can also pressure cook the chicken with, Salt, Turmeric powder, and Ginger garlic paste and then use the bones and the Chicken broth to prepare the gravy.

    In my Elumbu kuzhambu video I have prepared this way as I was shooting both the shredded Chicken Roast and this Kuzhambu the same day.

    So select the method whichever suites the best for you. The slow cooking method takes time to cook and the pressure cooker method is quick however flavor of the gravy is equally good both the ways.

    What is the difference between Country Chicken and Broiler Chicken

    Chicken that are specially grown for meat is called as Broiler Chicken .

    Country Chicken or Desi Chicken is feed in the open and are grown locally by the farmers or others.

    Broiler chicken is tender and young when it is used for meat. Whereas country chicken is feed and used for meat at the right stage. It also feeds on worms and other healthy stuff and is comparatively healthy then the broiler chicken.

    County Chicken tastes much better than the broiler chicken and takes more time to cook comparatively.

    Also, country chicken is organic and is less prone to diseases, so it is best to include country chicken in our food.

    Health benefits of chicken bones:

    It is good for joints, Also have plenty of Vitamins and Minerals. It is also good for digestive systems.

    As Bones themselves are rich sources of minerals including calcium and phosphorus, sodium, magnesium, as well as other important nutrients consuming them benefits us a lot.

    How to Prepare Chicken Curry with Bones

    1.      In a pan add in the Chicken Bone pieces, Onion, Curry Leaves, Tomato, Ginger Garlic paste, Water and cook till the chicken is 90 % done. It may take around 20-25 mins, alternatively it can be also cooked in a pressure cooker.

    Chicken Bone Curry

      2.      In a blender add in Green Chilli, Cumin Seeds, and Curry Leaves and give a quick pulse.

    Elumbu Kuzhambu

    4.      To the ground, paste add in Coconut and give a quick pulse and then add in water and grind to a fine paste

    Elumbu Kuzhambu

       5.      Now that the chicken bones would have cooked to this add-in Chilli powder, Turmeric powder, and Salt mix well and then add in the Ground Coconut Masala.

    Naatu Kozhi Elumbu Kuzhambu

    5.      Continue cooking in a medium flame wait till it comes to a boil and then mix well and keep it in a lower flame.

    Naatu Kozhi Elumbu Kuzhambu

     6.       In a tempering pan add in oil and once it heats up add the Ingredients mentioned in the To Temper table and then pour it to the Gravy and mix well. Switch off the flame.

    Country Chicken Bone Curry

    Tips for Chicken Bones Curry

    • This is a mild gravy and hence it tastes best with Steamed Rice and any other Non-Veg Starter.
    • Usually, I use the flesh of the chicken to fry or to prepare Roast and the remaining bones into this gravy.
    • Adjust the no of Green chili according to your spice level.
    Chicken Elumbu Kuzhambu

    Similar Chicken Recipes

    • Mutton bone soup
      Mutton Bone Soup Recipe
    • Shredded Chicken Soup
      Shredded Chicken Soup | Chicken Soup
    • Chicken Clear Soup | How to prepare Chicken Soup

    โ˜… Did you enjoy this recipe? If you happen to try it out, I would love to hear from you! Iโ€™d appreciate it if you could rate and leave a review below in the comments. Your reviews help others know the recipe better too.ย Thanks for your time. You can also follow me onย Facebook,ย Pinterest,ย Instagram,ย Youtubeย andย Twitterย for more updates

    ๐Ÿ“– Recipe

    Chicken Bones Curry
    Print Recipe Pin Recipe
    5 from 3 votes

    Naatu Kozhi Elumbu Kuzhambu

    Country Chicken Bone Curry is cooked with the left out bone pieces without adding much spices in a coconut based gravy .It is so flavourful.
    Prep Time10 minutes mins
    Cook Time30 minutes mins
    Total Time40 minutes mins
    Course: Kuzhambu
    Cuisine: TamilNadu
    Servings: 5
    Calories: 144kcal
    Author: Sharmila Kingsly
    Prevent your screen from going dark

    Standard 1 cup measures 240 ml

    Ingredients

    • ยฝ kg Chicken Bones
    • 1 Onion
    • 1 Tomato
    • 1 Curry Leaves
    • 1 teaspoon Ginger Garlic paste
    • ยผ teaspoon Turmeric powder
    • ยฝ teaspoon Red Chilli powder
    • ยฝ teaspoon Garam Masala
    • Salt as needed
    • Water as needed

    To Grind:

    • ยผ cup Coconut
    • 3 Green Chilli
    • 1 teaspoon Cumin Seeds
    • Curry Leaves few torn roughly - optional

    To Temper

    • 1 tablespoon Oil
    • 1 teaspoon Mustard Seeds
    • ยฝ teaspoon Cumin Seeds
    • 1 spring Curry Leaves
    • 3 Dry Red Chilli

    Instructions 

    • In a pan add in the Chicken Bone pieces, Onion, Curry Leaves, Tomato, Ginger Garlic paste, Water and cook till the chicken is 90 % done. It may take around 20-25 mins, alternatively it can be also cooked in a pressure cooker.
    • In a blender add in Green Chilli, Cumin Seeds, and Curry Leaves and give a quick pulse.
    • To the ground, paste add in Coconut and give a quick pulse and then add in water and grind to a fine paste.
    • Now that the chicken bones would have cooked to this add-in Chilli powder, Turmeric powder, and salt mix well and then add in the Ground Coconut Masala.
    • Continue cooking in a medium flame wait till it comes to a boil and then mix well and keep it in a lower flame.
    • In a tempering pan add in oil and once it heats up add the Ingredients mentioned in the To Temper table and then pour it to the Gravy and mix well. Switch off the flame.

    Video

    Notes

    • This is a mild gravy and hence it tastes best with Steamed Rice and any other Non-Veg Starter.
    • Usually, I use the flesh of the chicken to fry or to prepare Roast and the remaining bones into this gravy.
    • Adjust the no of Green chili according to your spice level.

    Nutrition

    Calories: 144kcal | Carbohydrates: 4.1g | Protein: 8.1g | Fat: 11.1g | Saturated Fat: 3.6g | Cholesterol: 33mg | Sodium: 143mg | Potassium: 115mg | Fiber: 1.4g | Sugar: 1.8g | Calcium: 16mg | Iron: 2mg
    Tried this recipe?Mention @happietrio or tag #happietrio
    Subscribe to my Channelclick for more videos

    Ulundhu Kali , Black Urad Dal Kali

    September 7, 2020 By Sharmila Kingsly Leave a Comment

    Ulundhu Kali

    Ulundhu Kali , Black Urad Dal Kali , Ulutham Kali, or Karupu Ulundhu Kali is a age-old traditional recipe . It is a very good source of proteins and it strengths the bones especially hip bones.

    Ulundhu Kali

    What is Ulundhu Kali:

    Ulundhu Kali is a sweet prepared with Black Urad Dal, Rice, Palm Jaggery, and Sesame Oil. It is very good for bone strength.

    It has a dense halwa like consistency and is one of the traditional and healthy sweet from TamilNadu

    Which dal is used to prepare Ulundu Kali:

    Ulundhu Kali is prepared with Black Urad Dal usually .But in cases where it is not available it can also be prepared with White Urad Dal.

    Ingredients

    Ulundhu Kali is made with just for ingredients , It is Urad Dal black with or without skin ,but then with skin is recommended ,Along with Rice ,Sesame oi and Palm Jaggery . If you are not able to source Palm Jaggery you can very well you normal Jaggery.

    Ingredients for Ulutham Kali / Ulundhu Kali

    Health benefits of Black urad dal:

    The First and foremost health benefit of black Urad Dal is that it improves bone strength. It is good for skin and hair. It protects the heart. Urad dal also improves digestion.

    Black gram or urad dal holds a high protein value than most of the legumes or pulses. It is also an excellent source of dietary fiber. So it is very important to be incuded regularly in our diet.

    Health benefits of Sesame Oil:

    Sesame oil is considered to be a healthy fat and hence it is recommended to add in our daily diet.

    It is lowers the blood pressure and good for skin.It is alwasy best to use Cold pressed sesame oil.

    Why Palm Jaggery is better than Jaggery:

    Palm sugar has a glycemic index of 35 while cane sugar has a glycemic index of 60. Also, Palm Sugar is rich in nutrients, it cleanses the systems. It is also good for migraines.

    Why Raw Rice is added in Ulundhu Kali:

    Rice is added only to give thickness to the Kali , So if you don't prefer you can definitively skip.

    Similar Traditional Recipes:

    Sakkarai Pongal

    Nei Appam

    Ulundhu Kali

    โ˜… Did you enjoy this recipe? If you happen to try it out, I would love to hear from you! Iโ€™d appreciate it if you could rate and leave a review below in the comments. Your reviews help others know the recipe better too. Thanks for your time. You can also follow me on Facebook, Pinterest, Instagram,Youtube and Twitter for more updates

    ๐Ÿ“– Recipe

    Ulundhu Kali
    Print Recipe Pin Recipe
    5 from 1 vote

    Ulundu Kali

    Ulundhu Kali is a sweet prepared with Black Urad Dal, Rice, Palm Jaggery, and Sesame Oil. It is very good for bone strength.
    Prep Time10 minutes mins
    Cook Time20 minutes mins
    Total Time30 minutes mins
    Course: Dessert
    Cuisine: TamilNadu
    Servings: 2
    Calories: 243kcal
    Author: Sharmila Kingsly
    Prevent your screen from going dark

    Standard 1 cup measures 240 ml

    Ingredients

    • ยฝ cup Black Urad Dal with skin
    • 1 tablespoon Raw Rice
    • ยพ cup Palm Jaggery
    • ยผ cup Sesame Oil Cold Pressed

    Instructions 

    • In a pan add in ยฝ cup of Black Urad Dal. Roast in a low flame untillit gives a nice aroma.
    • As it is black in colour , We cannot find if it changes colour or not, It gives a nice aroma once its roasted ,Also if you taste a urad dal it wil be crispy. This is the correct stage .Switch off and allow it to cool down.
    • Next add in 1 tablespoon of Rice and roast in a low flame. Slowsy the rice will puff up and turn crisp ,Swithc off at this stage and allow it to cool down.
    • In the same pan add in ยพ cup of Palm Jaggery along with ยผ cup of water , Cook untillthe palm Jaggery dissolves completely and then strain to remove the impurties if any and keep the PAlm Jaggery aside.
    • Grind the balck urad dal and rice to a very fine powder.Sieve and remove the hard particles if any.Grind the hard particles once again and sieve.
    • Now add the black urad dal and rice powder to the Palm Jaggery .Mix well and add another ยผ cup of Water. Combine everything well.
    • Cook in a low flame. Add 1 tablespoon of Sesame oil and mix well untillthe oil is fully abosrbed by the kali,
    • Repeast the same process. Keep adding the oil little by little and keep stirring . The Kali will be glossy and absorbs the oil.
    • If you pinch in a small portion of the dough and roll a ladoo it should hold shape. That is the correct stage. Switch off ay this atge and serve immeditaley.

    Video

    Notes

    It is very good for the bone strength.
    Usually, give to girls during their puberty for the strength.

    Nutrition

    Calories: 243kcal | Carbohydrates: 51.9g | Protein: 8.8g | Fat: 2g | Saturated Fat: 0.2g | Cholesterol: 0mg | Sodium: 14mg | Potassium: 7mg | Fiber: 9.9g | Sugar: 27.3g | Calcium: 2mg
    Tried this recipe?Mention @happietrio or tag #happietrio
    Subscribe to my Channelclick for more videos

    How to prepare Ulundhu Kali

    1. In a pan add in ยฝ cup of Black Urad Dal. Roast in a low flame until it gives a nice aroma. As it is black in color, We cannot find if it changes color or not, It gives a nice aroma once its roasted, Also if you taste an urad dal it will be crispy. This is the correct stage. Switch off and allow it to cool down.
    Step 1 : Roast the urad dal

    2.Next add in 1 tablespoon of Rice and roast in a low flame. Slowly the rice will puff up and turn crisp ,Switch off at this stage and allow it to cool down.

    Step 2 : Roast the rice

    3. In the same pan add in ยพ cup of Palm Jaggery along with ยผ cup of water, Cook until the palm Jaggery dissolves completely and then strain to remove the impurities if any, and keep the Palm Jaggery aside.

    Step 3 : Prepare the Palm Jaggery syrup for ulundhu Kali

    4. Grind the black urad dal and rice to a very fine powder. Sieve and remove the hard particles if any. Grind the hard particles once again and sieve.

    Step 4: mix the Urad dal flour with Palm Jaggery Syrup

    5. Now add the black urad dal and rice powder to the Palm Jaggery. Mix well and add another ยผ cup of water. Combine everything well. Cook in a low flame. Add 1 tablespoon of Sesame oil and mix well until the oil is fully absorbed by the kali,

    Step 5 ; Combine everything for preparing the Ulutham Kali

    6. Repeat the same process. Keep adding the oil little by little and keep stirring. The Kali will be glossy and absorbs the oil. If you pinch in a small portion of the dough and roll a ladoo it should hold shape. That is the correct stage. Switch off ay this stage and serve immediately.

    Step 6 : Add sesame oil for the ulutham kali and check the consistency once its cooked.
    Ulutham Kali

    Shredded Pepper Chicken

    September 4, 2020 By Sharmila Kingsly Leave a Comment

    Shredded Pepper Chicken

    Shredded Pepper Chicken is a south Indian yummy dry chicken appetizer made with shredded country chicken, Whole crushed pepper, and Shallots.

    It is very popular in the roadside shops and hotels in Tamil Nadu. It is popularly called as pichi potta pepper chicken in Tamil.

    Shredded Pepper Chicken

    Shredded Pepper Chicken is one recipe that we happen to taste accidentally in a military hotel in Salem. We were traveling to our Native place from Bangalore. We started around 11 o clock from Bangalore to our home town and by the time we reached Salem, it was 3 pm.

    Both of us were so hungry and we couldnโ€™t find many options as it was a Sunday and most of the shops were closed by that time. Luckily we found a Military Hotel in Salem bypass road. We had very minimal Options of food left.

    So I and my hubby ordered Desi Chicken Meal along with Shredded Pepper Chicken it was then we happened to taste this awesome dish. We both liked it so much and my hubby asked me to try the same recipe at home and I got close to it Happy me.

    This dish has very minimal spices added but it tastes awesome. This dish will be a part of our meal at regular intervals. Do try this recipe and I bet you too will fall in love!!

    What type of Chicken to used for Shredded Pepper Chicken:

    This dish is usually prepared with country chicken (Naatu Kozhi), however, regular chicken (Broiler Chicken) can also be used

    How to prepare Shredded Pepper Chicken :

    Shredded Pepper chicken is prepared by cooking the chicken pieces along with the bones and then segregating the bones and flesh separately.
    We will use only the flesh in this recipe.

    I have another recipe to use these bones, so definitely it will not go waste. We usually prepare Country chicken bones kuzhambu with these bones after preparing the shredded pepper chicken.

    How to Cook Country Chicken:

    Country chicken meat is slightly hard and requires more cooking time. since in this recipe, we are cooking the chicken in a pressure cooker.

    For Country chicken cook for 6 whistles in pressure cooker.For normal Chicken 3 whistles are enough.

    Similar Chicken Recipes:

    Chicken Legs Fry

    Chicken Keema Samosa

    Dry Pepper Chicken

    step by step pics on how to prepare Shredded pepper chicken Recipe

        1.      In a Pressure cooker add in the chicken, Salt, Turmeric powder, Ginger garlic paste, and water and pressure cook for one whistle. Wait till the pressure gets released all by itself.
        2.      Open the pressure cooker and shred the cooked chicken separately leaving aside bones. Squeeze the lemon juice over the chicken. Now in another pan/Kadai add in oil and wait till it heats up.
        3.      Add in curry leaves sautรฉ for a mina and then add in the chopped small onions. Cook till the onions turn translucent. Add in Garam Masala, Crushed pepper powder, Cumin Powder, and Salt and Mix everything well. 
        4.      Next, add in the Shredded Chicken and mix well. Roast for about 7 mins till everything gets blended and a nice aroma comes .check for salt and spice and switch off the flame.
    Tasty Shredded Pepper Chicken Roast is ready.
    Milagu chicken

    ๐Ÿ“– Recipe

    Shredded Pepper Chicken
    Print Recipe Pin Recipe
    5 from 2 votes

    Shredded Pepper Chicken

    Shredded Pepper Chicken is a yummy chicken appetizer made with shredded country chicken , Whole crushed pepper and Shallots.
    Prep Time15 minutes mins
    Cook Time20 minutes mins
    Total Time35 minutes mins
    Course: Appetizer
    Cuisine: Indian
    Servings: 3
    Calories: 360kcal
    Author: Sharmila Kingsly
    Prevent your screen from going dark

    Standard 1 cup measures 240 ml

    Ingredients

    To Pressure Cook

    • ยฝ kg Chicken preferably country chicken
    • 1.5 cups Water
    • 1 tablespoon Ginger garlic paste
    • ยฝ teaspoon Turmeric powder
    • ยฝ tsp Salt

    Other Ingredients:

    • 2 tablespoon Oil I used coconut oil
    • 3 springs Curry Leaves
    • 15 Shallots or Small Onions
    • ยฝ teaspoon Pepper Powder or Coarsely ground whole pepper
    • ยฝ teaspoon Garam Masala
    • ยฝ teaspoon Roasted Cumin Powder
    • ยฝ Lemon

    Instructions 

    To Pressure Cook the chicken:

    • In a Pressure cooker add in the chicken, Salt, Turmeric powder, Ginger garlic paste and water and Pressure cook for one whistle if using normal chicken. If using country chicken pressure cook for 4 to 6 whistles.
    • Wait till the pressure gets released all by itself and the open the cooker. Chicken will be cooked by now.
    • Open the pressure cooker and shred the cooked chicken separately leaving aside bones .

    To make Shredded Pepper Chicken.

    • Now in another pan/Kadai add in oil and wait till it heats up. I used coconut oil , use any cooking oil as you prefer.
    • Add in curry leaves sautรฉ for a min and then add in the chopped small onions .Cook till the onions turns translucent.
    • Add in Garam Masala, Crushed pepper powder, Cumin Powder and Salt and Mix everything well.
    • Next add in the Shredded Chicken and mix well. Roast for about 5 mins till everything gets blended and a nice aroma comes .
    • Check for Salt .Squeeze the lemon juice over the chicken and switch off the flame .

    Video

    Notes

    • The Original recipe calls for Desi Chicken/Naatu kozhi .
    • If Desi chicken/ Country chicken/ Naatu Kozhi is used pressure the chicken for about 4 to 6 whistles.
    • Use freshly ground pepper powder for the best taste.
    • More curry leaves can be used ,if you prefer.
    • I have a recipe coming up to use the bones from this cooked chicken,so it wont be waste.

    Nutrition

    Calories: 360kcal | Carbohydrates: 6.8g | Protein: 49.2g | Fat: 14.3g | Saturated Fat: 9.3g | Cholesterol: 128mg | Sodium: 752mg | Potassium: 439mg | Fiber: 0.3g | Sugar: 0.1g | Calcium: 40mg | Iron: 2mg
    Tried this recipe?Mention @happietrio or tag #happietrio
    Subscribe to my Channelclick for more videos

    Disclaimer: I am not a nutritionist, the nutrition value provided here is an estimate. It will vary based on the quantity and brands of the products used.

    Note: This post is originally from 2016. I have updated with a new Recipe card, Pictures, and video now.

    Shredded Pepper Chicken

    Tomato Rice ( Tomato bath )

    September 1, 2020 By Sharmila Kingsly 1 Comment

    tomato rice

    Vegan and Gluten Free ,classic south Indian Style Tomato Rice or Tomato bath , A easy go to dish for a busy working day!!

    tomato rice

    Tomato rice is an awesome south Indian Lunch box recipe. It is pretty simple to prepare but tastes good. The primary ingredient used is the tomatoes. Use good quality fresh tomatoes while preparing thakalli sadham to enjoy its richness. This tastes good with just onion raita or any chips.

    I usually prepare Tomato Rice with a biryani flavour. It tastes really good with just chips and raita or even pickle. So i suggest you use basmati rice in this method.However normal cooking rice can also be used and yes seeraga samba rice can also be used.

    I have used precooked rice in this recipe. And i have explained in detailed below how to cook or prepare tomato rice in a single pot. Just dump all the ingredient and beautiful Tomato bath is ready.

    How to prepare Tomato bath:

    Tomato rice is usually prepared in numerous ways. It can be prepared as a one pot method. ie cooking the rice along with the tomato masala. Or we can prepare by using pre cooked rice in a tomato masala.

    In this recipe , i have use precooked rice to the tomato masala for Tomato Rice , but it can very well be converted to a one pot method.

    How to prepare Tomato Rice in One pot Method:

    For the recipe below till you prepare the tomato masala. You a pressure cooker.soak the basmati Rice for 30 mins and set aside.

    Next add the soaked rice and fry for a min. Add required Water. It will be 1.25 cups of Water for every 1 cup of Rice. This is the ratio. Wait till the water comes to a boil and then close the cooker.When the presure coomes vigorously put the whistle and cook for 3 minutes in a high flame and switch off.

    Wait till the pressure releases completely and then open the cooker. Carefully fluff the rice and garnish with the coriander leaves and serve.

    How to prepare Tomato Rice in Open Pot :

    For cooking in open pot the rice and Water ratio is , for every 1 cup of Rice add 2 cups of Water.

    thakali sadham

    Check the video below to see how to prepare Tomato bath in detail:


    How to prepare Tomato Rice with step by step pictures:

    1) In a kadai add in oil. Once the oil becomes hot add in Fennel Seeds and Bay leaves .allow them to fry for a min and add in the curry leaves.
    2) Now add in Garlic pods and fry for a min and add in the sliced onions ,add in salt and fry till the onions turns golden brown or translucent.
    3) Add in the chopped tomatoes and the spice powders, mix everything together and fry till the tomatoes are cooked well and it leaves oil.

    4) Once the tomatoes start leaving oil add in the cooked rice to this mixture and mix gently .Hot and spicy Tomatoes are ready to be served.

    Tips:

    1) Tastes best when served with Onion Raita.
    2) If you donโ€™t prefer it spicy reduce the amount of chilli powder, mine was really spicy.
    3) You can even add green chilli and reduce the amount of chilli powder added.
     
     
    tomato rice

    ๐Ÿ“– Recipe

    Tomato Rice
    Print Recipe Pin Recipe
    5 from 3 votes

    Tomato rice | Tomato bath

    Tomato rice is an awesome south Indian Lunch box recipe. It is pretty simple to prepare . tomato Rice goes well with chips and raita.
    Prep Time10 minutes mins
    Cook Time15 minutes mins
    Total Time25 minutes mins
    Course: Main Course
    Cuisine: Indian
    Servings: 4
    Calories: 207kcal
    Author: Sharmila Kingsly
    Prevent your screen from going dark

    Standard 1 cup measures 240 ml

    Ingredients

    • 2 cup Cooked Rice I used Basmathi Rice
    • 2 Onion Medium Sized
    • 3 big Tomato
    • 15 -20 Garlic
    • 1 teaspoon Fennel Seeds
    • 2 Bay Leaves
    • 2 springs Curry Leaves
    • 3 tablespoon Corriander Leaves
    • Salt โ€“ as needed
    • ยฝ teaspoon Sugar
    • ยฝ teaspoon Turmeric powder
    • ยฝ teaspoon Garam masala
    • 1ยฝ teaspoon Chilli powder
    • 2 tablespoon Oil

    Instructions 

    • In a kadai add in oil. Once the oil becomes hot add in Fennel Seeds and Bay leaves .allow them to fry for a min and add in the curry leaves.
    • Now add in Garlic pods and fry for a min and add in the sliced onions ,add in salt and fry till the onions turns golden brown or translucent.
    • Add in the chopped tomatoes and the spice powders, mix everything together and fry till the tomatoes are cooked well and it leaves oil.
    • Once the tomatoes start leaving oil add in the cooked rice to this mixture and mix gently .Hot and spicy Tomatoes are ready to be served.

    Video

    Notes

    1) Tastes best when served with Onion Raita.
    2) If you donโ€™t prefer it spicy reduce the amount of chilli powder, mine was really spicy.
    3) You can even add green chilli and reduce the amount of chilli powder added.

    Nutrition

    Calories: 207kcal | Carbohydrates: 32.1g | Protein: 4.2g | Fat: 8.4g | Saturated Fat: 0.9g | Cholesterol: 0mg | Sodium: 10mg | Potassium: 428mg | Fiber: 5.5g | Sugar: 6.5g | Calcium: 37mg | Iron: 1mg
    Tried this recipe?Mention @happietrio or tag #happietrio
    Subscribe to my Channelclick for more videos

    Disclaimer: I am not a nutritionist , the nutrition value provided here is an estimate.It will vary based on the quantity and brands of the products used.

    Note: This post is originally from 2016 . I have updated with new Recipe card, Pictures and video now.

    Tomato Rice
    • « Previous Page
    • 1
    • …
    • 26
    • 27
    • 28
    • 29
    • 30
    • …
    • 67
    • Next Page »

    Footer

    โ†‘ back to top

    As an Amazon Associate I earn from qualifying purchases.

    Copyright ยฉ ย 2025 COOK WITH SHARMILA

    Rate This Recipe

    Your vote:


    A rating is required
    A name is required
    An email is required