Vermicelli Dessert Cups are a perfect dessert for any special occasion. You can fill the cups with your favorite filling and make it extra special.
Follow us on Pinterest for delicious pins. Join our Facebook group for more Instant Pot and Air Fryer recipes.
India’s most popular and celebrated festival season is here. So I thought I will come up with some awesome desserts for the Diwali party. These cute vermicelli cups are just perfect for any occasions. You can make them before hand and refrigerate. Fill the cups with your favorite filling and serve as you need.
What is Vermicelli?
Vermicelli is a thin variety of Asian Noodle. It is very popular in Asian Countries. Specially in India we use vermicelli to prepare a variety of dishes. From sweets to main course it comes handy in a lot of recipes.
The Very Popular Kunafa , Sheer khurma all these desserts use these thin variety of vermicelli.
In India we even prepare Biryani with vermicelli.
Ingredients

Vermicelli – Use thin vermicelli for preparing the cups. They gets cooked easily as you sauté in butter and hence they are perfect. The thick ones take time to cook. Sauté in butter or ghee as you prefer.
Condensed milk – It gives the perfect texture, taste and thickens along with the vermicelli.
Cardamom Powder – Gives a nice flavour to the vermicelli cups.
Butter or Ghee – We saute the vermicelli in butter for getting the crispy and perfect vermicelli.

How to make Vermicelli Cups
Use thin vermicelli for making the vermicelli cups. Break then into small pieces.

Heat a pan with butter and let it melt.

Next add the thin vermicelli and sauté them in a very low flame for 5 mins.

Next add cardamom powder.

And then add condensed milk. Combine everything and keep cooking in low flame.

Cook for another 5 mins. The mixture gets thick and comes together switch off at this stage. Make sure you keep stirring else it might get burnt easily. Switch off and let it cool for few mins.

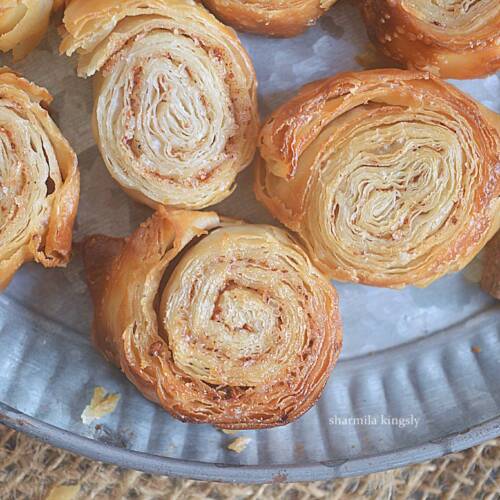
Line a muffin tray with cup cake liner. Scoop a small portion of vermicelli and then spread over the cupcake liner. It resembles the shape of a cup.

Freeze this for 30 mins and then remove from fridge. Remove the cup cake liner gently and the vermicelli cups are now ready.

Top the vermicelli cups with your favourite dessert and serve. I topped with rabdi.

Tips & Variations
Always use thin variety vermicelli for making the dessert cups.
Makes a fantastic showstopper dessert.
Serve the cups as soon as possible once they are out of the refrigerator.
Keeping them outside for a longer time ,tends to loosen the cup a bit.
You can also bake the cups to keep them firm.
Bake at 180 C / 356 F for 7-10 mins in a preheated oven.
Fill the dessert cups with your favorite option.
Serving Suggestions
Serve the dessert with any of your favorite filling
You can serve the cup by any one of the below topping
Fruit Custard - Fruit custard is a delicious l dessert that has a custard base mixed with fresh seasonal fruits.
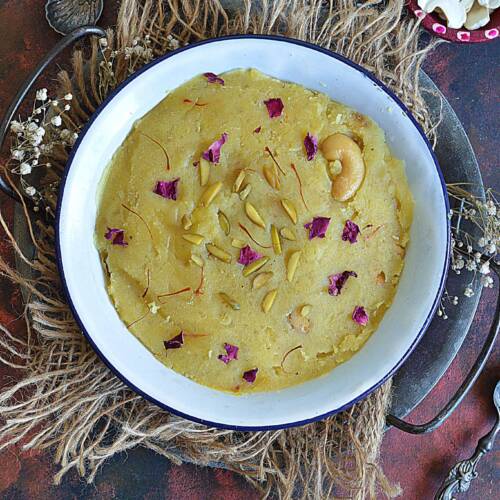
Carrot Halwa - It is usually prepared with juicy red carrots along with sugar and ghee. You can also serve with beetroot halwa , Apple halwa and many more
Gulab Jamun - Mini sweet dessert balls fried and soaked in sugar syrup.
Rasgulla - Mini milk solid balls soaked in sugar syrup.
Rabdi - Prepared by reducing the milk until its thickened along with rich malai.
Shrikhand - creamy chilled dessert made of Thick Yogurt and Sugar flavored with cardamom powder.
Mouuse - You can also simple serve with any mouuse or chocolate.
Similar recipes


★ Did you enjoy this recipe? If you happen to try it out, I would love to hear from you! I’d appreciate it if you could rate and leave a review below in the comments. Your reviews help others know the recipe better too. Thanks for your time. You can also follow me on Facebook, Pinterest, Instagram, Youtube and Twitter for more updates from me.
📖 Recipe

Vermicelli Dessert Cups
Standard 1 cup measures 240 ml
Ingredients
- 1 tablespoon Butter
- 2 cup Thin Vermicelli
- 1 cup Condensed Milk
- ½ teaspoon Cardamom Powder
Instructions
- Use thin vermicelli for making the vermicelli cups. Break then into small pieces.
- Heat a pan with butter and let it melt.
- Next add the thin vermicelli and sauté them in a very low flame for 5 mins.
- Next add cardamom powder.
- And then add condensed milk. Combine everything and keep cooking in low flame.
- Cook for another 5 mins. The mixture gets thick and comes together switch off at this stage. Make sure you keep stirring else it might get burnt easily. Switch off and let it cool for few mins.
- Line a muffin tray with cup cake liner. Scoop a small portion of vermicelli and then spread over the cupcake liner. It resembles the shape of a cup.
- Freeze this for 30 mins and then remove from fridge. Remove the cup cake liner gently and the vermicelli cups are now ready.
- Top the vermicelli cups with your favourite dessert and serve. I topped with rabdi.
Notes
Nutrition
Disclaimer: I am not a nutritionist, the nutrition value provided here is an estimate. It will vary based on the quantity and brands of the products used